
K 3500 Truck 4WD V8-454 7.4L VIN J SFI (1996)
degrease the tripot housing. Allow the tripot housing to dry prior to assembly.
Important: Handle the tripot spider assembly with care. Tripot balls and needle rollers may separate from the spider trunnion if the tripot balls
and needle rollers are not handled carefully.
3. Use side cutters to cut away the small seal clamp.
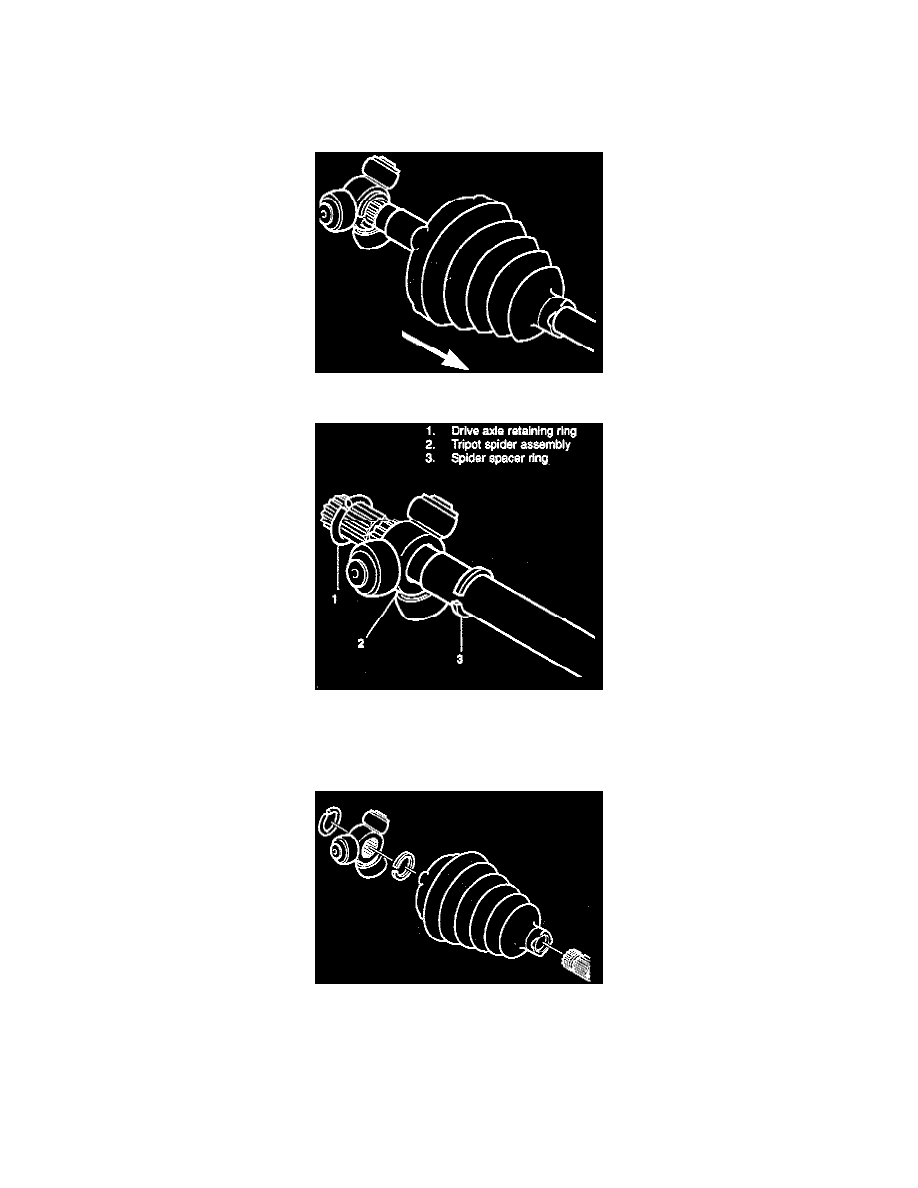
4. Slide the tripot seal up the drive axle shaft, away from the tripot spider assembly toward the outboard (CV joint assembly) end of the drive axle.
5. Move the tripot spider assembly in the following manner:
A. Spread the spider spacer ring with tool J 8059 (or equivalent).
B. Slide the spider spacer ring and the tripot spider assembly up on the drive axle.
-
This will provide access to the drive axle retaining ring which is in the groove at the end of the drive axle.
6. Remove the retaining ring, spider assembly, spacer ring, and tripot seal.
7. Clean the drive axle. Use a wire brush in order to remove any rust in the seal mounting area (grooves).
-
Inspect the needle rollers, needle bearings, and trunnion. Check the tripot housing for unusual wear, cracks, or other damage. Replace any
damaged parts.
Assemble Tripot Joint and Seal
-
Required Tools:
-
J 35910 Seal Clamp Tool