
K 3500 Truck 4WD V8-5.7L VIN R (1998)
Brake Caliper: Adjustments
Bendix calipers have wear shims available to compensate for wear at the caliper to anchor plate contact points. A rattling sound, originating from the
front brake area, will occur when the caliper and anchor plate are excessively worn. Use the following procedure to measure and correct this condition.
1. Remove the caliper.
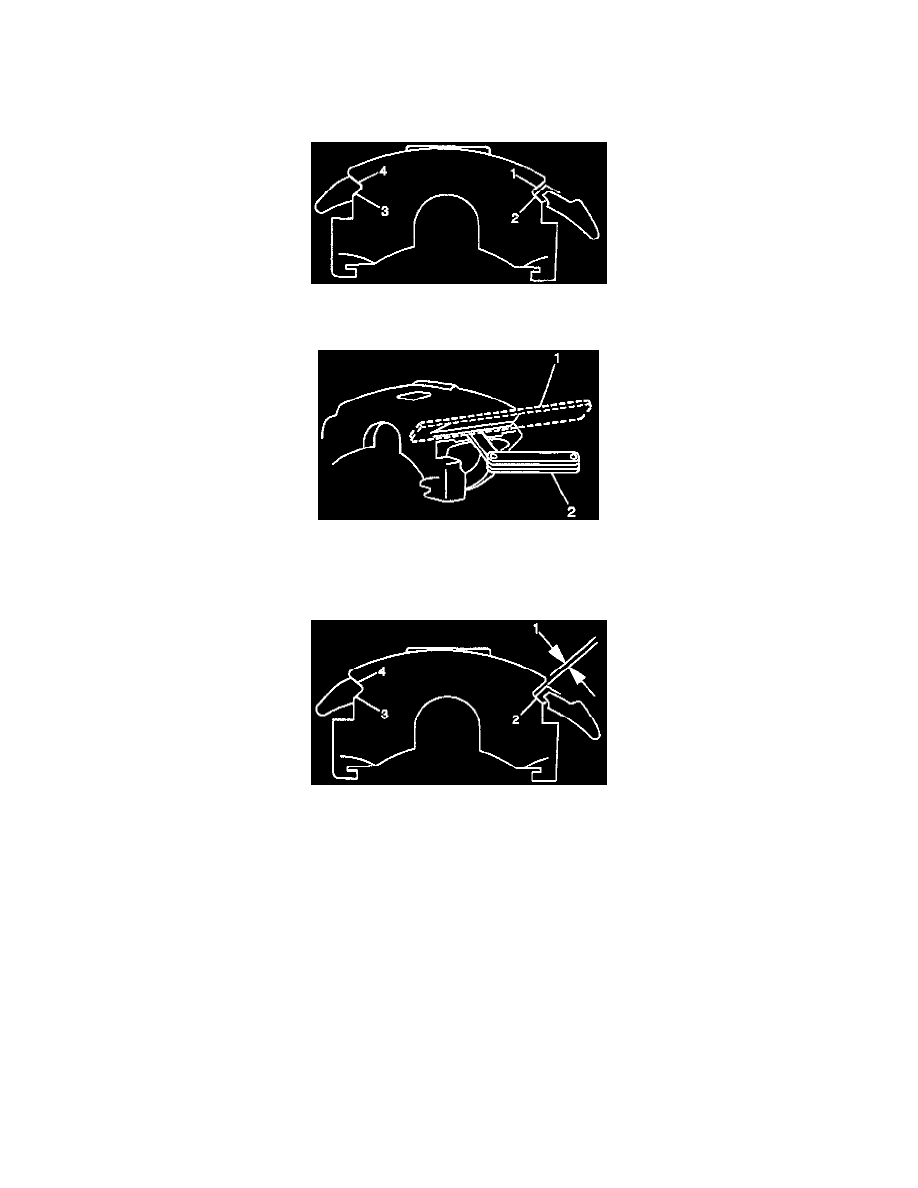
2. Clean surfaces (1-4) with a wire brush.
3. Smooth any deep nicks or gouges with a file.
4. Measure the caliper contact surface for wear by performing the following steps.
4.1. Lay a straight edge (1) across the caliper surfaces.
4.2. Measure the maximum depth of any wear on the surfaces using feeler gage (2)
4.3. Replace any calipers worn to a depth of 1.25 mm (0.050 inch) or more.
5. Measure caliper to anchor plate wear by performing the following steps.
5.1. Install the caliper.
5.2. Install a new standard size key without the spring.
5.3. Install the key retention bolt.
5.4. Insert a screw driver into the center of the key bumper gap (1).
5.5. Pry the screw driver firmly into the center of the key bumper gap to ensure that the caliper is sitting at the surfaces.
5.6. Measure the bumper gap with the largest feeler gauge that will fit into the gap on either side of the screw driver.
5.7. Based on the bumper gap measurement, select a shim. Refer to Component Specifications.
6. Replace the caliper by performing the following steps.
6.1. Remove the caliper from the anchor plate.
6.2. Install the shim on the anchor plate V-way opposite from the key and the spring V-way.
6.3. Install the caliper using a new key and new spring.
7. Remeasure the bumper gap. Install a thicker shim or replace the components if the gap exceeds 1.50 mm (0.058 inch). Refer to Component
Specifications.