
K 3500 Truck 4WD V8-8.1L VIN G (2002)
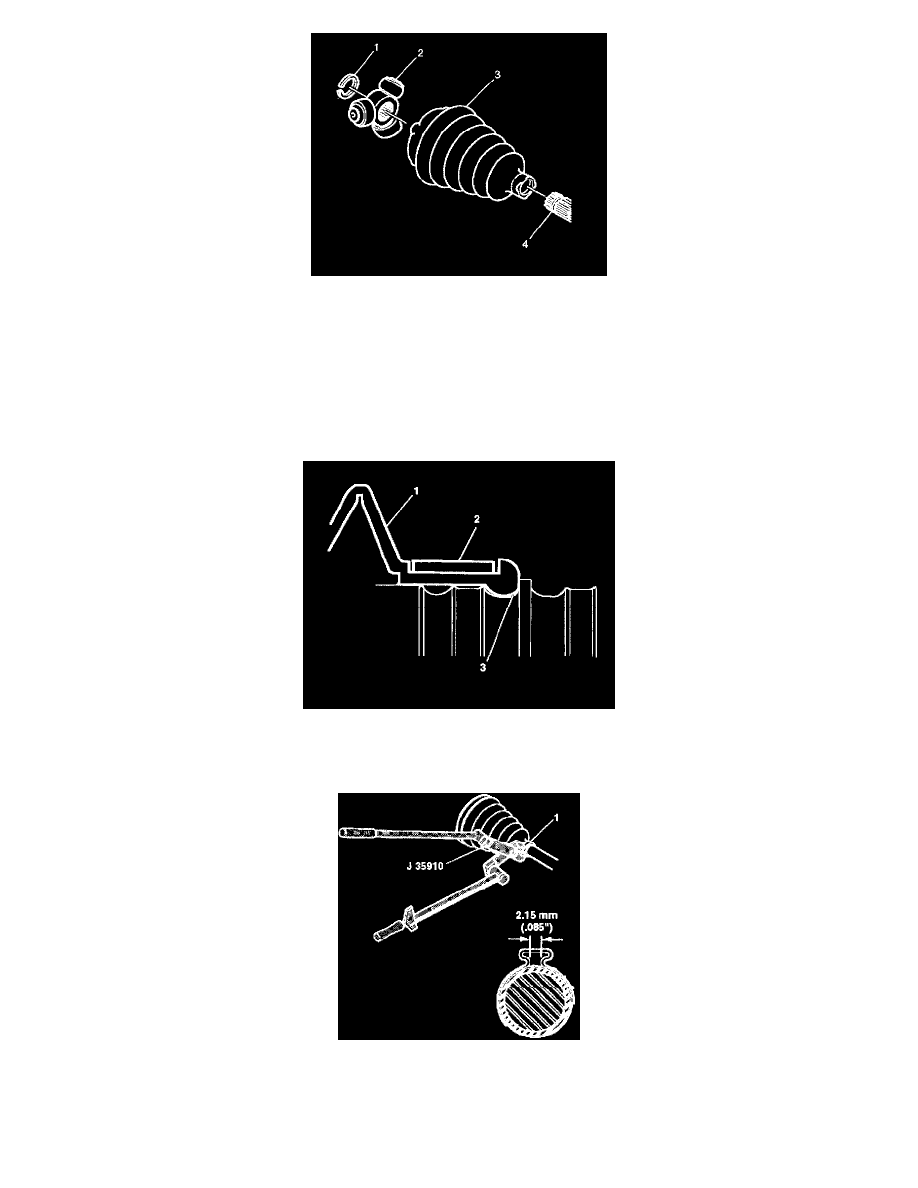
8. Remove the following items from the halfshaft bar:
8.1.
The spacer ring (1)
8.2.
The spider assembly 12)
8.3.
The tripot seal (3)
9. Clean the halfshaft bar (4). Use a wire brush in order to remove any rust in the seal mounting area (grooves).
10. Inspect the needle rollers, needle bearings, and trunnion. Check the tripot housing for unusual wear, cracks, or other damage. Replace any
damaged parts with the appropriate service kit.
Assembly Procedure
1. Place the new small seal clamp (2) onto the small end of the joint seal (1). Compress the joint seal (1) and small seal clamp (2) onto the halfshaft
bar.
2. Position the small end of the joint seal (1) into the joint seal groove (3) on the halfshaft bar.
Notice: Refer to Fastener Notice in Service Precautions.
3. Secure the small seal clamp (1) with J 35910 (or equivalent), a breaker bar, and a torque wrench.
^
Tighten the small seal clamp (1) to 136 Nm (100 ft. lbs.).
4. Check the gap dimension on the clamp ear. Continue tightening until the gap dimension is reached.