
K Tahoe 4WD V8-4.8L VIN V (2000)
Evaporative Emissions Hose: Service and Repair
Rear EVAP Purge Pipe
REMOVAL PROCEDURE
IMPORTANT: When replacing the EVAP pipe, always replace the pipe with original equipment or pans that meet the GM specifications for this
part. The replacement pipe must have the same types of fittings as the original pipe in order to ensure the integrity of the connection.
1. Raise the vehicle. Refer to Lifting and Jacking the Vehicle in General Information.
2. Clean all of the EVAP pipe connections and the surrounding areas before disconnection in order to avoid possible contamination of the EVAP
system.
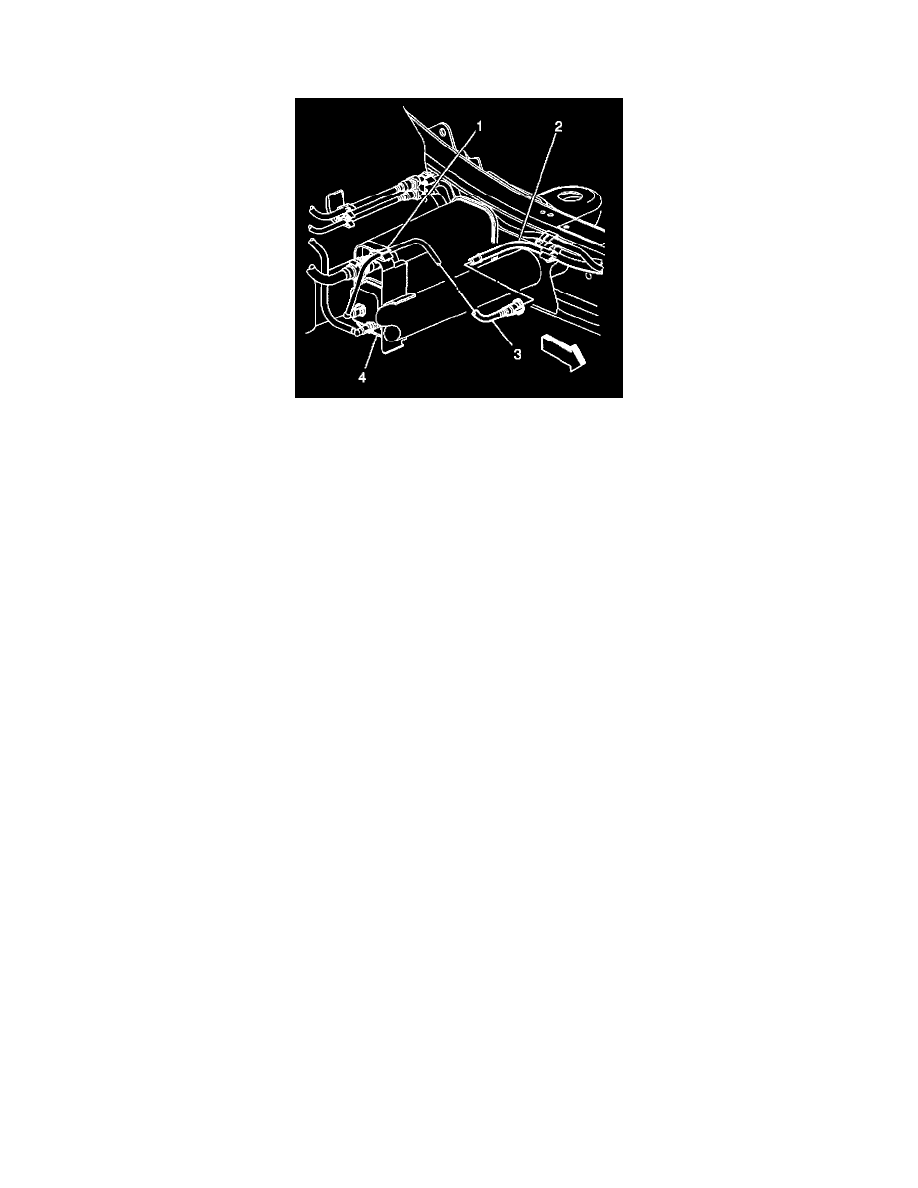
3. Disconnect the rear EVAP purge pipe (3) at the chassis EVAP purge pipe (2).
4. Disconnect the rear EVAP purge pipe at the EVAP canister (4).
5. Remove the rear EVAP purge pipe from the mounting clip (1).
6. Cap the chassis EVAP purge pipe and the EVAP canister in order to prevent possible EVAP system contamination.
INSTALLATION PROCEDURE
1. Remove the caps from the chassis EVAP purge pipe and the EVAP canister.
2. Connect the rear EVAP purge pipe (3) at the EVAP canister (4).
3. Connect the rear EVAP purge pipe at the chassis EVAP purge pipe (2).
4. Install the rear EVAP purge pipe into the mounting clip (1).
5. Lower the vehicle.