
K Tahoe 4WD V8-4.8L VIN V (2000)
Drive/Propeller Shaft: Service and Repair
Propeller Shaft Replacement
^
Tools Required
-
J 43218 Clamp Plier
Removal Procedure
1. Raise the vehicle on a hoist. Refer to Vehicle Lifting.
2. Remove the transfer case shield. Refer to Shield Replacement.
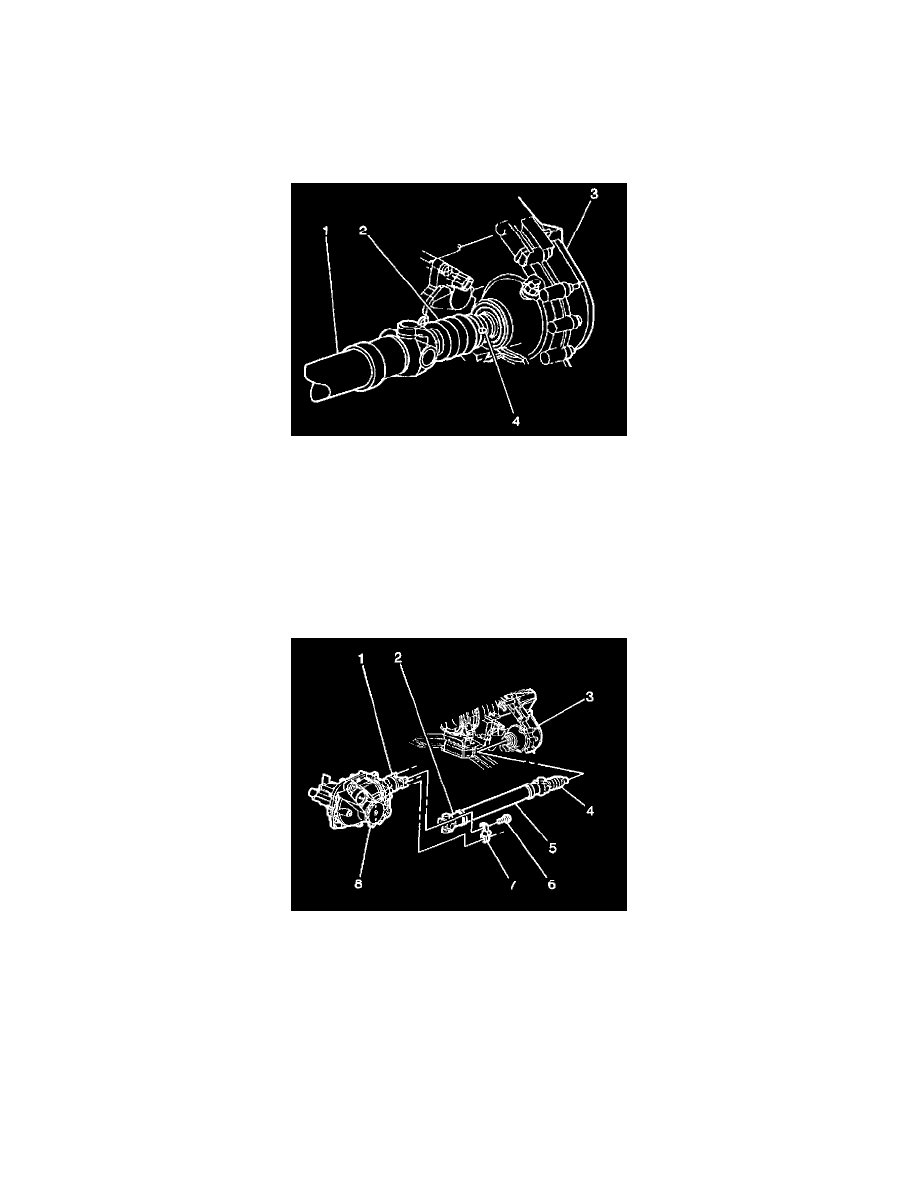
3. Remove the clamp (4) at the transfer case (3) by prying up the exposed end of the clamp (4) with a flat bladed tool.
Important: Observe and accurately reference mark all driveline components relative to the propeller shaft and axles before disassembly. These
components include the propeller shafts, the wheel drive shafts, the pinion flanges, the output shafts, etc., All components must be reassembled in
the exact relationship to each other as they were when removed. In addition, published specifications and torque values, as well as any
measurements made prior to disassembly must be followed.
4. Reference mark the relationship of the propeller shaft (5) to the front axle flange (1).
5. Remove the bolts (6) and the yoke retainers (7) from the front axle flange (1).
Important: Do not pound on the propeller shaft when trying to disconnect the propeller shaft.
6. Slide the propeller shaft rearward enough in order to disengage. Move the propeller shaft forward.
Important: Avoid dropping the bearing cap assemblies of the yoke end.
7. Remove the propeller shaft (5).
8. Inspect the propeller shaft (5) for any evidence of damage.
Installation Procedure