
K Tahoe 4WD V8-5.7L VIN R (1996)
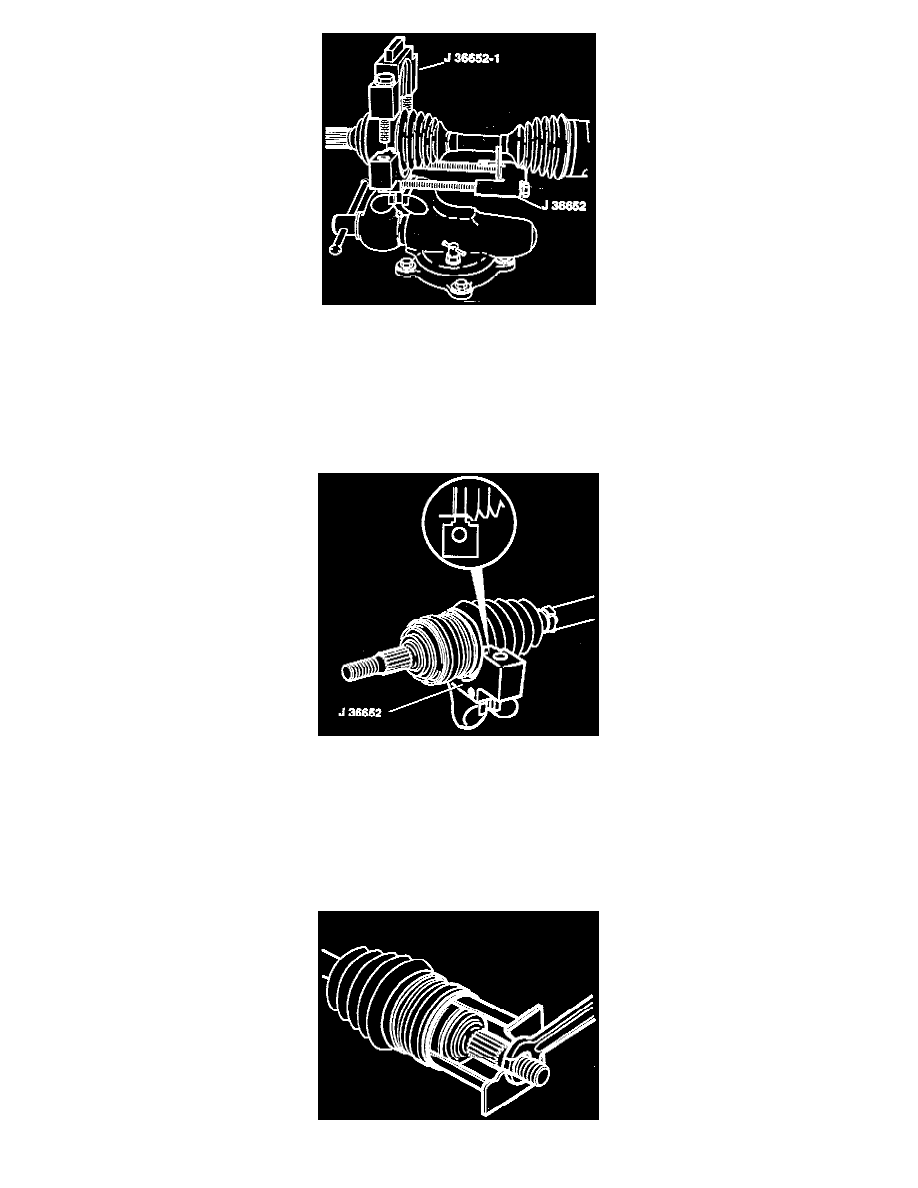
8. Clamp the CV joint seal tightly to the CV joint outer race with the large swage ring, using the following procedure:
A. Mount the J 36652 Swage Clamp Tool in a vise.
B. Install the bottom half of the split-plate swage clamp on the J 36652 Swage Clamp tool:
-
J 36652-1 Split Plate Swage Clamp (K10/K20 models)
-
J 36652-2 Split Plate Swage Clamp (K30 models)
C. Position the CV joint end (outboard end) of the drive axle (halfshaft) assembly in the bottom half of the Swage Clamp tool.
Important: Make sure that the seal, housing and swage ring all remain in alignment during this procedure.
D. Install the top half of the Swage Clamp tool onto the lower half of the Swage Clamp tool, over the CV joint and seal.
E. Align the swage ring and the swage ring clamp.
F. Insert the bolts into the Swage Clamp tool. Hand tighten the bolts until the bolts are snug.
G. Tighten each bolt 180° at a time. Tighten each bolt alternately until both sides of the top half of the Swage Clamp tool touch the bottom half of
the Swage Clamp tool.
H. Loosen the bolts and remove halfshaft assembly from the Swage Clamp tool.
Install Deflector Ring