
Lumina V6-191 3.1L VIN T MFI (1993)
Fluid color will be red when new.
IMPORTANT:
When new, automatic transaxle fluid is red in color. The red dye is added so the assembly plant can identify it as transaxle fluid and distinguish #
from engine oil or antifreeze. The red dye is not an indicator of fluid quality and is not permanent. As the vehicle is driven the fluid will begin to look
darker in color. The color may eventually appear light brown. A dark brown color with a burnt odor may indicate fluid deterioration and signal a
need for a transaxle fluid change.
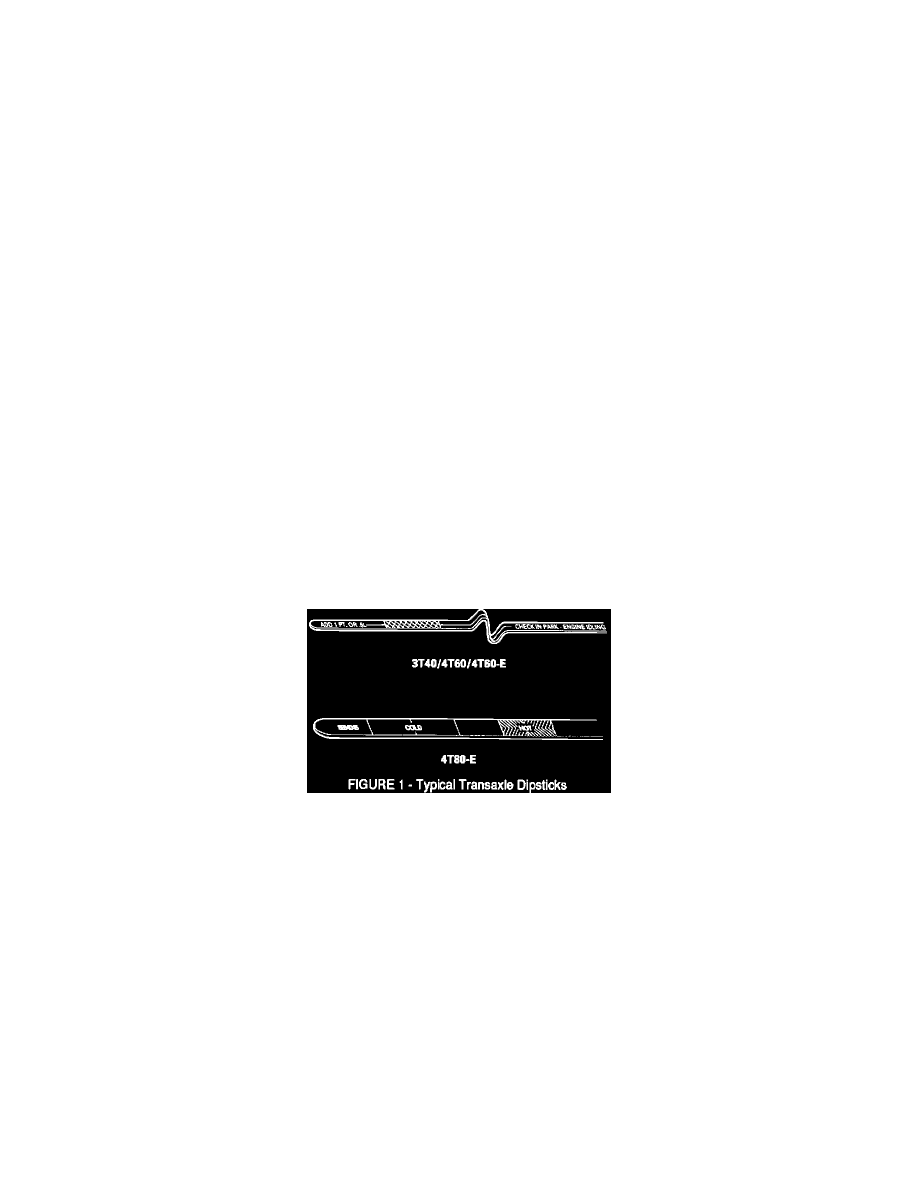
TRANSAXLE FLUID CHECKING PROCEDURE:
1.
Start engine and drive vehicle until the transaxle reaches operating temperature of 82-93 degrees C (180-200 degrees F). This temperature is
reached after about 24 km (15 miles) of driving.
Inaccurate fluid level readings will result if the fluid level is checked immediately after the vehicle has been operated under certain conditions:
-
When outside temperatures are above 32 degrees C (90 degrees F)
-
At sustained high speeds
-
In heavy city traffic during hot weather
-
Towing a trailer
-
In commercial service such as taxi or police use
If the vehicle has been operated under any of these conditions, shut the engine off and allow the vehicle to cool for thirty (30) minutes. Then restart
the vehicle and continue with step two.
2.
Stop vehicle on level ground and put the gear selector in "P" (Park).
3.
Set parking brake.
4.
With your foot on the brake pedal, move the shift lever through each gear range, pausing for about three seconds in each range. Then put the gear
selector back in "P" (Park).
5.
Let the engine idle for three to five minutes.
6.
Pull out the dipstick and wipe it with a clean rag or towel.
7.
Push it back in all the way, wait three seconds and pull it back out.
8.
Check both sides of the dipstick and read the lower level. The fluid should be in the crosshatched "HOT" area.
IMPORTANT:
The fluid level is ok if it is any where within the cross hatched area. It does not have to beat the top of the cross hatched area. Do not add fluid unless
the fluid level is below the crosshatched area.
9.
If the fluid level is where it should be, push the dipstick back in all the way.
ADDING TRANSAXLE FLUID:
If fluid level is low (after properly performing the checking procedure above) add only enough fluid to bring the level into the crosshatched area. It
doesn't take much fluid, generally less than a pint. Don't overfill. Remember that the level does not need to be at the top of the crosshatched area to be
correct.
After adding fluid, always recheck the fluid level as described in the above procedure.