
Lumina V6-191 3.1L VIN T MFI (1993)
Dual Crankshaft Sensor: Service and Repair
California Emissions
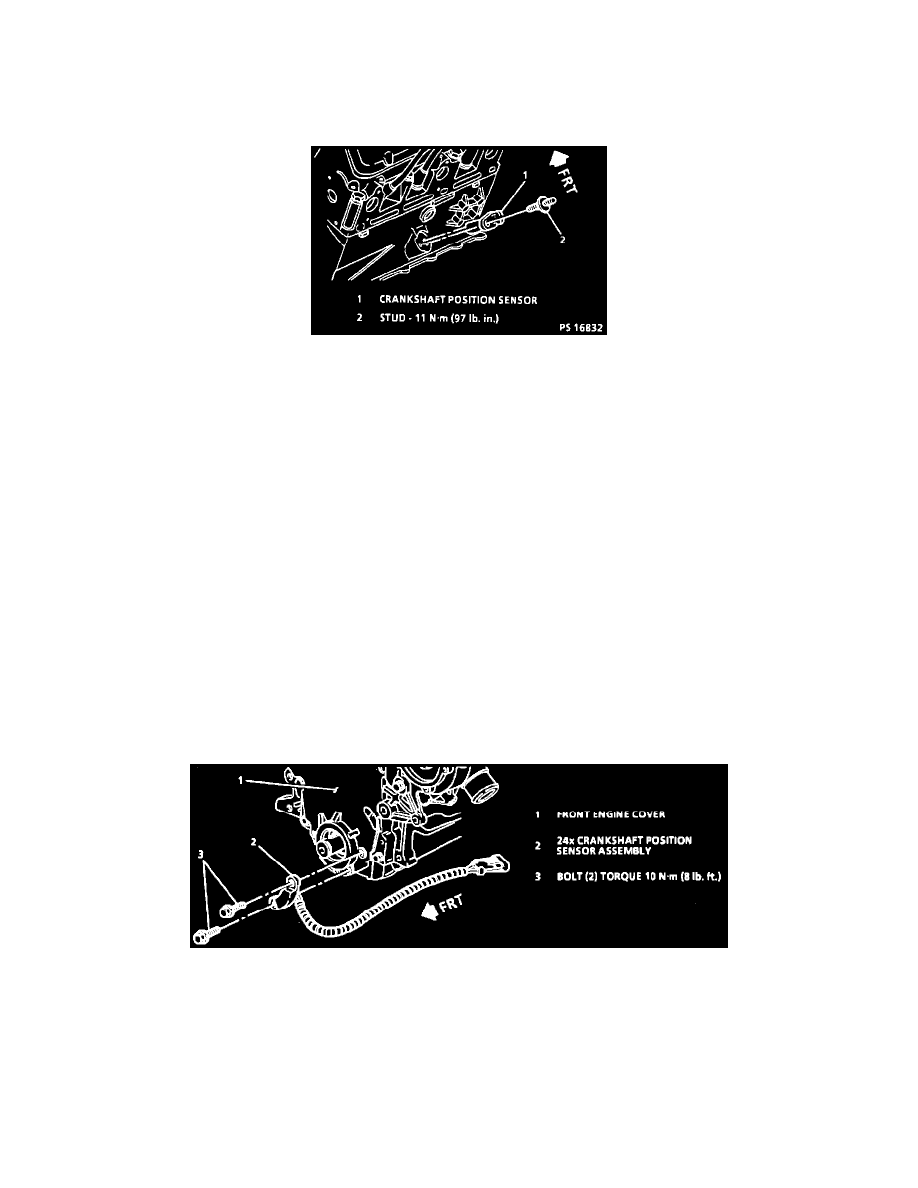
3X Crankshaft Sensor (Side of Engine)
Crankshaft Position Sensor Installation
REMOVE OR DISCONNECT:
1. Negative battery cable.
2. Electrical connector from the crankshaft sensor.
3. Sensor hold-down bolt.
4. Sensor from engine.
5. Inspect the crankshaft sensor o-ring for cracks, wear or leakage. Before installing new sensor, lubricate the new o-ring with engine oil.
INSTALL OR CONNECT:
1. New sensor into the hole in the engine block.
2. Tighten the sensor hold-down bolt and torque to 10 Nm (88 in lb).
3. Crankshaft sensor electrical connection.
4. Negative battery cable.
NOTE: The system has a learning ability which allows it to make corrections for minor variations in the fuel system to improve driveability.
When the battery is disconnected the computer's memory is cleared and the learning process has to begin all over again. A change may be noticed
in the driving performance of the vehicle. To reset the vehicles learning ability, make sure the engine is at operating temperature and operate the
vehicle at part throttle, moderate acceleration, and idle conditions, until normal performance returns.
24X Crankshaft Sensor (Front of Engine)
24X Crankshaft Sensor Installation
REMOVE OR DISCONNECT
1. Disconnect negative battery cable.
2. Remove serpentine belt from pulley.
3. Lift vehicle.
4. Remove harmonic balancer to crankshaft bolt.
5. Remove harmonic balancer using puller.
6. Disconnect sensor electrical connector.
INSTALL OR CONNECT