
Lumina V6-204 3.4L DOHC (1991)
2.
Drill a hole through the regulator sector gear and backplate (See Figure 1) and install a bolt and nut to lock sector gear in position. Do not drill
hole closer than 13 mm (1/2") to edge of sector gear or backplate.
3.
Using a 1/4" drill bit, drill out the ends of all 3 motor to regulator attaching rivets from the motor side of the assembly (See Figure 1).
4.
Remove the motor from the regulator and the remaining portions of the rivets.
5.
Position new motor to the regulator backplate and with the aid of a helper, install motor with 1 rivet (bottom location, Figure 1) by collapsing or
crushing end of rivet (P/N 9441949) with a ball peen type hammer as shown in Figure 2.
Parts are currently available from GMSPO.
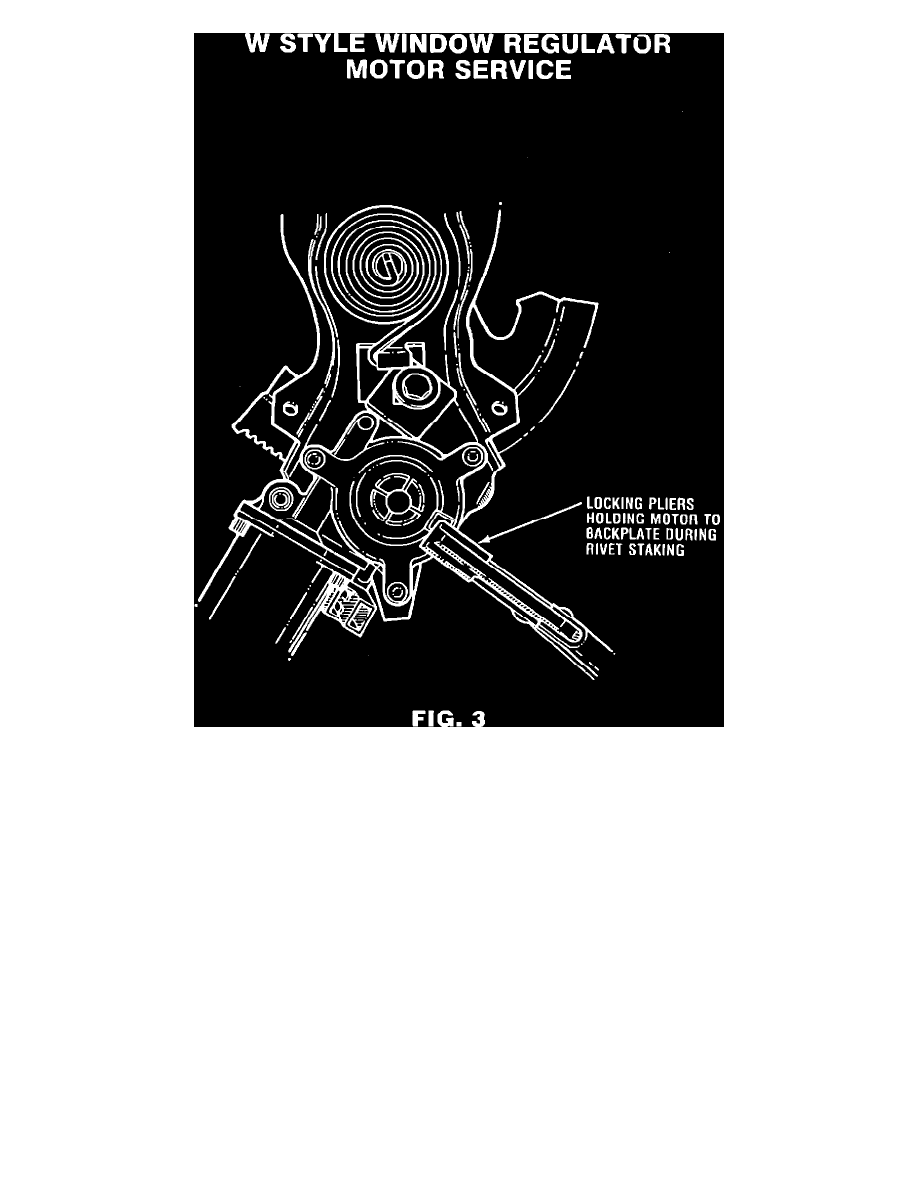
6.
Once the motor is installed with 1 rivet, clamp the motor to the backplate with locking pliers as shown in Figure 3.
7.
Remove bolt securing sector gear to backplate and using an electric power source, move regulator in one direction to gain access to 2nd rivet.
8.
Remove old rivet head and install new rivet (P/N 9441949) using the procedure in step 5 (See Figure 2).
9.
Using same power source, move regulator in opposite direction and repeat step 8.
10.
Remove locking pliers and reinstall regulator assembly into door using 1/4" x 1/2" peel type rivets.