
Lumina V6-204 3.4L DOHC VIN X SFI (1996)
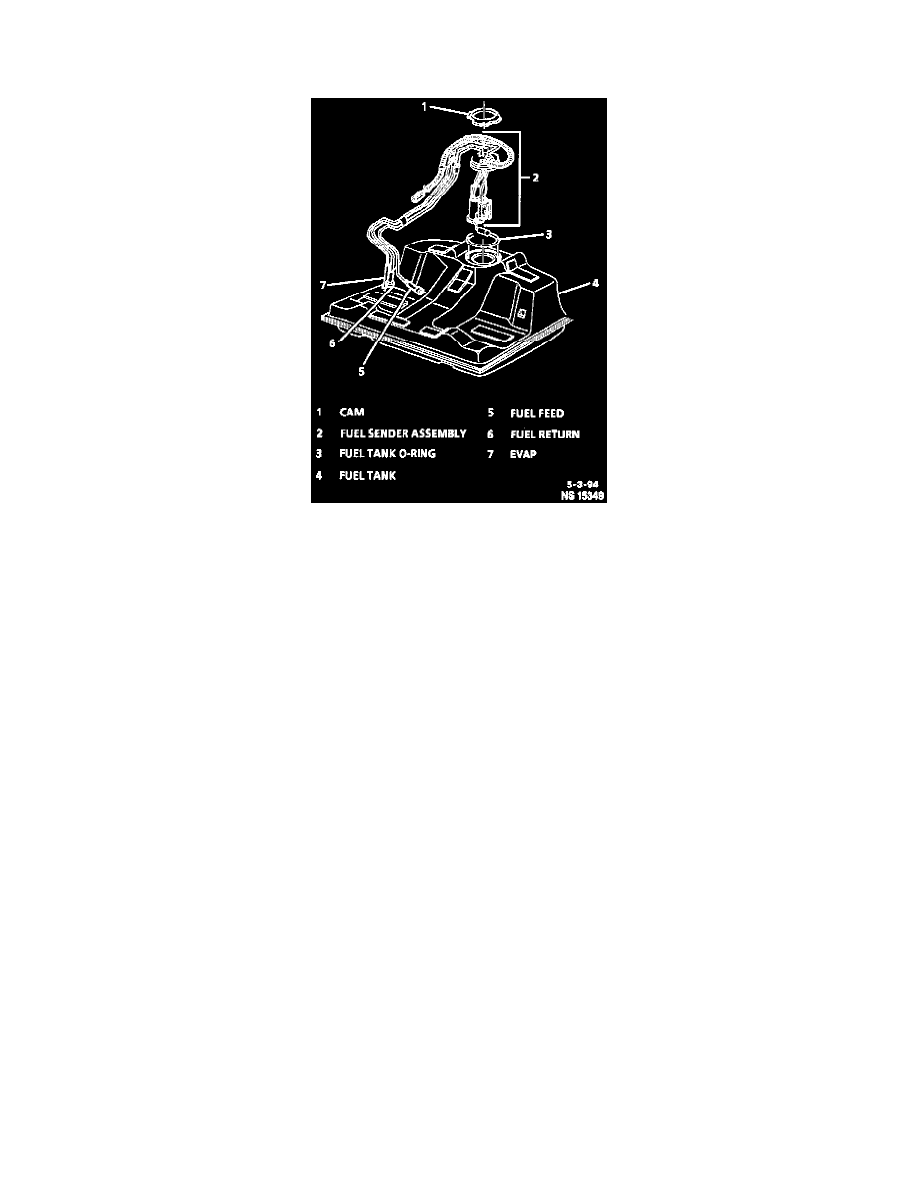
Modular Fuel Sender Assembly: Service and Repair
Fuel Sender Assembly Replacement
Fuel Sender Assembly
CAUTION:
-
Do Not handle the fuel sender by the fuel pipes. Due to the length of the pipes, the amount of leverage generated by handling the pipes could
damage the solder joints.
-
Always replace fuel sender O-rings when reinstalling fuel sender assembly.
REMOVE OR DISCONNECT
1. Negative battery cable.
2. Perform Fuel Pressure Release procedure.
3. Drain fuel tank.
4. Fuel tank.
DISASSEMBLE
Tool Required: J 35731 Fuel Tank Sending Unit Spanner Wrench.
1. Quick-connect fittings at fuel sender assembly (see "Servicing Quick-Connect Fittings").
2. Using J 35731, remove fuel sender assembly retaining cam, fuel sender assembly and O-ring from fuel tank. Discard fuel sender assembly O-ring.
CLEAN AND INSPECT
Fuel sender assembly O-ring sealing surfaces.
ASSEMBLE
1. Position new fuel sender assembly O-ring on fuel tank.
CAUTION: Care should be taken not to fold over or twist the fuel pump strainer when installing the fuel sender assembly as this will restrict fuel
flow. Also, assure that the fuel pump strainer does not block full travel of float arm.
2. Fuel sender assembly and fuel sender assembly retainer cam using J 35731.
3. Chassis to sender fuel feed and return pipe assemblies to fuel sender quick-connect fittings.
INSTALL OR CONNECT
1. Fuel tank.
2. Add fuel and install fuel filler cap.
3. Negative battery cable.
INSPECT