
Lumina V6-3.1L VIN J (2000)
Power Trunk / Liftgate Lock Switch: Service and Repair
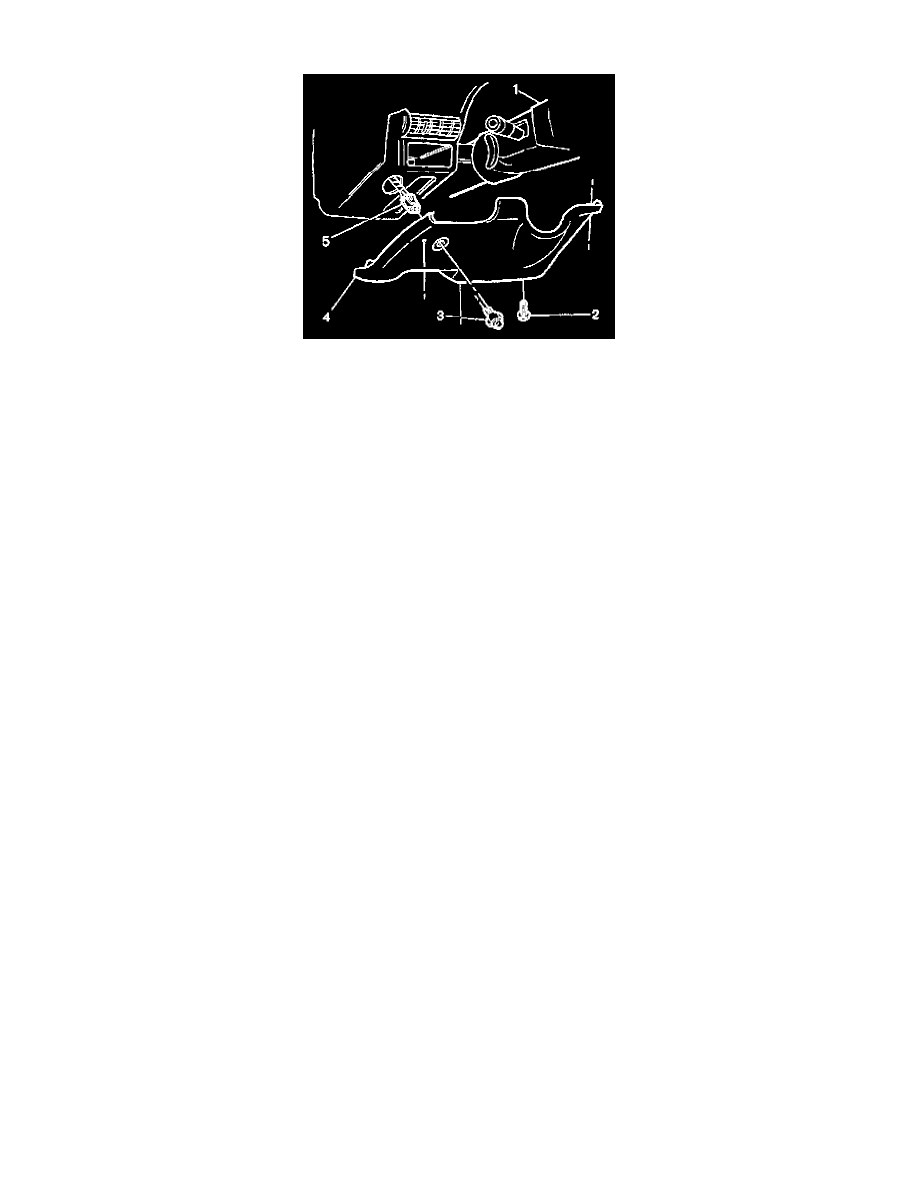
REMOVAL PROCEDURE
1. Remove the instrument panel (IP) steering column opening filler screws (2).
2. Remove the IP steering column opening filler panel retainer.
3. Adjust the IP steering column opening filler for access.
4. Disconnect the electrical connector (5) from the rear compartment lid switch.
5. Remove the rear compartment lid switch (3).
INSTALLATION PROCEDURE
1. Install the rear compartment lid switch (3).
2. Connect the electrical connector (5) to the rear compartment lid switch.
3. Install the instrument panel (IP) steering column opening filler (4).
4. Install the IP steering column opening filler panel retainer.
NOTE: Refer to Fastener Notice in Service Precautions.
5. Install and finger tighten the IP steering column opening filler panel screws.
Tighten
5.1. Tighten the RH IP steering column opening filler screw first in order to properly install the P steering column opening filler panel. Tighten
the RH IP steering column opening filler panel screw to 1.9 N.m (17 lb in).
5.2. Tighten the LH IP steering column opening filler panel screw to 1.9 N.m (17 lb in).