
Lumina V6-3.1L VIN J (2000)
Compressor Clutch Coil: Service and Repair
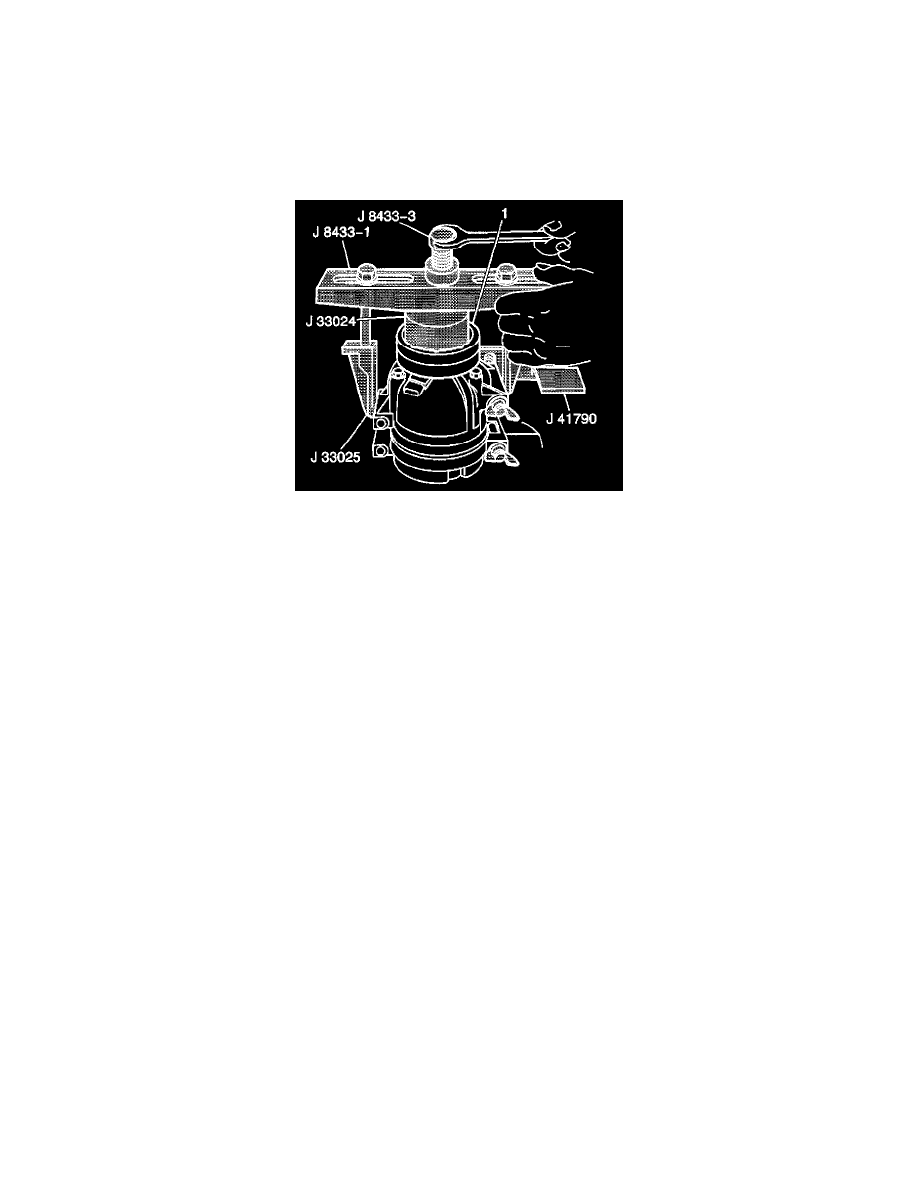
Compressor Clutch Coil Install (V5 - Direct Mount)
TOOLS REQUIRED
^
J 33024 Clutch Coil Installer Adaptor
^
J 33025 Clutch Coil Puller Legs
^
J 8433 Compressor Pulley Puller
^
J 8433-3 Forcing Screw
^
J 41790 Compressor Holding Fixture
1. Place the clutch coil assembly (1) on the front head with the clutch coil terminal at the positioned at the mark made during disassembly.
2. Place the J 33024 over the internal opening of the clutch coil housing and align installer with the compressor front head.
3. Install the J 8433-3 into the J 8433 and center the screw in the countersunk center hole of the J 33024.
4. Install the 4 inch through bolts and washers from the J 42136 tool kit into the J 33025 and attach them to the compressor mounting bosses.
5. Turn the center forcing screw of the J 8433 to press the clutch coil onto the front head until the clutch coil is fully seated.
Make sure the clutch coil and the J 33024 stay in-line with each other while pressing the clutch coil onto the compressor.
6. Install the compressor clutch rotor and bearing assembly.
7. Install the compressor clutch plate and hub assembly.
8. Remove the compressor from the J 41790.