Lumina V6-3.1L VIN J (2000)

Use the following repair procedures in order to repair the following:
^
Push to Seat terminals
^
Pull to Seat terminals
^
Weather Pack(R) terminals
Some terminals do not require all of the steps shown.Skip the steps that do not apply for your immediate terminal repair. The J 38125-B Terminal Repair
Kit contains further information.
1. Cut off the terminal between the core and the insulation crimp. Minimize any wire loss. For Weather Pack(R) terminals, remove the seal.
2. Apply the correct seal per gauge size of the wire. For Weather Pack(R) terminals, slide the seal back along the wire in order to enable insulation
removal.
3. Remove the insulation.
4. For Weather Pack(R) terminals only, align the seal with the end of the cable insulation.
5. Position the strip in the terminal.
For Weather Pack(R) terminals, position the strip and seal in the terminal.
6. Hand crimp the core wings.
7. Hand crimp the insulation wings.
For Weather Pack(R) terminals, hand crimp the insulation wings around the seal and the cable.
8. Solder all of the hand crimp terminals.
Arrows and Symbols
Arrows and Symbols
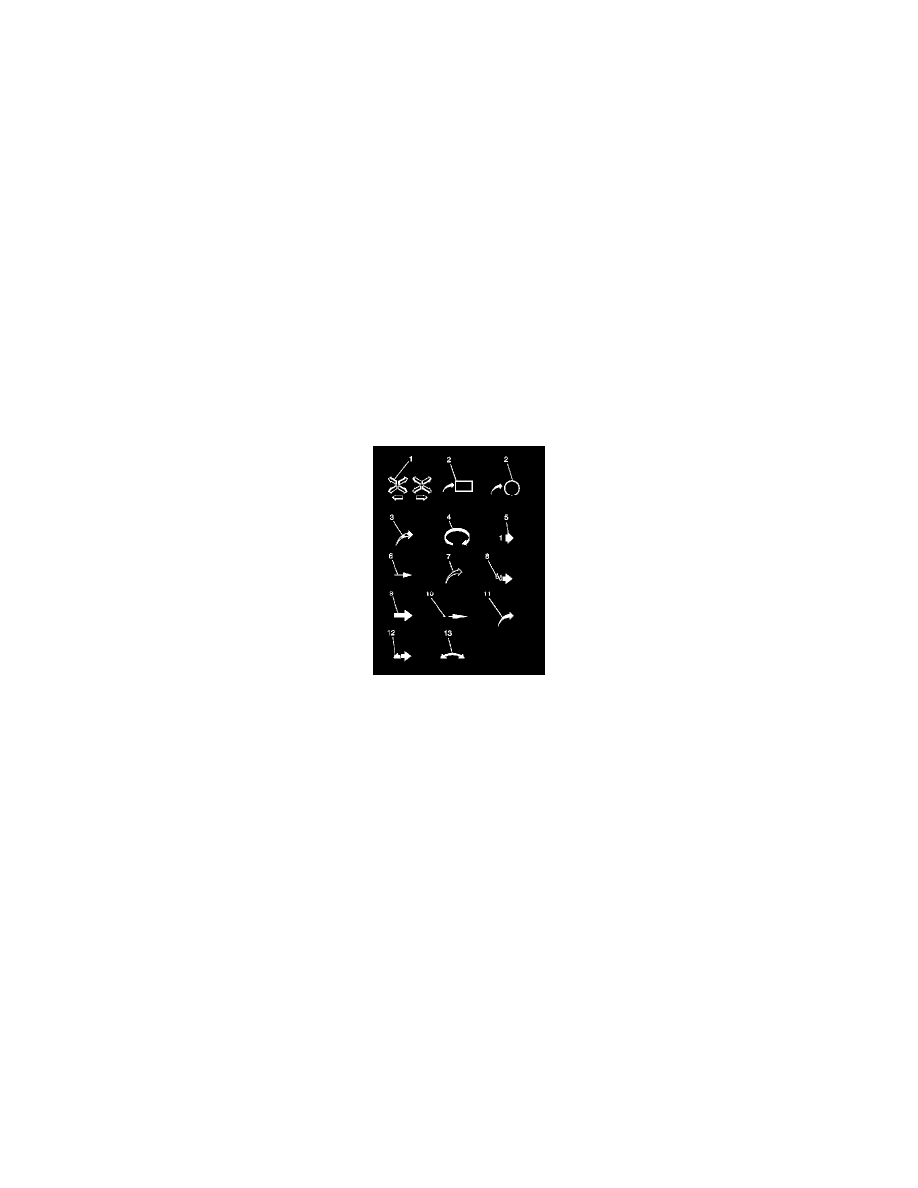
This service manual uses various symbols in order to describe different service operations.
Arrows and Symbols
1 - Front of Vehicle
2 - View Detail
2 - View Detail
3 - Ambient Air Mixed With Another Gas or Indicate Temperature Change
4 - Motion or Direction
5 - View Angle
6 - Dimension (1:2)
7 - Ambient/Clean Air Flow or Cool Air Flow
8 - Lubrication Point - Oil or Fluid
9 - Task Related
10 - Sectioning (1:3)
11 - Gas Other Than Ambient Air or Hot Air Flow
12 - Lubrication Point - Grease or Jelly
13 - Multidirectional Arrow
US English/Metric Conversion
US English/Metric Conversion
