
Lumina V6-3.8L VIN K (1998)
Brake Master Cylinder: Service and Repair
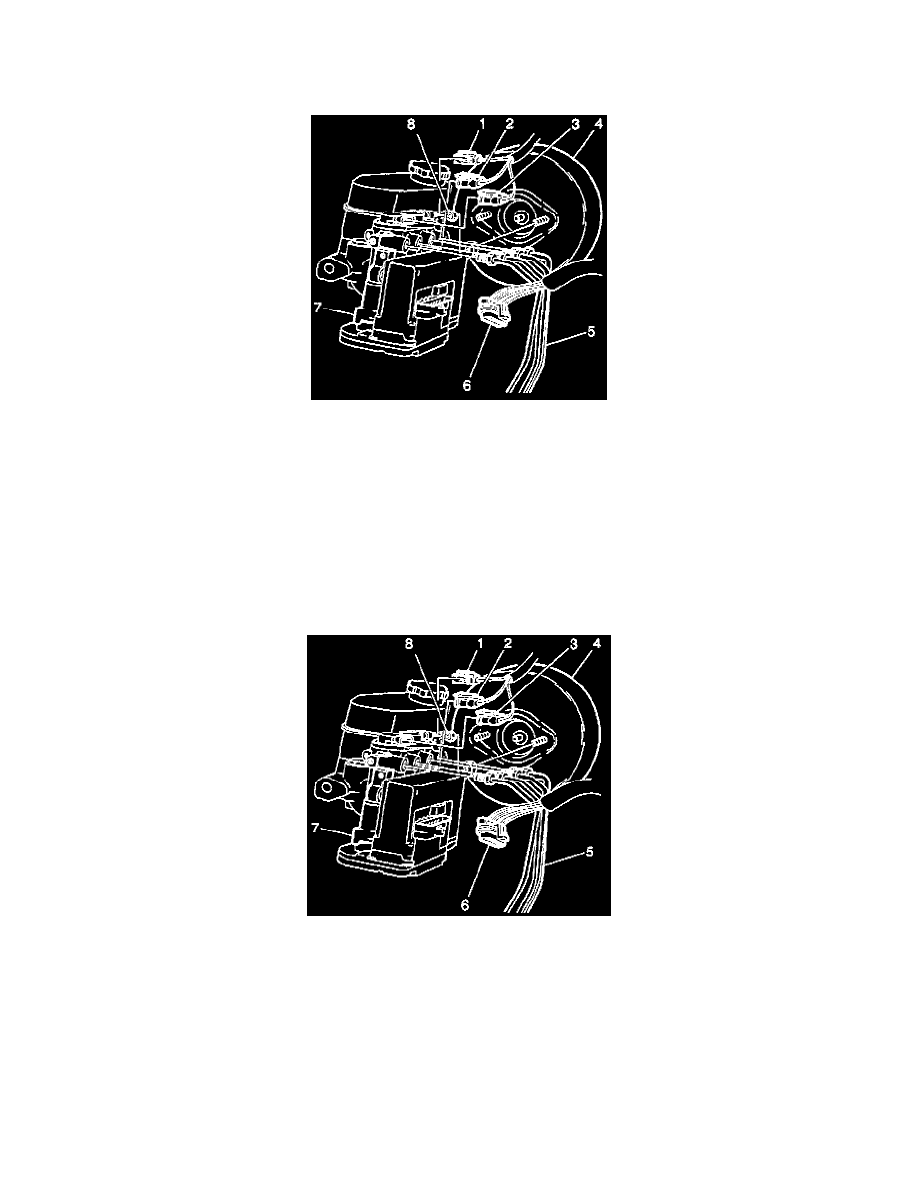
Brake Modulator/Master Cylinder ASM Replacement (B) (with ABS)
REMOVAL PROCEDURE
CAUTION: To help avoid personal injury due to a retained load on the brake modulator, the Gear Tension Relief function of the scan tool
must be performed prior to removal of the ABS brake modulator/master cylinder assembly.
1. Use the Scan Tool in order to perform the Gear Tension Relief Sequence.
2. Disconnect two brake solenoid valve electrical connectors (1), (3).
3. Disconnect the brake fluid level indicator sensor connector (2).
4. Disconnect the ABS brake motor pack 6-way electrical connector (6).
5. Remove four brake pipes (5).
6. Remove the two nuts (8) attaching the ABS brake modulator/master cylinder assembly (7) to the vacuum booster.
7. Remove the ABS brake modulator/master cylinder assembly (7).
INSTALLATION PROCEDURE
1. Install the ABS brake modulator/master cylinder assembly (7) into the vehicle.
Install the two nuts (8) attaching the ABS modulator/master cylinder assembly (7).
^
Tighten the ABS brake modulator/master cylinder nuts (8) to 27 Nm (20 ft. lbs.).
NOTICE: Refer to Fastener Notice in Cautions and Notices.
2. Install four brake pipes (5) onto the ABS brake modulator/master cylinder assembly (7).
^
Tighten the tube nuts to 24 Nm (18 ft. lbs.).
3. Connect the ABS brake motor pack 6-way electrical connector (6).
4. Connect the brake fluid level indicator sensor electrical connector (2).