
Lumina V6-3.8L VIN K (1998)
6. Install the lower intake manifold seals.
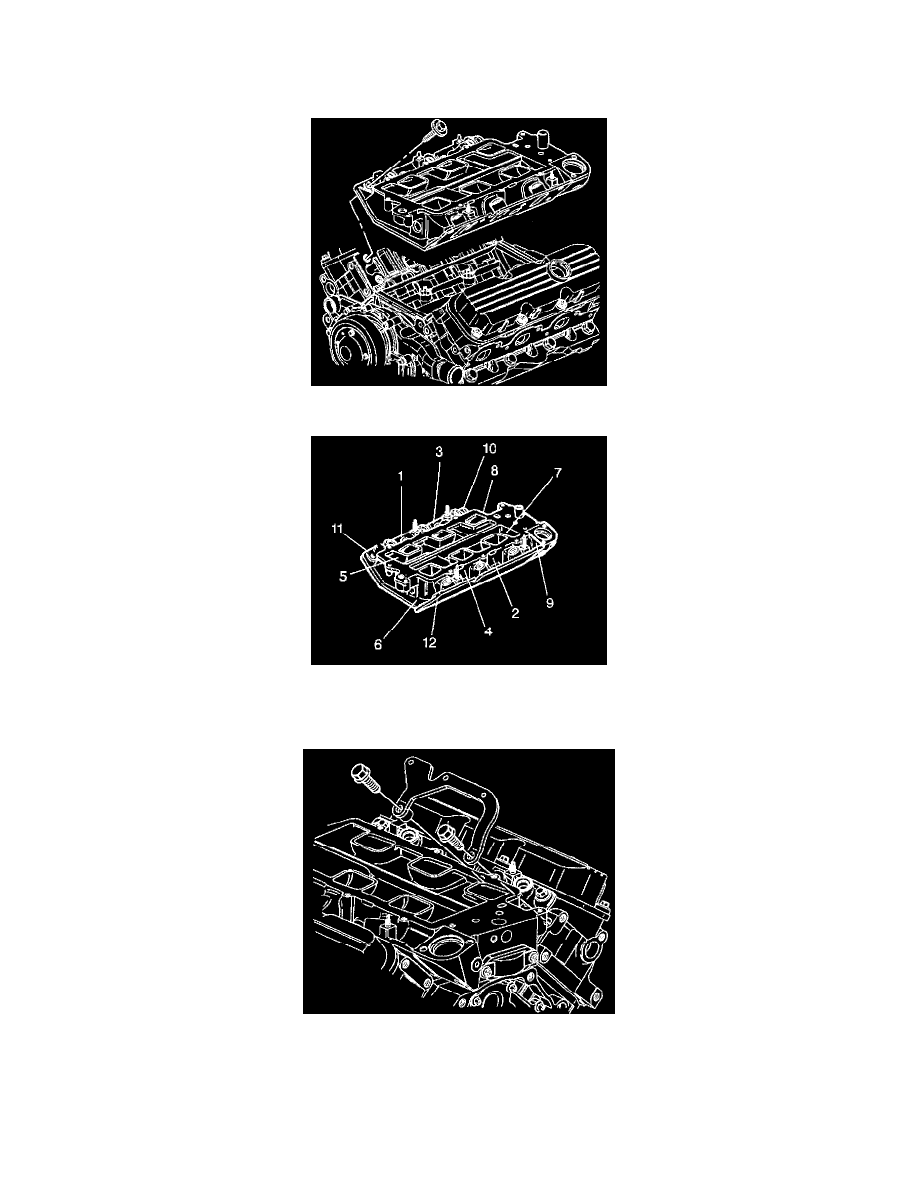
NOTICE: The two bolts which fasten the lower intake manifold to the cylinder head are accessible only after the upper intake is removed. The
bolts are located in the right front and left rear corners of the lower intake manifold. Remove the upper intake manifold to service the lower intake.
7. Install the lower intake manifold.
8. Install the lower intake manifold bolts (1-12). Apply thread lock compound GM P/N 12345382 or equivalent to the two hidden bolts (5 and 7) and
ensure they are installed.
^
Tighten the lower intake manifold bolts (1-12) in sequence to 15 Nm (11 ft. lbs.).
9. Install the generator brace bracket.
10. Install the generator brace bracket bolts.
^
Tighten the generator brace bracket bolts to 50 Nm (37 ft. lbs.).
11. Install the evaporative emissions canister purge solenoid valve.
12. Install the temperature sensor wiring harness connector.
13. Install the radiator inlet hose to the water outlet housing. Refer to Radiator Inlet Hose Replacement (3800 Engine) in Cooling System.