
Lumina V6-3.8L VIN K (1998)
Case: Service and Repair
4T65-E Automatic Transaxle
Case Porosity
REPAIR PROCEDURE
1. Use solvent to clean the leak area.
2. Use compressed air to dry the area.
3. Follow the manufacturer's recommendations to mix a sufficient amount of GM P/N 1052533, or equivalent, epoxy cement.
CAUTION: Epoxy adhesive may cause skin irritations and eye damage. Read and follow all information on the container label as provided by the
manufacturer.
4. Use a clean and dry soldering acid brush to apply the epoxy cement while the transaxle case is hot.
5. Allow the epoxy cement to cure for three hours.
6. Start the engine.
7. Repeat the fluid leak diagnosis procedures.
Case Extension Housing Replacement
REMOVAL PROCEDURE
1. Disconnect the battery ground (negative) cable. Refer to Battery Negative Cable Disconnect/Connect in Starting and Charging.
2. Raise and support the vehicle. Refer to Vehicle Lift Points.
3. Disconnect the right drive axle from the transaxle. Refer to Wheel Drive Shafts Replacement in Drive Axle.
4. Remove the transaxle brace. Refer to AT Brace Replacement.
5. Remove the vehicle speed sensor Refer to Vehicle Speed Sensor Replacement.
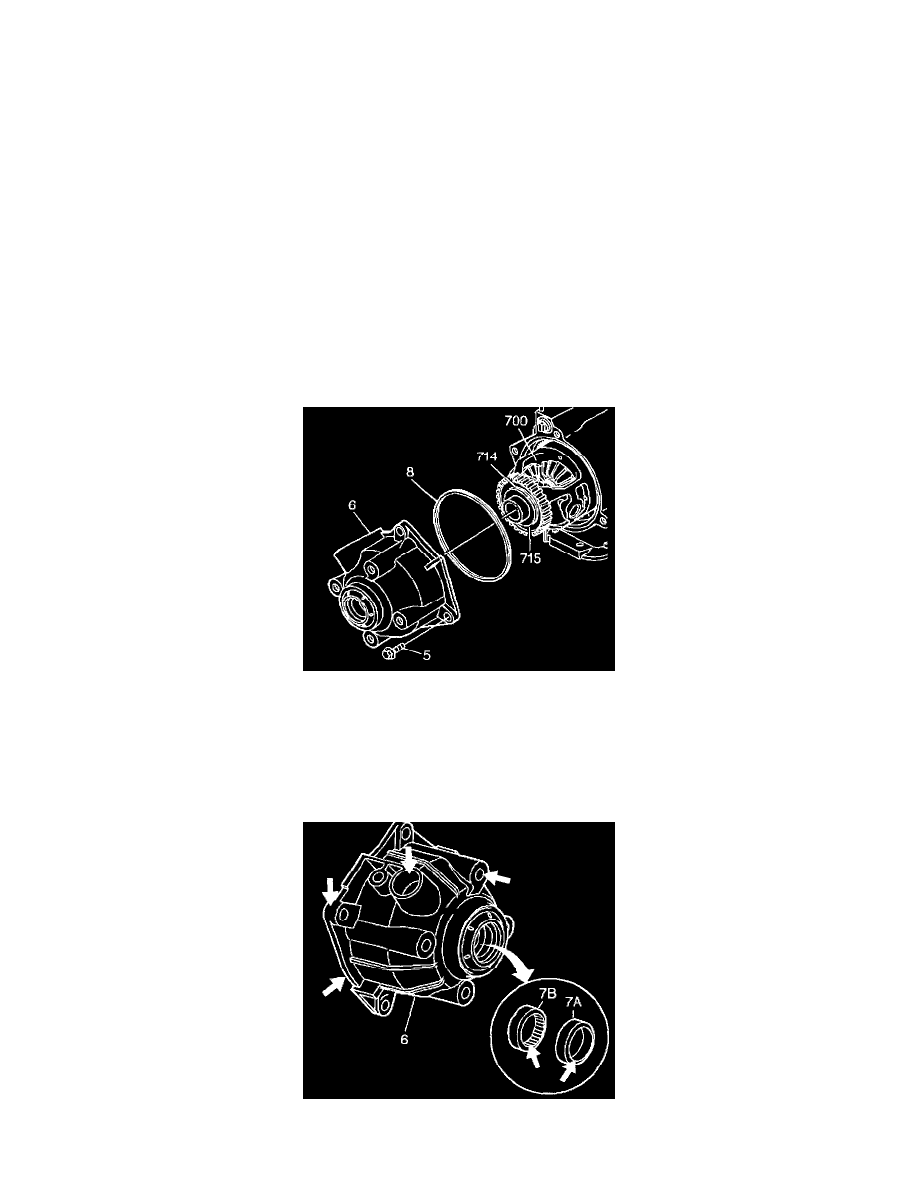
6. Remove the case extension housing bolts (5).
7. Remove the case extension housing (6) with axle seal and the O-ring (8).
8. Inspect the case extension (6) for the following conditions:
^
A damaged or porous sealing surface for the case extension seal