
Lumina V6-3100 3.1L VIN M SFI (1995)
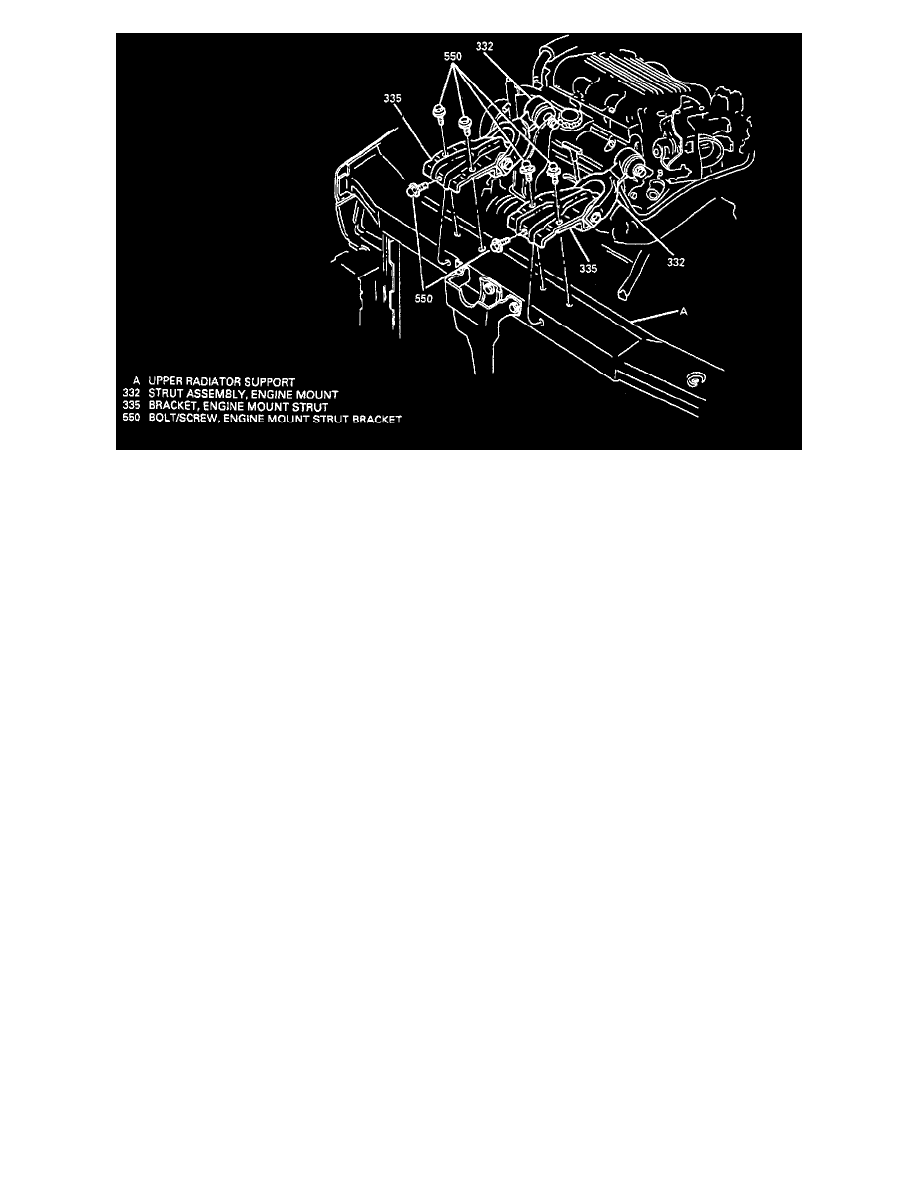
ENGINE MOUNT STRUT BRACKET Figure 9
Remove or Disconnect
1. Strut assembly (332) from bracket (335). Refer to "Engine Mount Strut Assembly" in this section.
2. Horizontal bolt/screw (550) from bracket (335).
3. Vertical bolts/screws (550) from bracket (335).
4. Bracket (335) from upper radiator support.
Install or Connect
NOTICE: See "Notice" above.
1. Position bracket (335) over upper radiator support so bracket (335) and strut assembly (332) are aligned. Make sure bracket (335) is aligned to
proper holes of upper radiator support.
2. Vertical bolts/screws (550) to bracket (335).
Tighten Bolts/screws (550) to 26 N.m (19 lb. ft.).
3. Horizontal bolt/screw (550) to bracket (335).
Tighten Bolt/screw (550) to 26 N.m (19 lb. ft.).
4. Strut assembly (332) to bracket (335). Refer to "Engine Mount Strut Assembly" in this section.
ROTATING ENGINE ASSEMBLY
Figure 10
Tool Required: J 41131 Engine Tilter
Remove or Disconnect
1.54GAir cleaner and duct assembly.
2. Put transaxle assembly in "NEUTRAL."
3. Torque strut-to-engine bracket bolts (334) and swing torque struts aside.
4. Install J 41131 and rotate engine assembly forward.
Install or Connect
1. Rotate engine assembly backward and remove J 41131.
2. Torque strut-to-engine bracket bolts (334).
3. Put transaxle assembly in "PARK."
4. Air cleaner and duct assembly.