
Lumina APV V6-191 3.1L (1990)
2.
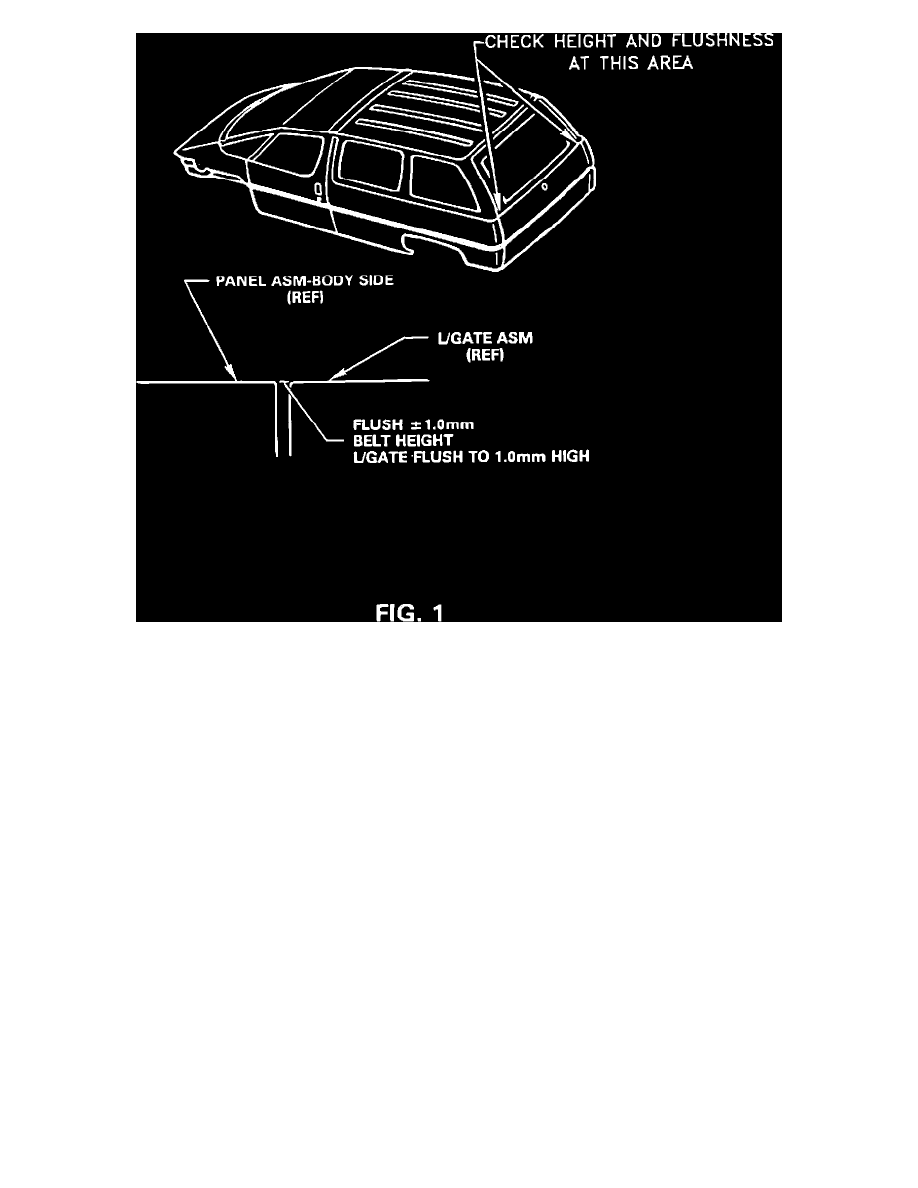
If efforts are still unacceptable remove strikers (leave struts attached). Close the lift gate and check the height at the belt line as shown in Figure 1.
Lift gate should be flush for height with the quarter panel (+/- 1.0 MM). If not flush, loosen lift gate side hinge bolts and (using hinge bolt
attachment witness marks as a guide) adjust in desired direction to obtain a flush condition. Be sure to equalize opposite hinge by loosening bolts
and retorque.
3.
Reinstall strikers to set lift gate flush (+/- 1.0 MM) fore/aft at the quarter panels. The strikers should not be dragging on the top or boftom of the
latch.
4.
If efforts are still unacceptable after following steps 1-3 above, install service kit and follow procedure listed below.
Kit Part Number:
10219104
Note:
Installing this kit will reduce latching effort and initial pull down effort from the full open position. However, a slight increase in opening effort will be
experienced.
Retrofit kit consists of the following parts:
Struts (Two)
Bracket Assembly (Two)
Rivet (Two) Bolt (Two)
Lock Cylinder
Instruction Sheet
Template
Procedure:
1.
Remove speaker covers to access trim panel retaining screws and remove.
2.
Remove the rest of retaining screws and remove trim panel.
3.
Remove rear pillar shoulder belt anchor bolts.