Malibu L4-2.4L Hybrid (2008)

3. Remove the caps or plugs from the brake caliper opening and the brake hose.
Important: Do not reuse the copper brake hose gaskets.
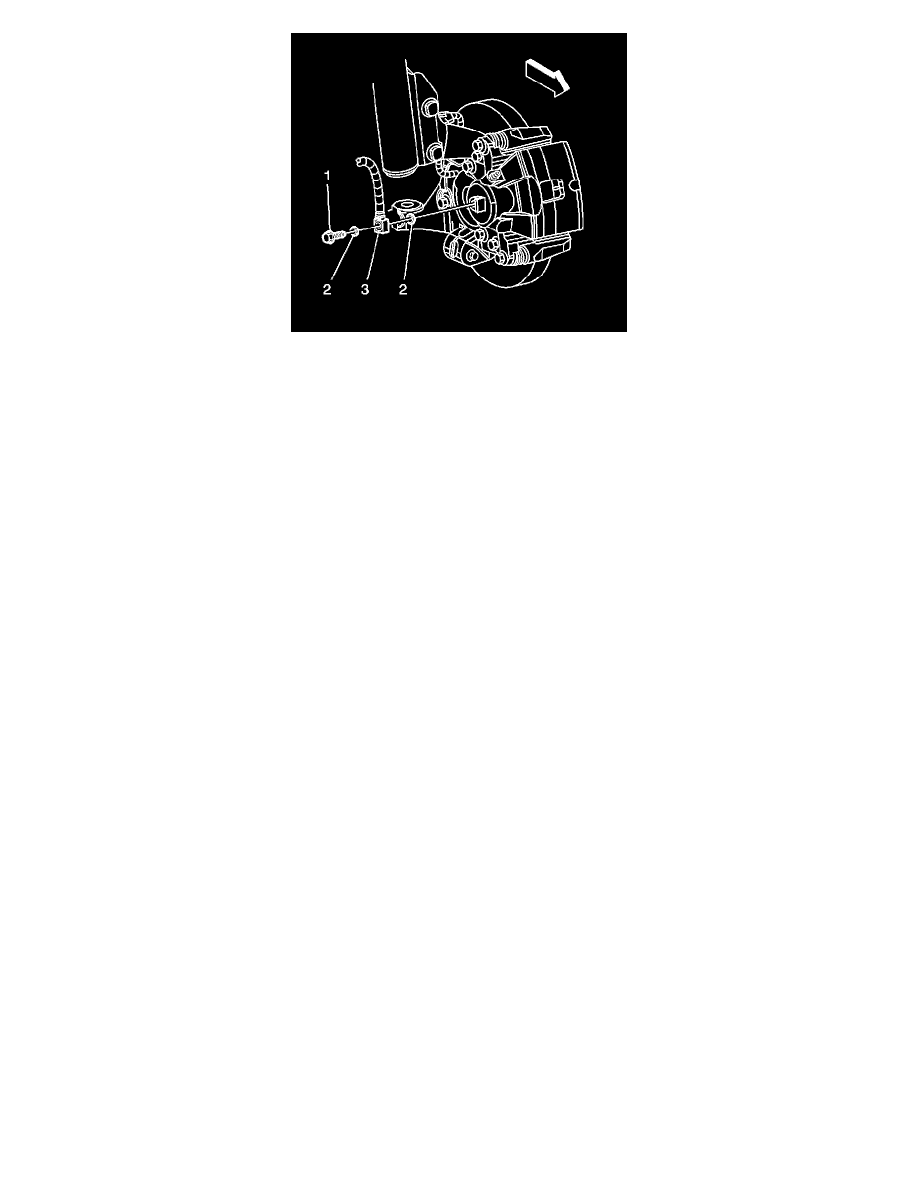
4. Install NEW copper brake hose gaskets (2) to the brake hose-to-caliper bolt (1) and to the brake hose (3).
5. Install the brake hose and the brake hose-to-brake caliper bolt to the brake caliper.
Tighten the bolt to 50 N.m (37 lb ft).
6. Bleed the hydraulic brake system. Refer to Hydraulic Brake System Bleeding (Manual) (See: Brake Bleeding/Service and Repair)Hydraulic Brake
System Bleeding (Pressure) (See: Brake Bleeding/Service and Repair) .
7. Remove the wheel nuts retaining the brake rotor to the wheel hub.
8. Install the tire and wheel assembly. Refer to Tire and Wheel Removal and Installation .
9. Lower the vehicle.
10. With the engine OFF, gradually apply the brake pedal to approximately 2/3 of its travel distance.
11. Slowly release the brake pedal.
12. Wait 15 seconds, then repeat steps 10 and 11 until a firm brake pedal is obtained. This will properly seat the brake caliper piston and brake pads.
Rear Brake Caliper Replacement
Rear Brake Caliper Replacement
Removal Procedure
Caution: Refer to Brake Fluid Irritant Caution .
Notice: Refer to Brake Fluid Effects on Paint and Electrical Components Notice .
1. Inspect the fluid level in the brake master cylinder reservoir.
2. If the brake fluid level is midway between the maximum-full point and the minimum allowable level, no brake fluid needs to be removed from the
reservoir before proceeding.
3. If the brake fluid level is higher than midway between the maximum-full point and the minimum allowable level, remove brake fluid to the
midway point before proceeding.
4. Raise and suitably support the vehicle. Refer to Lifting and Jacking the Vehicle .
5. Remove the tire and wheel assembly. Refer to Tire and Wheel Removal and Installation .
