
Malibu L4-2.4L Hybrid (2008)
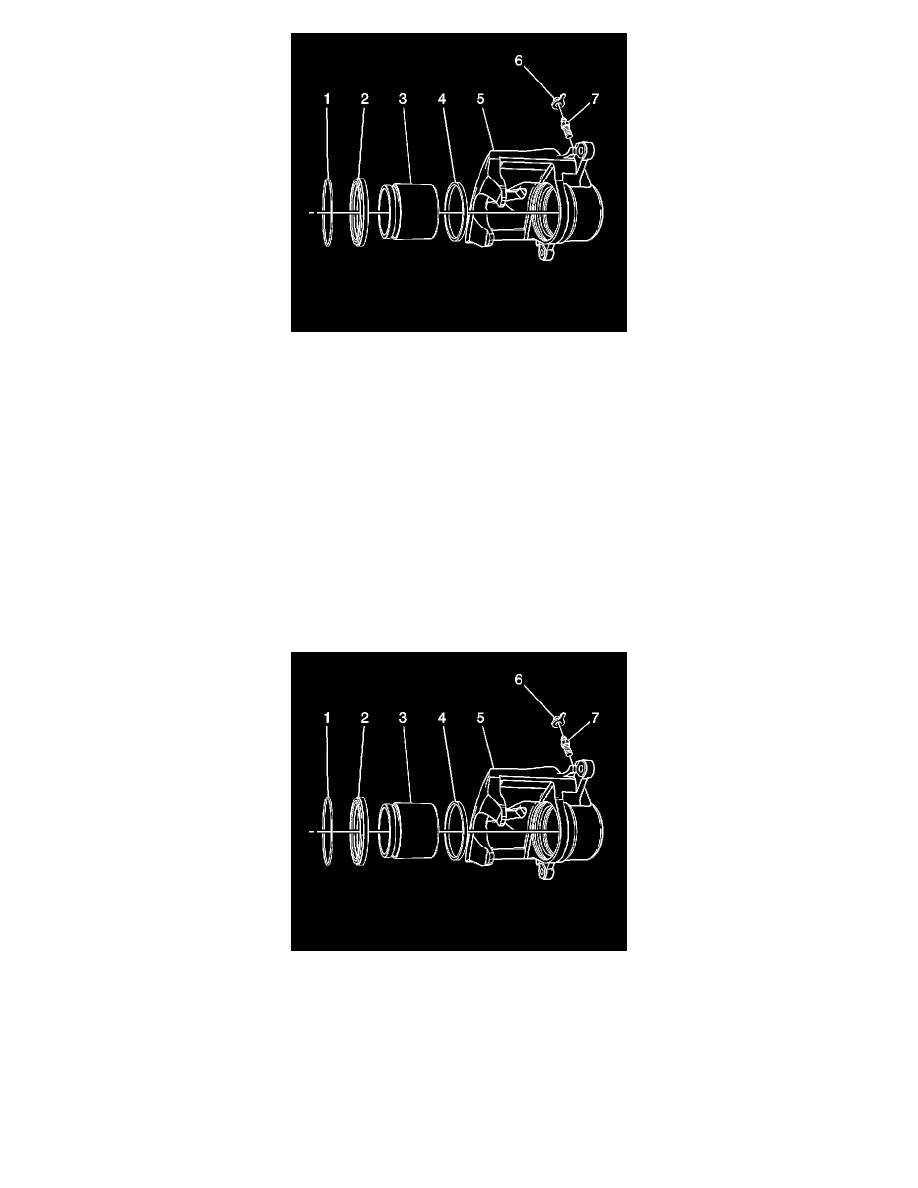
4. Remove the piston dust boot seal (2) from the seal counterbore in the caliper (5). Discard the boot seal.
5. Using a small wooden or plastic tool, remove the piston seal (4) from the caliper bore . Discard the piston seal.
6. Remove the bleeder valve cap (6).
7. Remove the bleeder valve (7).
Important: Do not use abrasives to clean the brake caliper piston.
8. If cracks, scoring, pitting, excessive rust, and/or excessive corrosion are present in the caliper bore, replace the caliper assembly.
9. If light rust or light corrosion are present in the caliper bore, attempt to remove the imperfection with a fine emery paper. If the imperfection
cannot be removed, replace the caliper assembly.
10. Clean the brake caliper piston bore and seal counterbore, and the caliper piston with denatured alcohol, or equivalent.
11. Dry the caliper piston bore and counterbore, and the piston with non-lubricated, filtered, compressed air.
12. Inspect the caliper piston for cracks, scoring, and/or damage to the plating. Replace the caliper piston if any of these conditions exist.
13. Inspect the caliper mounting holes for cracks, scoring, pitting, rust and/or excessive corrosion. Replace the caliper assembly if any of these
conditions exist.
Assembly Procedure
1. Lubricate the new piston seal (4) with Delco Supreme 11 GM P/N 12377967 (Canadian P/N 992667), or equivalent DOT-3 brake fluid from a
clean, sealed brake fluid container.
2. Install the lubricated, new piston seal (4) into the caliper bore.
3. Apply a thin coat of Delco Supreme 11 GM P/N 12377967 (Canadian P/N 992667), or equivalent DOT-3 brake fluid from a clean, sealed brake
fluid container onto the outer surface area of the caliper piston (3).