
Malibu V6-191 3.1L VIN M SFI (1997)
Hydraulic Assembly: Service and Repair
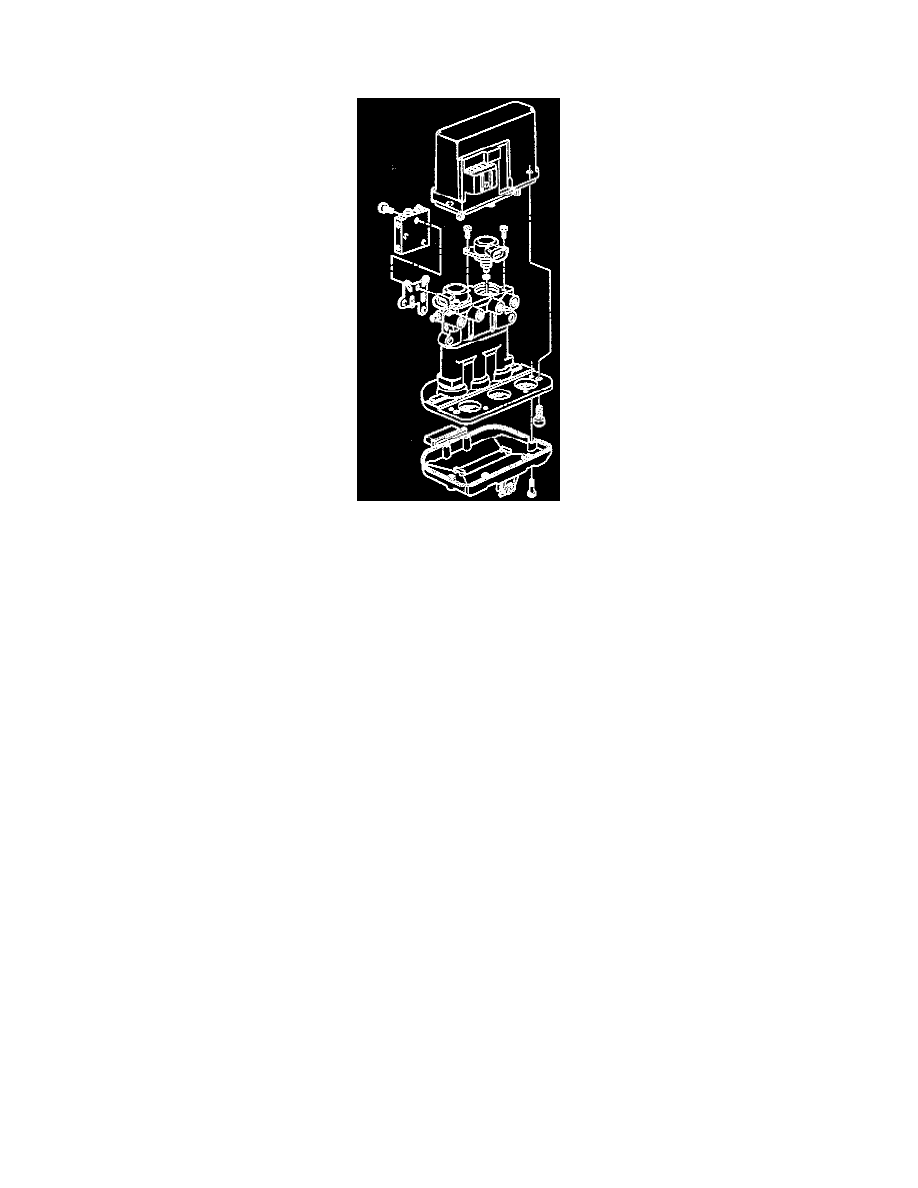
Hydraulic Modulator
DISASSEMBLE
1. Hydraulic modulator assembly.
2. Screws attaching gear cover.
3. Remove gear cover.
4. Screws attaching motor pack to hydraulic modulator.
5. Remove motor pack.
6. Proportioning valve mounting screws.
7. Remove Proportioning valve.
NOTE: If hydraulic modulator is to be replaced, install the three gears in the same location on replacement hydraulic modulator. No repair of the
hydraulic modulator is authorized. Replace as an assembly.
ASSEMBLE
1. Proportioning Valve to Hydraulic Modulator. Tighten Proportioning Valve screws to 12 Nm (106 inch lbs.). A new gasket MUST be used when
installing the Proportioning Valve.
2. With the hydraulic modulator upside down, and the gears facing you, rotate each hydraulic modulator gear counterclockwise until movement
stops. This procedure will position the pistons very close to the top of the hydraulic modulator bore.
3. Motor pack to hydraulic modulator assembly.
4. Motor pack to hydraulic modulator screws. Tighten Motor pack to hydraulic modulator screws to 5 Nm (44 inch lbs.).
5. Gear cover to hydraulic modulator assembly. If the gear cover seal is damaged, the cover must be replaced. Tighten Gear cover screws to 4 Nm
(36 inch lbs.).
6. Hydraulic modulator into vehicle.
7. Perform Diagnostic System Check. See: Testing and Inspection