
Malibu V6-191 3.1L VIN M SFI (1997)
Accumulator HVAC: Service and Repair
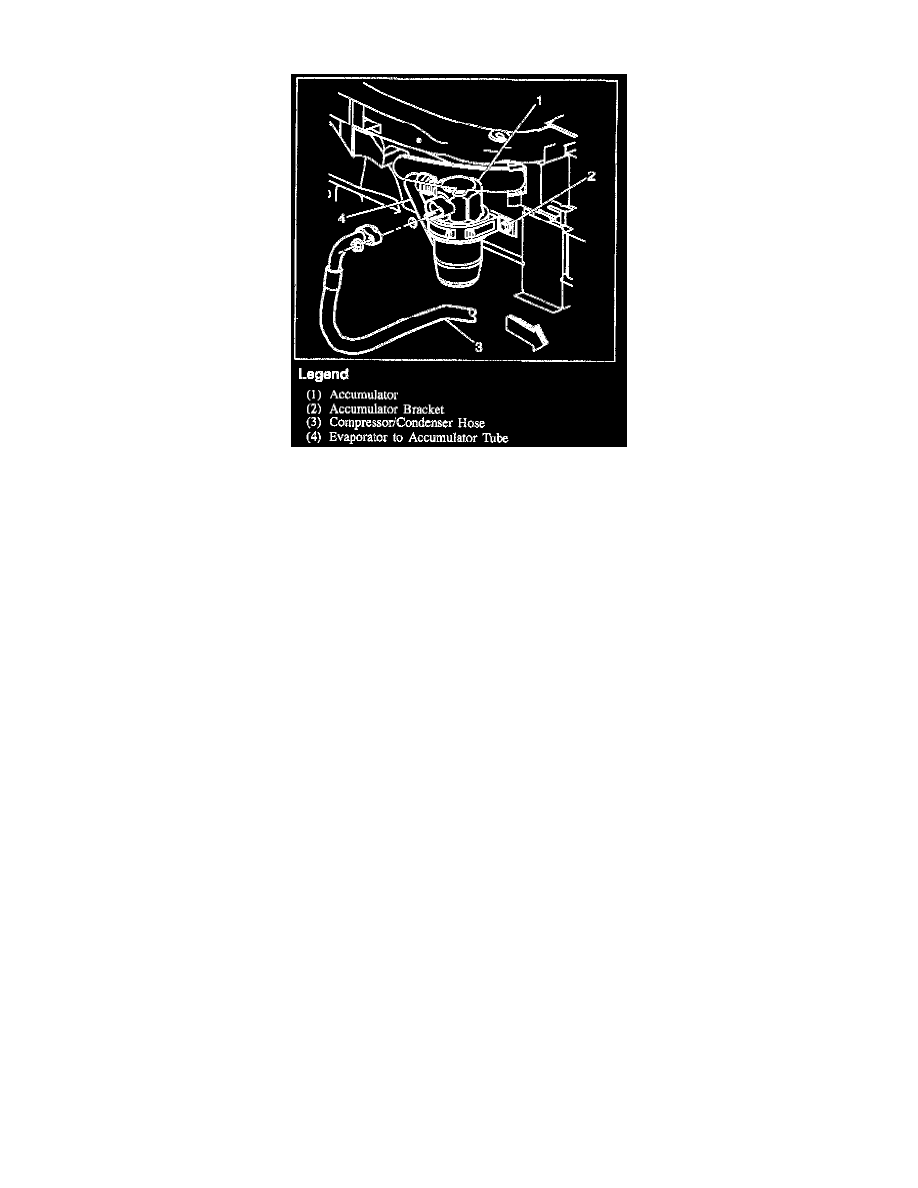
Accumulator Mounting
The accumulator assembly service replacement part includes O-rings (as necessary) for connections. The desiccant within the shell is NOT serviced
separately - it is part of the sealed accumulator assembly.
The accumulator assembly should be replaced ONLY when the shell is perforated and a refrigerant leak is found, or the system has been open to the
atmosphere for an extended period. Accumulators do not require periodic replacement due to the following changes:
^
Use of improved desiccant.
^
Use of improved hose material and increased use of metal tubes, both of which reduces the ability of moisture to enter the refrigerant system.
Refer to Refrigerant Oil Distribution to determine the quantity of oil to be added to an accumulator that has been replaced.
Tool Required:
J 39500 R-134a Refrigerant Recovery, Recycling, and Recharging (ACR4) System
Remove or Disconnect
1. Negative battery cable.
2. Recover refrigerant. Refer to Recovery.
3. Raise vehicle.
4. Right front tire/wheel.
5. Partially remove splash shield and position aside.
6. Tube nut fitting and block fitting at accumulator.
7. Accumulator bracket from vehicle.
8. Accumulator from bracket.
Install or Connect
1. Accumulator to bracket.
Important
^
Add required amount of new refrigerant oil. Refer to Refrigerant Oil Distribution.
2. Accumulator bracket to vehicle
Tighten
^
Bolt to 10 N.m (89 lb in).