
Malibu V6-191 3.1L VIN M SFI (1997)
Air Bag: Service and Repair
Deployed Inflator Module
Install or Connect
INSTALL OR CONNECT
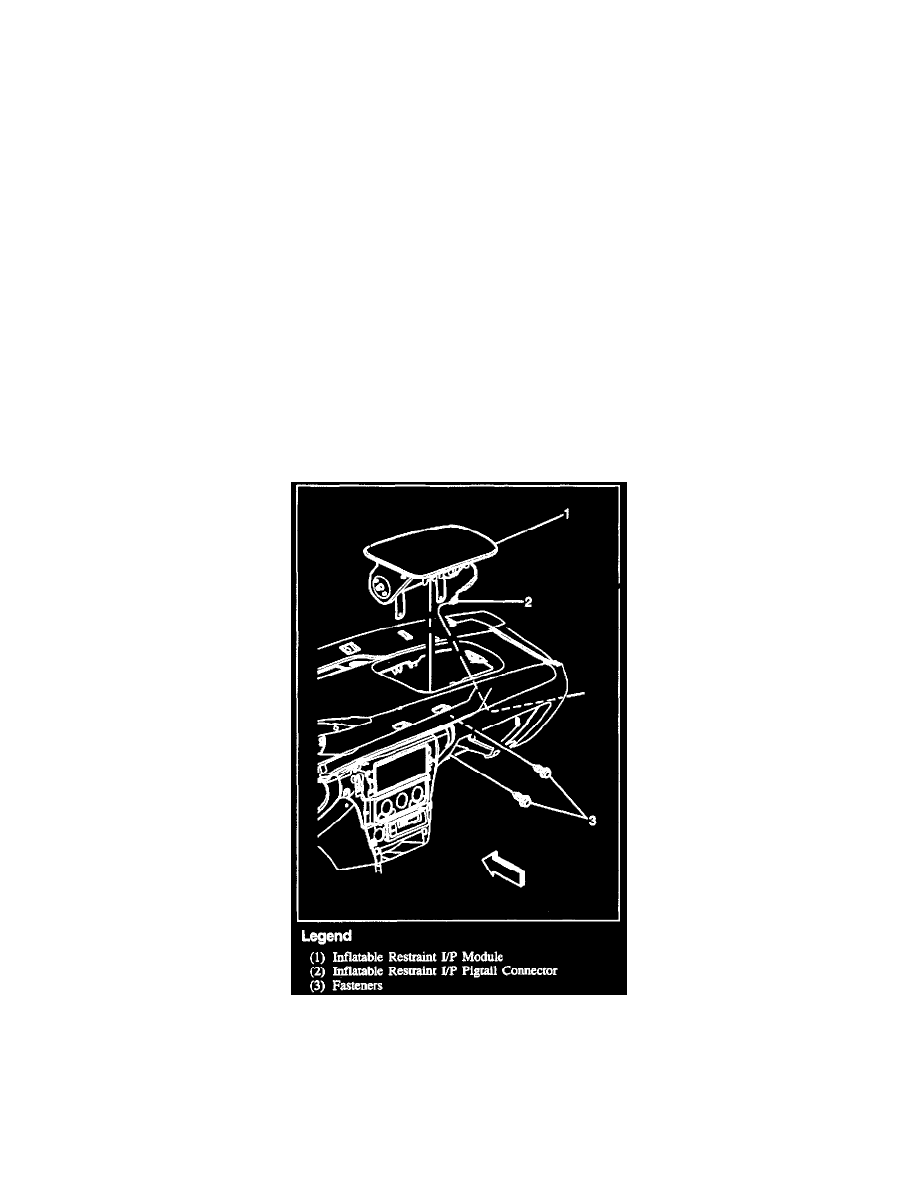
1. Inflatable restraint I/P module to the crosscar beam.
2. Fasteners to the inflatable restraint I/P module.
TIGHTEN
^
Fasteners to 10.0 N.m (89 lb. in.).
3. Electrical connector and the Connector Position Assurance (CPA).
4. Instrument panel compartment. Refer to instrument panel compartment in Instrument Panel, Gauges and Warning Indicators.
^
Enable the SIR system. Refer to Enabling the SIR System. See: Air Bag(s) Arming and Disarming/Service and Repair
Preliminary Precautions
After the inflator module has been deployed, the surface of the air bag may contain a powdery residue. This powder consists primarily of cornstarch
(used to lubricate the bag as it inflates) and by-products of the chemical reaction. Sodium hydroxide dust (similar to lye soap) is produced as a
by-product of the deployment reaction. The sodium hydroxide then quickly reacts with atmospheric moisture and is converted to sodium carbonate and
sodium bicarbonate (baking soda). Therefore, it is unlikely that sodium hydroxide will be present after deployment. As with many service procedures,
you should wear gloves and safety glasses.
Remove or Disconnect
Description
REMOVE OR DISCONNECT
^
Disable the SIR system. Refer to Disabling the SIR System. See: Air Bag(s) Arming and Disarming/Service and Repair
1. Instrument panel compartment. Refer to instrument panel compartment in Instrument Panel, Gauges and Warning Indicators.
2. Connector Position Assurance (CPA) and the electrical connector.
3. Fasteners from the inflatable restraint I/P module.