
Malibu V6-191 3.1L VIN M SFI (1997)
^
Tighten hex lock nut (32) to 30 Nm (22 ft. lbs.).
2. Dust cover (33) to gear assembly (30).
3. Stub shaft bearing annulus assembly (21) onto valve stub shaft.
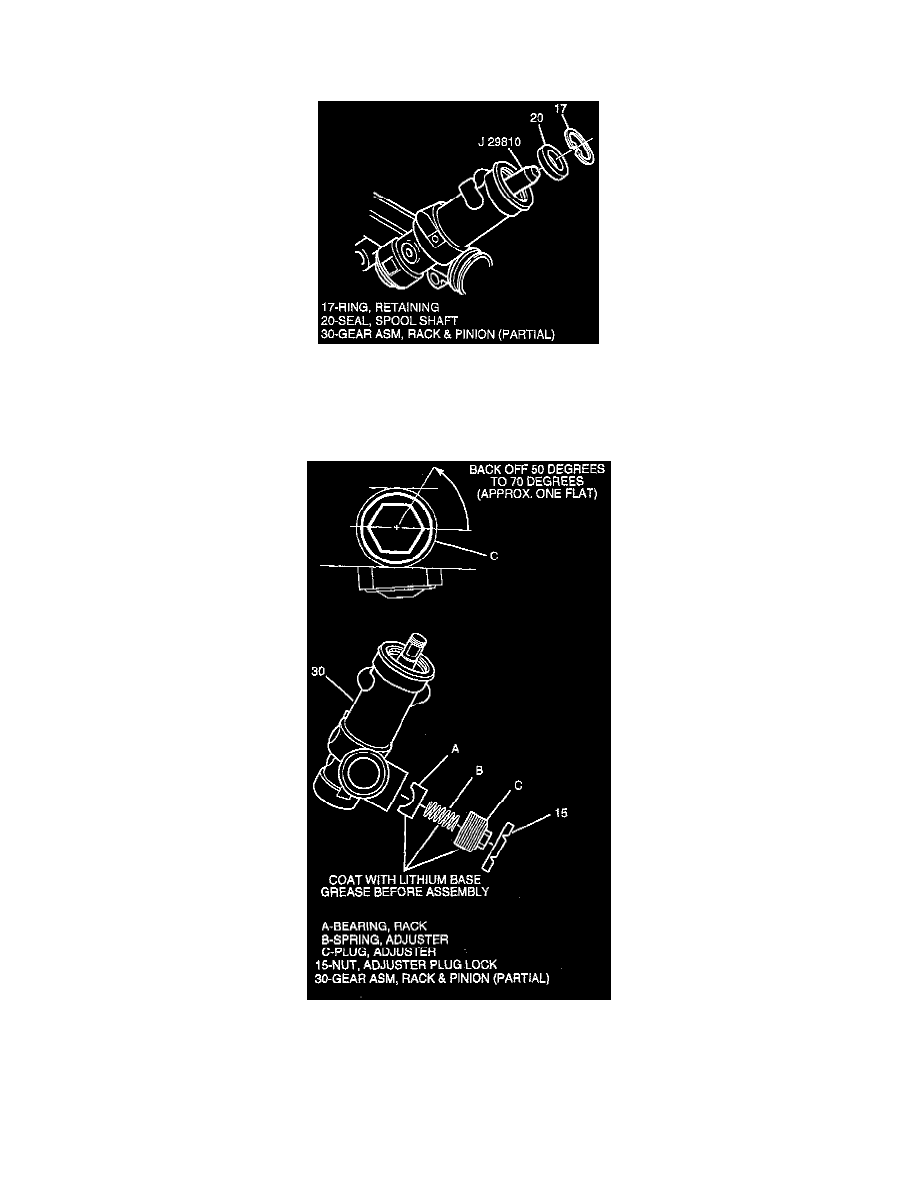
4. Seal protector J 29810 onto valve stub shaft.
5. Apply a small quantity of grease on seal (20).
^
Spool shaft seal (20) over protector and into gear assembly (30).
6. Retaining ring (17) into groove in gear assembly (30).
7. Lubricate stub shaft and dust seal area with grease.
8. Coat rack bearing, adjuster spring and adjuster plug with lithium base grease and install in gear assembly (30).
^
With rack centered in the gear assembly (30), turn adjuster plug clockwise until it bottoms in the gear assembly, then back off 50° to 70°
(approx. one flat). Check rotational torque on pinion. Maximum pinion preload torque is 1.8 Nm (16 inch lbs.).
9. Adjuster plug lock nut (15) to adjuster plug. Tighten firmly against gear assembly while holding adjuster plug stationary.
^
Tighten lock nut (15) to 68 Nm (50 ft. lbs.) while holding adjuster plug stationary.
10. Rack and pinion assembly into vehicle.