
Malibu V6-3.1L VIN J (2002)
Trunk / Liftgate Latch: Service and Repair
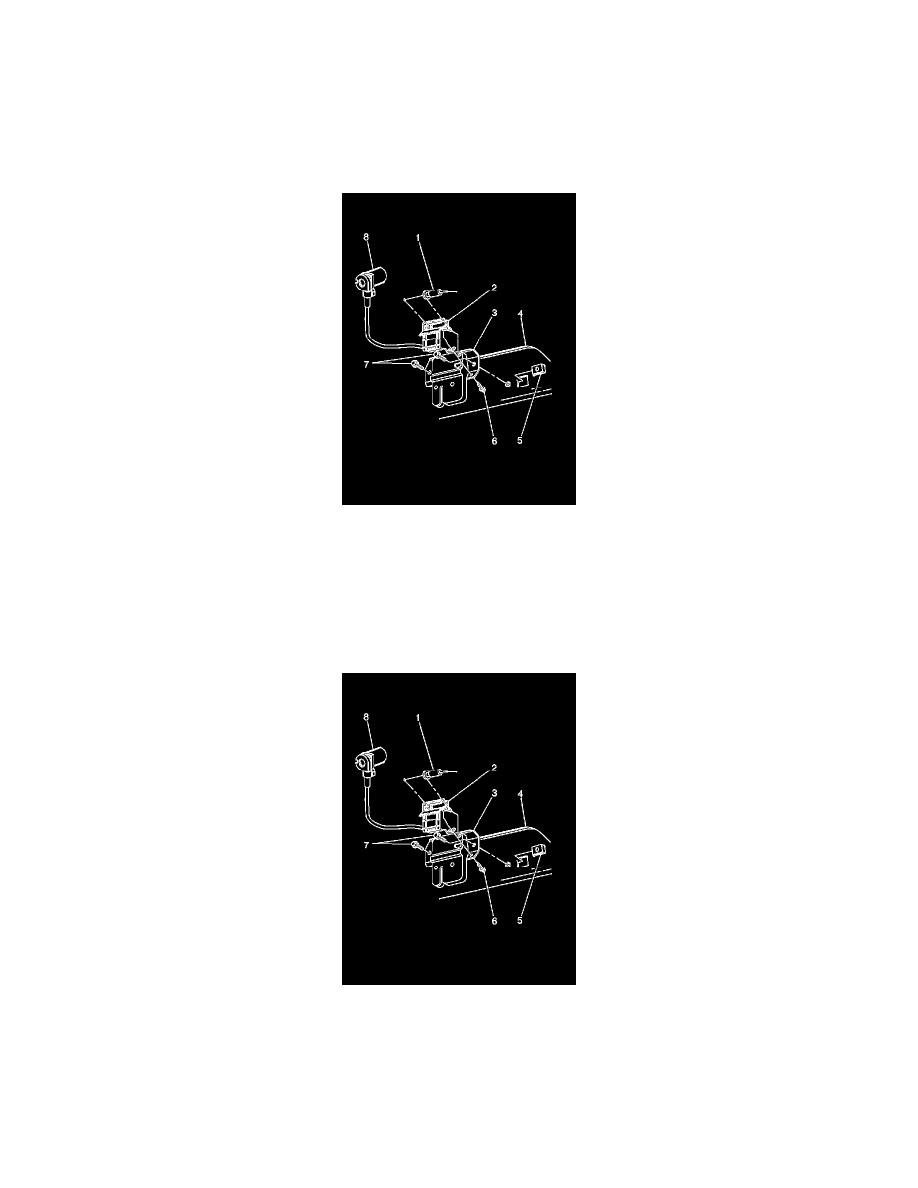
Latch Replacement - Rear Compartment Lid
Removal Procedure
1. Open the rear compartment.
2. Mark the position of the latch on the rear compartment lid.
3. Remove the lock cable from the lock cylinder. Use a flat-bladed tool to spread the plastic cover (8) and pull down.
4. Open the cable door at the top of the lock release box (2) to expose the remote release cable, if equipped.
5. Remove the remote release cable (1) from the lock release box, if equipped.
6. Disconnect the electrical connector from the compartment lid lock, if equipped.
7. Remove the rear compartment lid lock bolts (7) from the rear compartment lid.
8. Remove the latch assembly (3) from the rear compartment lid.
Installation Procedure
1. Position the latch assembly (3) to the alignment marks on the rear compartment lid.
Notice: Refer to Fastener Notice in Service Precautions.
2. Install the rear compartment lid latch bolts (7) to the rear compartment lid.
Tighten the bolts to 11 N.m (97 lb in).