
Malibu V6-3.1L VIN J (2002)
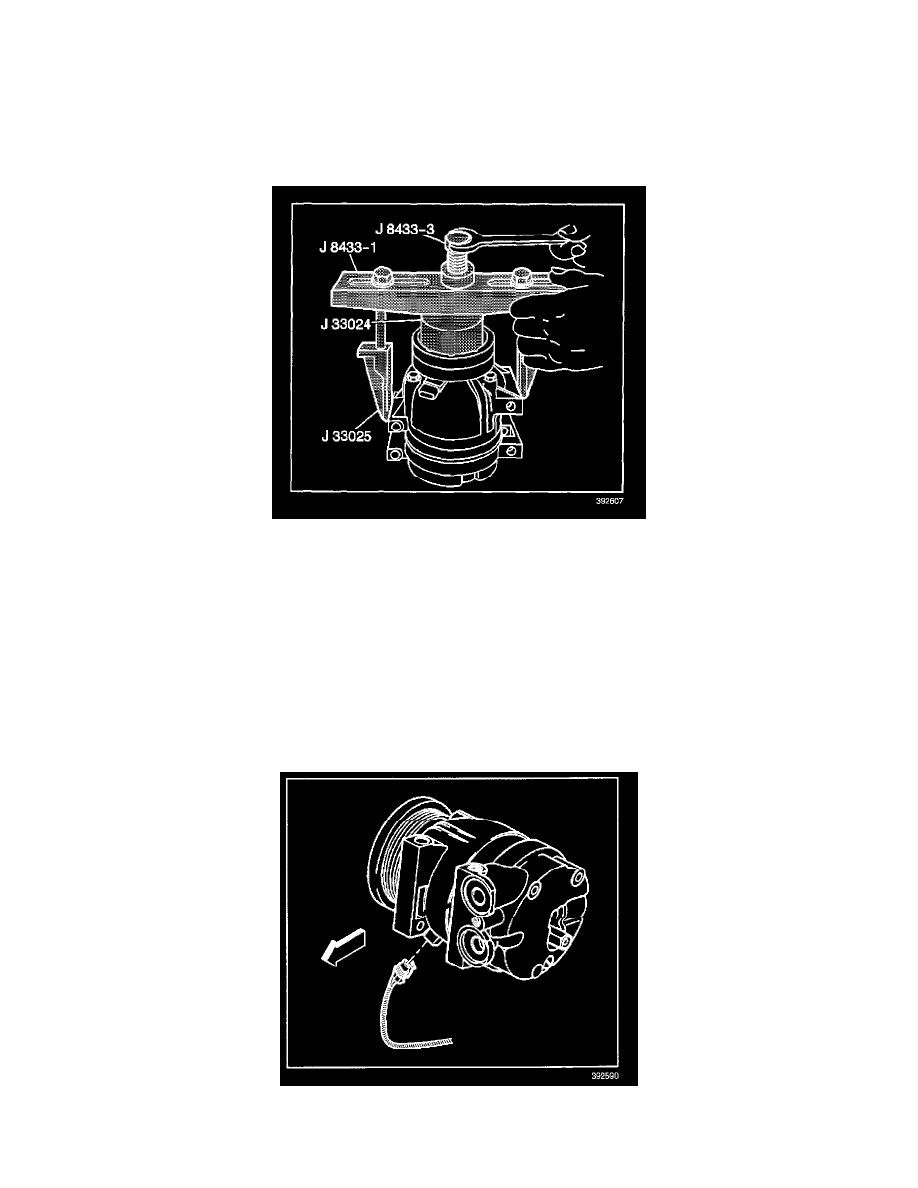
10. Remove the following tools:
^
J 8433-1
^
J 8433-3
^
J 33025
^
J 33023-A
11. Remove the A/C clutch coil.
INSTALLATION PROCEDURE
1. Place the clutch coil assembly on the front head with the coil terminal at the positioned at the mark made during disassembly.
2. Place the J 33024 over the internal opening of the clutch coil housing and align installer with the compressor front head.
3. Install the following tools onto the A/C clutch coil:
^
J 8433-1
^
J 8433-3
^
J 33024
4. Tighten the center screw of the puller bar until the screw pushes the A/C clutch coil all of the way down into position.
5. Remove the following tools from the compressor:
^
J 8433-1
^
J 8433-3
^
J 33024
6. Install the compressor clutch rotor and bearing assembly.
7. Install the A/C compressor pulley.
8. Install the electrical connector to the compressor.
9. Install the right side wheelhouse splash shield.