
Malibu V6-3.6L (2010)
Note: The engine front cover is removed for clarity in the following graphics, but NOT required to perform the procedure.
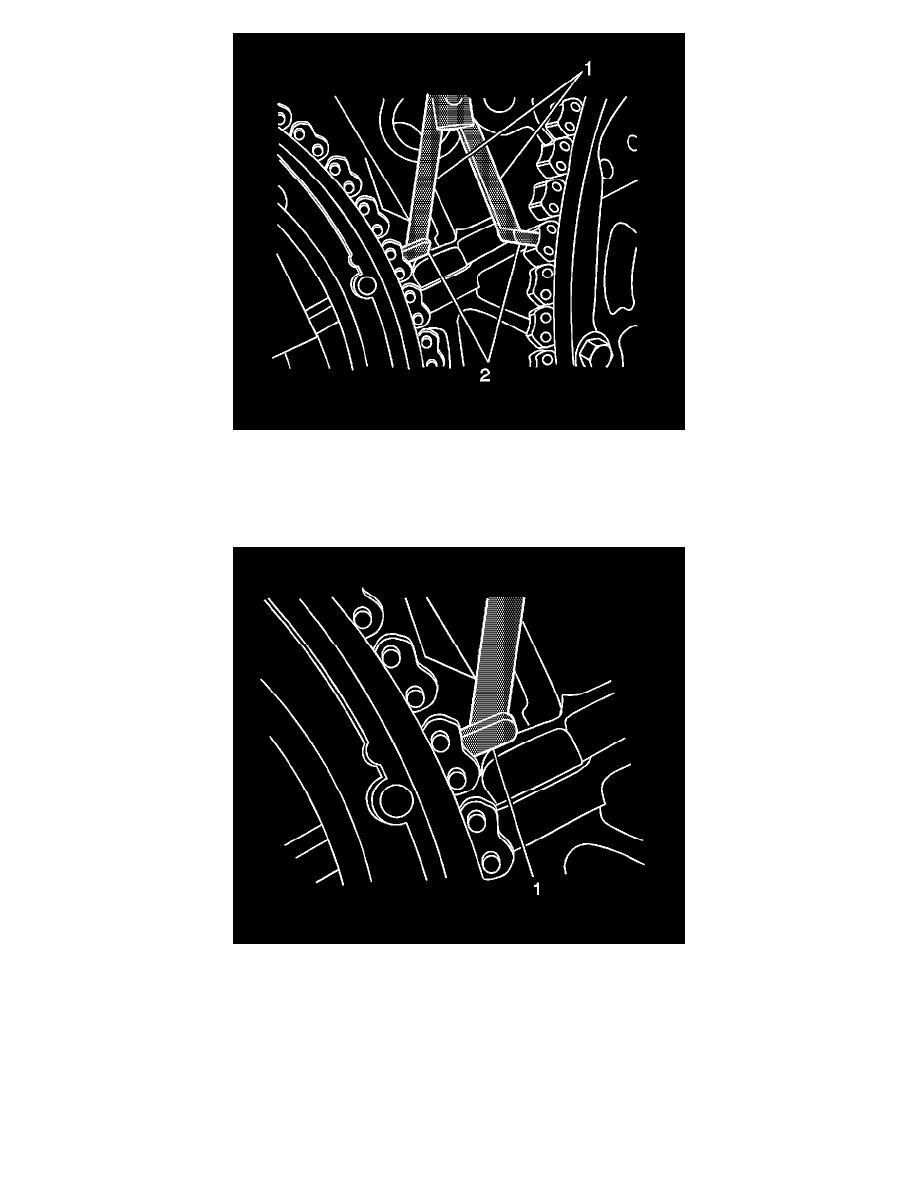
9. Ensure that the feet (2) on the legs of the tool are facing the front of the engine.
10. Partially expand the legs (1) of the EN-48313 by turning the T-shaped handle clockwise.
11. Continue expanding the EN-48313 until the feet (1) contact the timing chain. Do not tighten at this time.
Note:
*
Ensure that the foot (1) of the EN-48313 is engaged into one of the link pockets to prevent chain slippage during tightening of the EN-48313.
*
Do not allow the body of the EN-48313 to rotate when tightening the T-handle.
12. Hand tighten the EN-48313.
13. Use an open end wrench on the hex cast into the body of the EN-48313 and hand tighten the T-handle.
14. Use an open end wrench on the hex cast into the right intake and exhaust camshafts and rotate the camshafts towards each other in order to create
slack in the chain between the actuators.