
Malibu V6-3.6L (2010)
1. Remove the piston pin assembly from the servo cover.
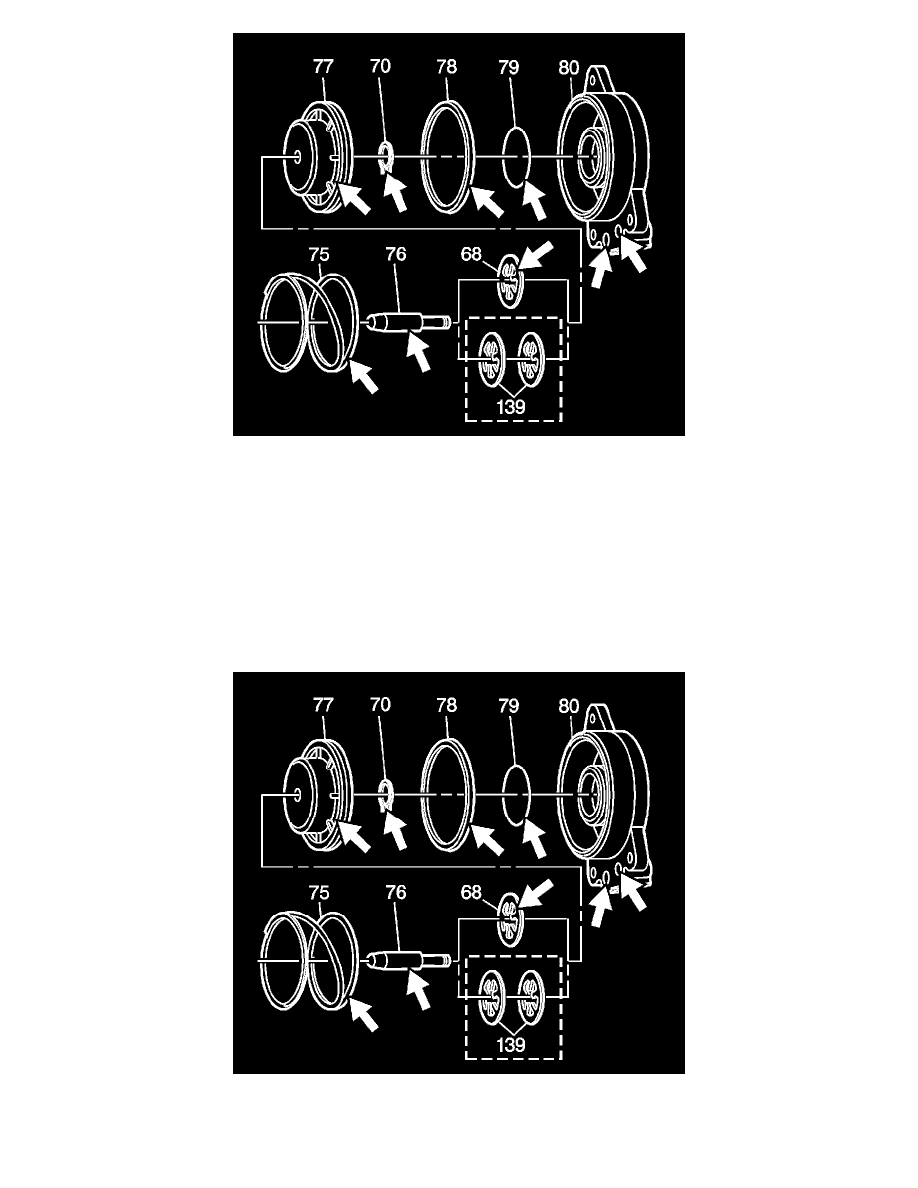
2. Remove the snap ring (70) from the servo pin.
3. Remove the piston (77) and the servo cushion springs (75) from the servo pin.
4. Remove the servo piston seals from the cover (78, 79).
5. Discard the servo piston seals.
6. Inspect all components for damage.
7. Inspect the fluid feed holes for the proper opening.
8. Inspect the bolt hole threads for debris or stripping.
9. Inspect the seal grooves for damage.
10. Clean and dry each component.
Assembly Procedure
1. Assemble the servo cushion springs (75) and the servo piston (77) onto the servo pin (76).
2. Install the snap ring (70) onto the servo pin in order to retain the servo cushion springs and servo piston.
3. Assemble new seals (78, 79) onto the servo piston and servo cover.