
Malibu V6-3.9L (2007)
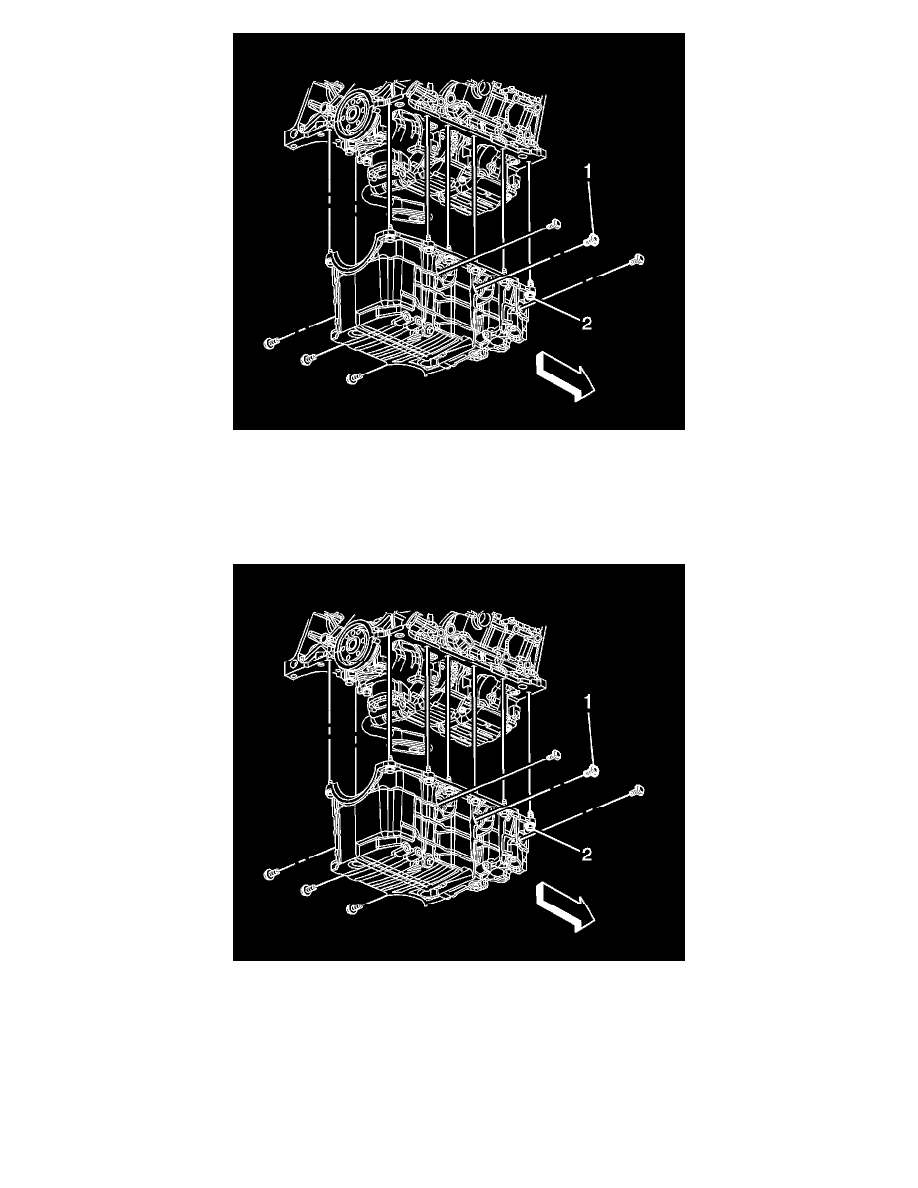
13. Remove the oil pan bolts (1, 2).
14. Remove the oil pan.
15. Remove and discard the oil pan gasket.
16. Clean the oil pan sealing surfaces.
Installation Procedure
1. Apply sealer to both sides of the crankshaft rear main bearing cap. Press the sealer into the gap using a putty knife. Refer to Sealers, Adhesives,
and Lubricants.
2. Apply sealer to both sides of the front cover/block mating area. Refer to Sealers, Adhesives, and Lubricants.
3. Install a NEW oil pan gasket.
4. Position the oil pan to the engine.
Notice: Refer to Fastener Notice.
5. Install the oil pan bolts (1, 2).
^
Tighten the bolts (1) to 50 N.m (37 lb ft).