
Metro L3-061 1.0L VIN 6 TBI (1998)
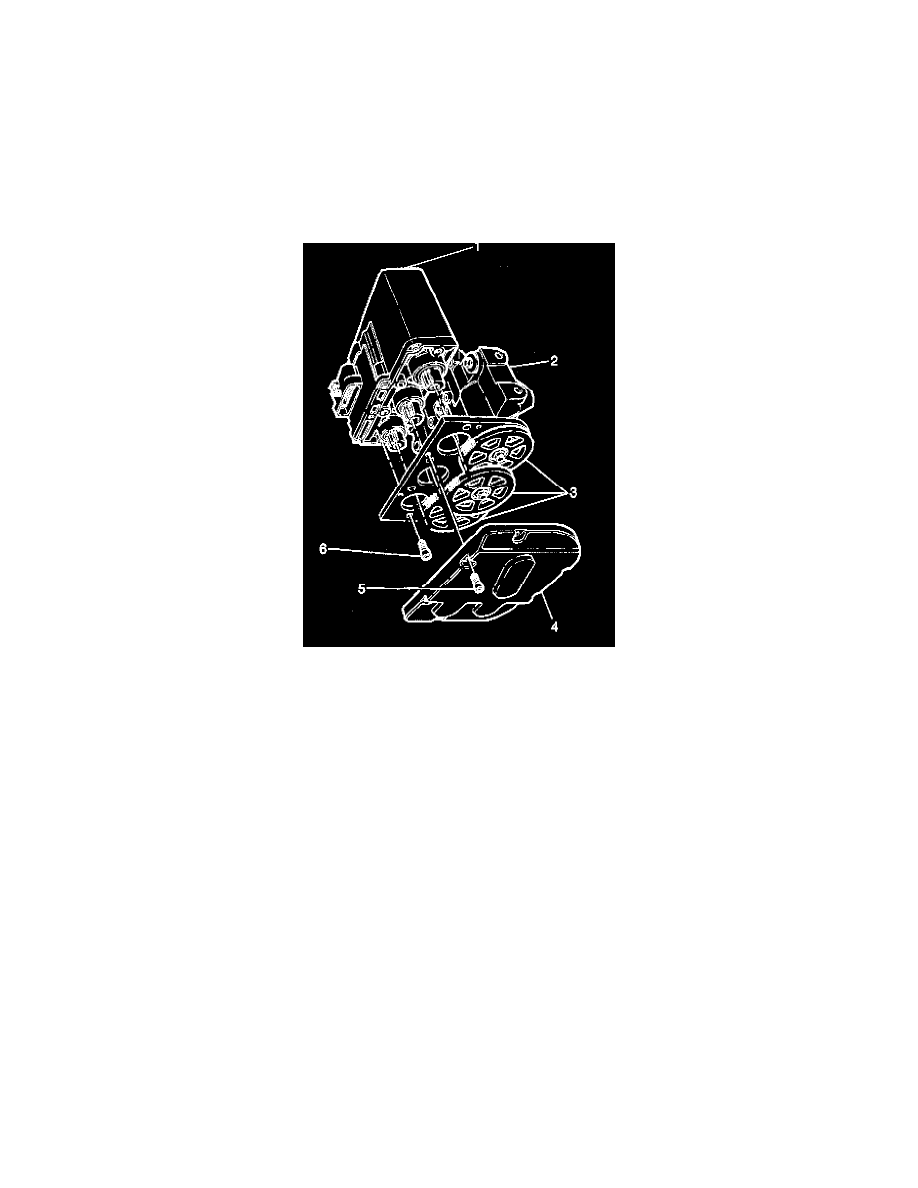
5. Install the four motor pack to modulator Torx head screws (6).
^
Tighten the four Torx head screws (6) to 5 Nm (44 inch lbs.).
6. Install the gear cover (4) onto the modulator (2) with the six Torx head screws (5).
^
Tighten the six Torx head screws (5) to 4 Nm (36 lb in).
7. Install the Hydraulic Modulator assembly into the vehicle.
8. Perform the Motor Rehome Procedure.
9. Perform the "Diagnostic System Check".
Brake Modulator Replacement
REMOVAL PROCEDURE
1. Remove the brake modulator assembly.
2. Remove the four Torch head screws that retain both ABS brake solenoids from the hydraulic modulator assembly.
3. Remove both brake solenoids from the hydraulic modulator assembly.
4. Remove the Torx head screws (5) attaching the gear cover (4).
5. Remove the gear cover (4).
6. Remove the four Torx head screws (6) attaching the motor pack (1) to the hydraulic brake modulator (2).
7. Remove the motor pack (1) from the hydraulic brake modulator (2).
IMPORTANT: Use care when handling the motor pack to ensure the motor pack connector is not damaged, or accidental intrusion of brake fluid
into the motor pack does not occur. This may result in a premature failure of the motor pack.
IMPORTANT: Take care in handling the motor pack. If dropped or damaged during handling, the motor pack must be replaced.
8. Remove the two brake modulator to master cylinder banjo bolts and the proportioning valve from the hydraulic brake modulator.
9. Remove the two transfer tubes with the O-rings from the proportioning valve or hydraulic brake modulator.
10. Remove the banjo bolt O-rings from the proportioning valve and the hydraulic brake modulator.