
Metro L3-061 1.0L VIN 6 TBI (1998)
Brake Light Switch: Service and Repair
REMOVAL PROCEDURE
CAUTION: Refer to Battery Disconnect Caution in Cautions and Notices.
1. Remove the negative battery cable.
2. Disconnect the stoplamp switch electrical connector.
3. Press the brake pedal.
4. Remove the locknut from the threaded portion (2) of the stoplamp switch (4).
5. Unscrew the stoplamp switch (4).
INSTALLATION PROCEDURE
1. Install the stoplamp switch.
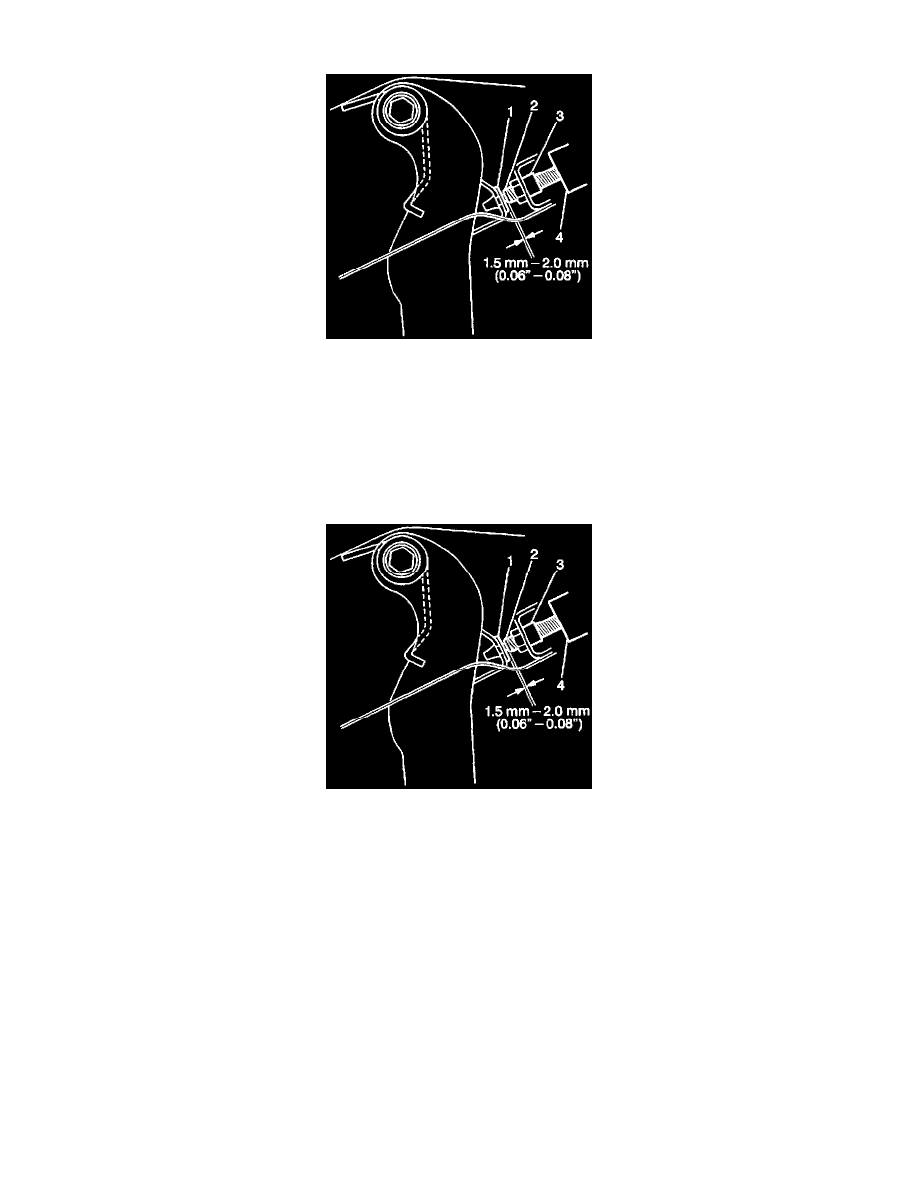
2. Adjust the stoplamp switch using the following procedure:
2.1. Pull the brake pedal all the way back and hold.
2.2. Adjust the switch (4) position so that the switch plunger is pressed by the brake pedal contact plate. Ensure that the threaded portion of the
switch (2) is within 1.5-2.0 mm (0.06-0.08 in) from the pedal contact plate.
NOTICE: Refer to Service Precautions.
3. Press the brake pedal. Install the stoplamp switch locknut.
^
Tighten the stoplamp switch locknut to 8 Nm (71 inch lbs.).
4. Connect the stoplamp switch electrical connector.
5. Connect the negative battery cable.