
Metro L3-061 1.0L VIN 6 TBI (1998)
Fuel Pressure: Testing and Inspection
Fuel Gauge Installation
Fuel Gauge Installation
Installation Procedure
Tools Required
^
J 34730 - 1A Fuel Pressure Gauge.
^
J 34730 - 75 Fuel Rail Adapter.
1. Relieve the fuel pressure. Refer to Fuel Pressure Relief Procedure.
2. Remove the air cleaner (ACL). Refer to Air Cleaner Assembly Replacement.
3. Disconnect the hose clamp and the fuel feed hose from the throttle body. Use a shop towel to catch any remaining fuel that may leak.
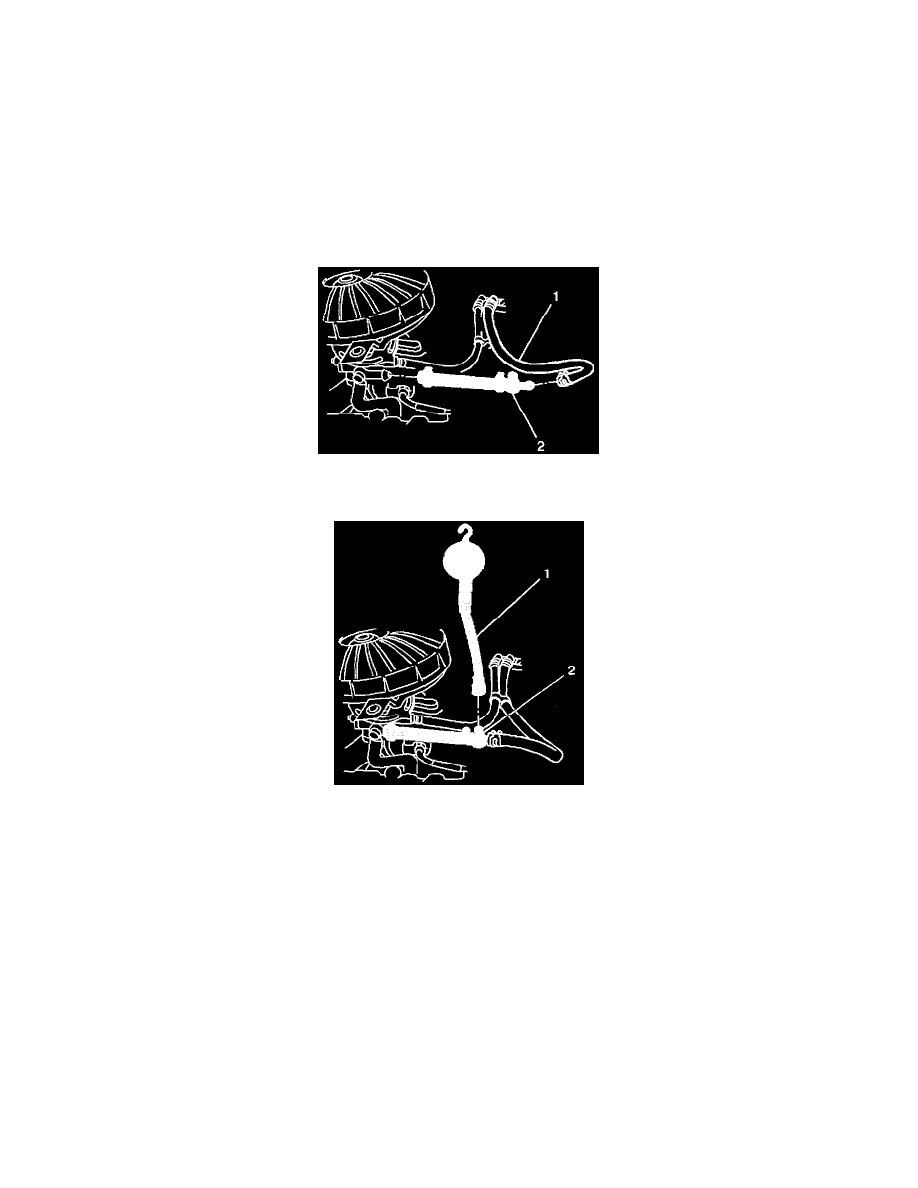
4. Install the J 34730 - 75 Fuel Rail Adapter (2) to the throttle body fuel injection unit.
5. Connect the fuel feed hose (1) to the J 34730 - 75 Fuel Rail Adapter (2) and secure with the hose clamp.
6. Install the J 34730 - 1A Fuel Pressure Gauge (1) to the J 34730 - 75 Fuel Rail Adapter (2) and tighten securely.
7. Install the ACL. Refer to Air Cleaner Assembly Replacement.
Notice: Refer to Fastener Notice in Cautions and Notices.
8. Connect the negative battery cable.
Tighten
Tighten the negative battery cable terminal retainer to 5.5 N.m (4 lb ft).
9. Start the engine.
10. Idle the engine at normal operating temperature.
11. Check the fuel pressure as follows:
^
9-140 kPa (13-20 psi) with the engine idling.
^
16-207 kPa (23-30 psi) with the engine not running and the ignition switch is ON - FUEL PUMP IS RUNNING.
^
Fuel pressure should hold at or above 90 kPa (13 psi) within one minute of the engine not running while the ignition switch is ON - FUEL
PUMP IS NOT RUNNING.
12. If the fuel pressure is not within the specification, refer to Fuel System Diagnosis.