
Metro L3-061 1.0L VIN 6 TBI (1998)
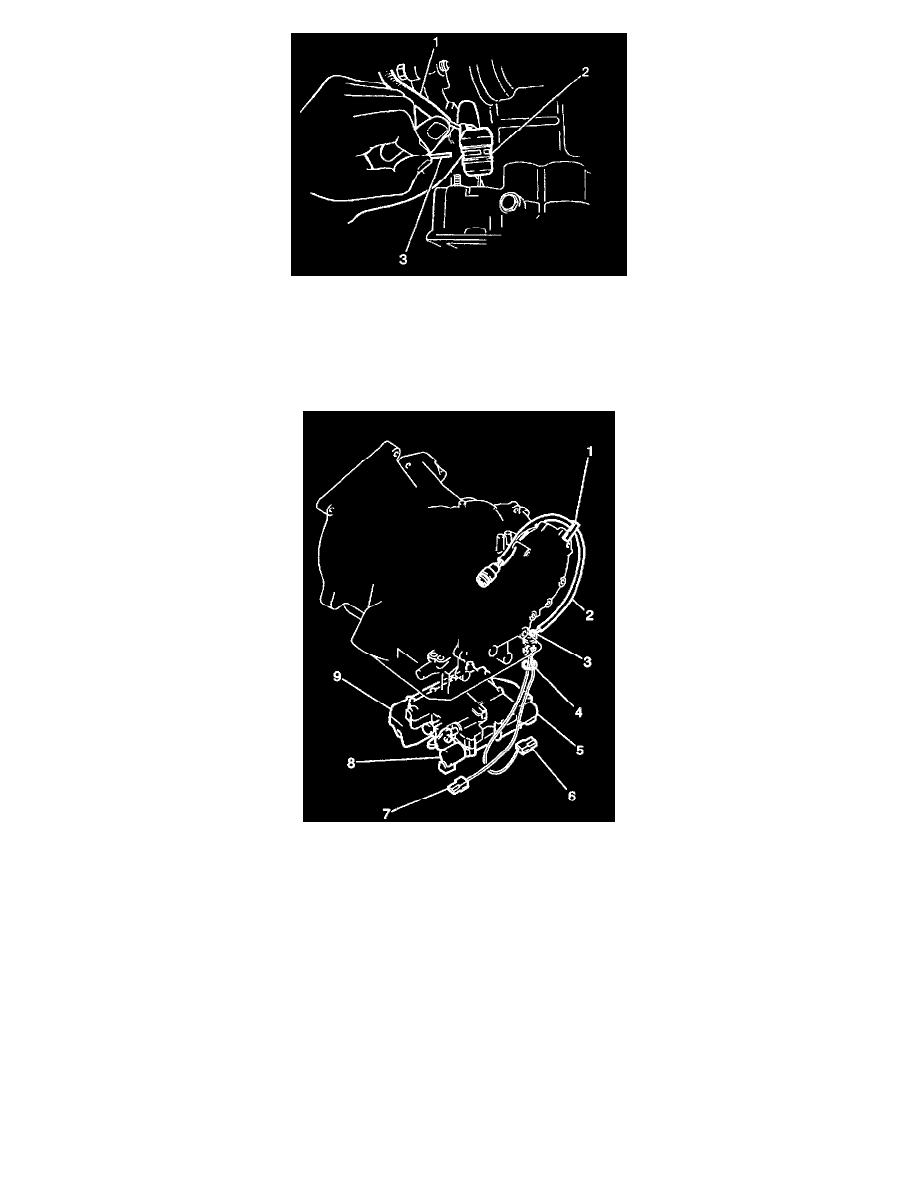
7. Remove the solenoid wiring harness retaining nut and the plate (3).
8. Remove the solenoid wiring harness retaining bracket from the outer side of the transaxle case.
9. Remove the solenoid wiring harness (1) from the transaxle.
10. Inspect the wiring harness grommet and the O-ring for cuts or other damage. Replace the components if necessary.
INSTALLATION PROCEDURE
1. Install the solenoid wiring harness (2) into the transaxle case.
2. Install the solenoid wiring harness retaining plate (3) and nut.
^
Tighten the solenoid wiring harness retaining nut to 20 Nm (15 ft. lbs.).
NOTICE: Refer to Fastener Notice in Service Precautions.
3. Install the solenoid wiring harness retaining bracket (1) to the transaxle case.
^
Tighten the solenoid wiring harness retaining bracket bolt to 20 Nm (15 ft. lbs.).
4. Install the direct clutch solenoid (5) and the second brake solenoid to the lower valve body. Secure the items with 2 retaining bolts.
^
Tighten the direct clutch and the second brake solenoid retaining bolts to 4 Nm (35 inch lbs.).
5. Connect the electrical connectors (6,7) to the direct clutch and the second brake solenoids (5,8).
6. Install the new fluid pan gasket, the fluid pan and the fluid pan guard to the transaxle. Secure the items with 15 bolts.
^
Tighten the transaxle fluid pan bolts to 6 Nm (53 inch lbs.).
7. Install the transaxle drain plug.
^
Tighten the drain plug to 23 Nm (17 ft. lbs.).