
Metro L4-079 1.3L VIN 2 MFI (2001)
Fuel Pressure Release: Service and Repair
Fuel Pressure Gage Installation and Removal
INSTALLATION PROCEDURE
TOOLS REQUIRED
^
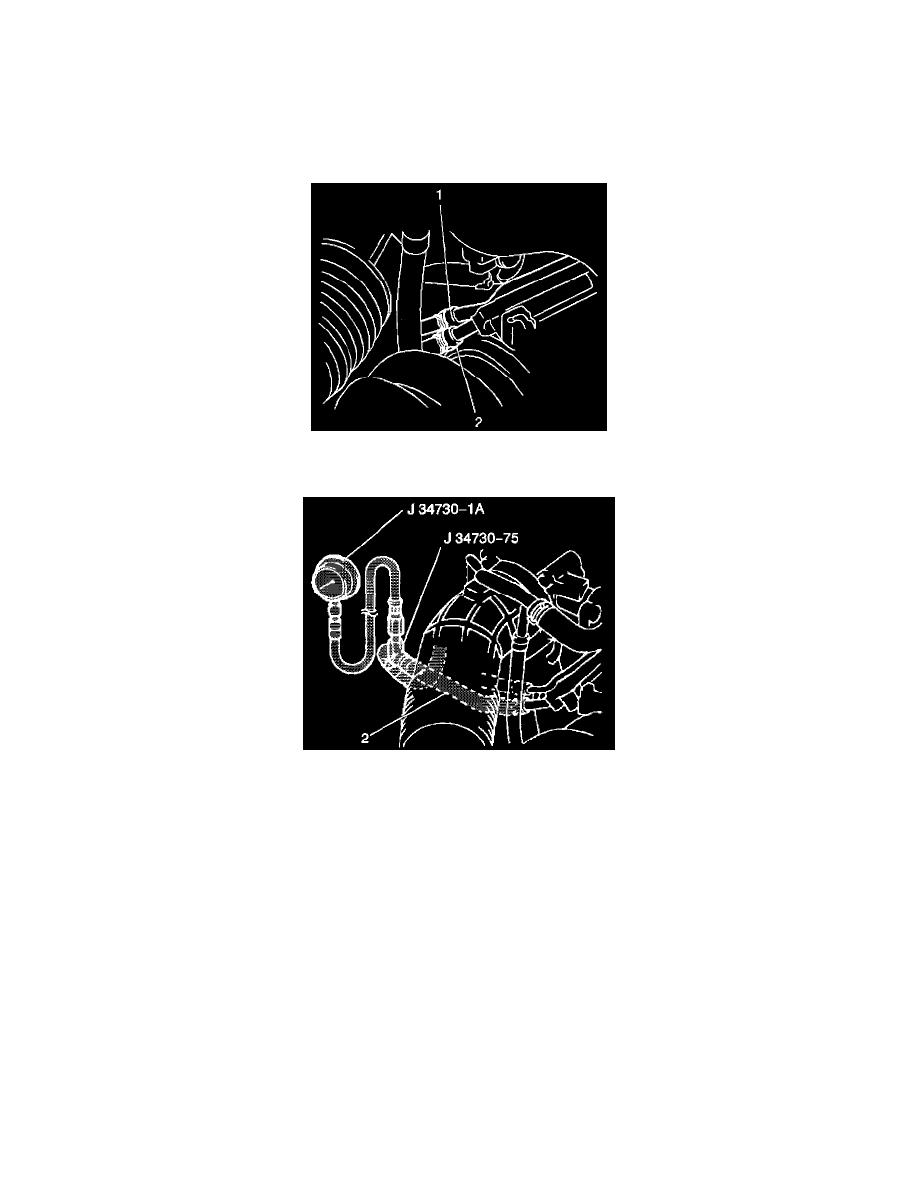
J 34730-1A Fuel Pressure Gauge
^
J 34730-75 Fuel Rail Adapter
1. Relieve the fuel pressure. Refer to Fuel Pressure Relief Procedure.
2. Disconnect the fuel feed hose (2) from the chassis fuel feed pipe. Use a shop towel in order to catch any remaining fuel that may leak.
3. Install the J 34730-75 fuel rail adapter (1) to the chassis fuel feed pipe.
4. Connect the fuel feed hose (2) to the J 34730-75 fuel rail adapter (1), and secure the hose with the hose clamp.
5. Securely connect J 34730-1A the fuel pressure gauge (3) to J 34730-75 the fuel rail adapter (1).
6. Connect the negative battery cable.
7. Start the engine.
8. Idle the engine at normal operating temperature.
9. Use the following procedure in order to check the fuel pressure:
^
200-240 kPa (28.5-34 psi) with the engine idling.
^
270-310 kPa (38.5-44 psi) with the engine off and the ignition switch on.
^
The fuel pressure should remain at least 200 kPa (28.5 psi) within 1 minute of key-off and the ignition switch on.
10. If the fuel pressure is not within the specification, refer to Fuel System Diagnosis.
REMOVAL PROCEDURE