
Monte Carlo V6-3.4L VIN E (2000)
Headliner: Removal and Replacement
Headlining Trim Panel Replacement (Monte Carlo)
Tool Required
J 38778 Door Trim Pad and Garnish Clip Remover
Removal Procedure
1. Remove the sunshades. Refer to Sunshade Replacement (See: Sun Visor/Service and Repair/Sunshade Replacement).
2. Remove the sunshade anchors. Refer to Sunshade Anchor Replacement (See: Sun Visor/Service and Repair/Sunshade Anchor Replacement).
3. Remove the overhead console, if equipped. Refer to Roof Console Replacement (See: Console/Service and Repair/Roof Console Replacement).
4. Remove the dome lamp. Refer to Dome Lamp Replacement (Impala and Monte Carlo) Dome Lamp Replacement (Impala with SEO, RPO 6C7)
.
5. Remove the assist handle. Refer to Assist Handle Replacement (Monte Carlo) (See: Passenger Assist Handle/Service and Repair).
6. Disconnect the electrical connector from the rear view mirror.
7. Remove the windshield pillar garnish molding. Refer to Windshield Pillar Garnish Molding Replacement (Monte Carlo) (See: Trim
Panel/Service and Repair/Windshield Pillar Garnish Molding Replacement).
8. Remove the rear seat back. Refer to Rear Seat Back Cushion Replacement (Non Folding) (See: Seats/Seat Cushion/Service and Repair/Rear Seat
Back Cushion Replacement (Non Folding))Rear Seat Back Cushion Replacement (Folding) (See: Seats/Seat Cushion/Service and Repair/Rear
Seat Back Cushion Replacement (Folding)) in Seats.
9. Remove the rear window trim panel. Refer to Rear Window Shelf Trim Panel Replacement (Monte Carlo) (See: Trim Panel/Service and
Repair/Rear Window Shelf Trim Panel Replacement) in Interior Trim.
10. Remove the upper quarter trim panel. Refer to Quarter Upper Trim Panel Replacement (Monte Carlo) (See: Trim Panel/Service and
Repair/Quarter Upper Trim Panel Replacement) in Interior Trim.
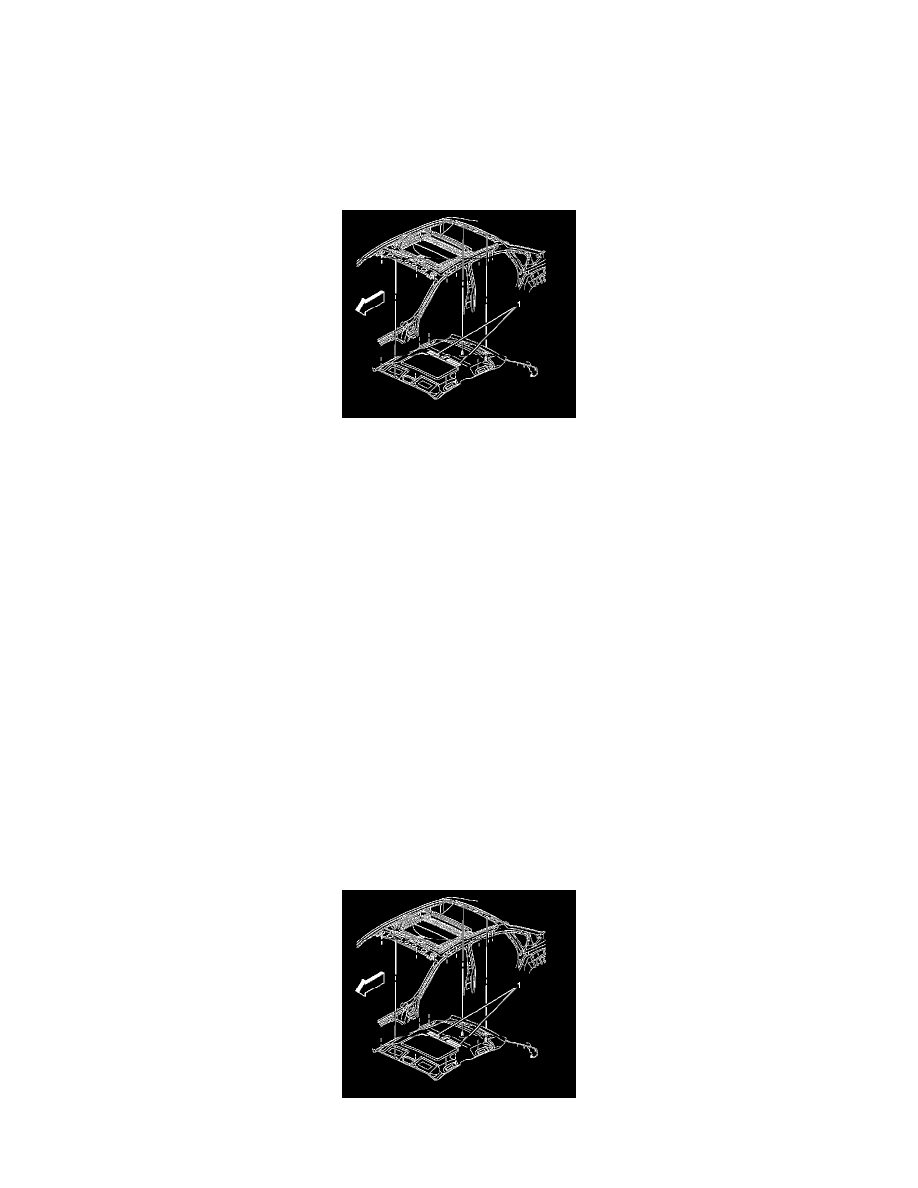
11. Remove the push-in retainers from the rear of the headliner using J 38778 , with help from an assistant to support the front of the headliner.
12. Disconnect the headliner electrical harness connector and the ground wire, which are located under the right side of the window trim panel.
13. Remove the headliner wiring harness from the inner roof panel.
14. Recline the front seats in order to aid in the removal of the headliner from the vehicle.
15. Remove the headliner (without sunroof) from the roof insulator pad, using a flat-bladed tool to cut through the glue bonding the headliner to the
roof insulator pad.
16. Remove the headliner (with sunroof) from the sunroof module by disengaging the velcro strips.
17. Remove the headliner from the vehicle through the right front door, with an assistant.
Installation Procedure
Important: Do not bend the headlining too much when loading the headliner in to the vehicle.