
Monte Carlo V6-3.4L VIN E (2000)
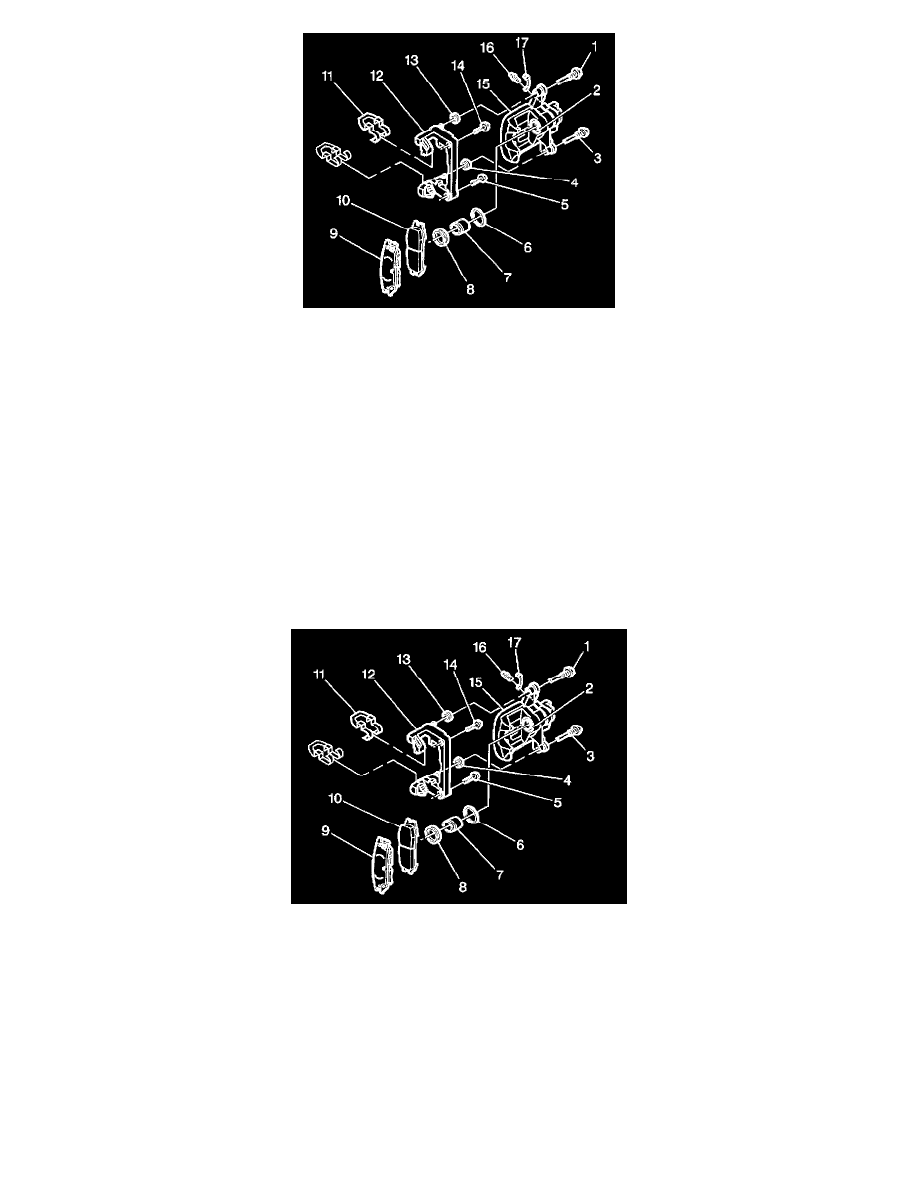
8. Remove the brake pads (9,10) from the caliper bracket.
9. Remove the two pad clips (11) from the caliper bracket.
10. Inspect the caliper bracket boots for the following conditions:
^
Cuts
^
Tears
^
Deterioration
Replace the bracket boots if damage exists. Refer to or Brake Caliper Bracket Replacement (Rear).
11. Inspect the piston boot (8) for the following conditions:
^
Cuts
^
Tears
^
Deterioration
Replace the piston boot if damage exists. Refer to Brake Caliper Overhaul (Rear).
12. Inspect the caliper bolts for corrosion or damage. If corrosion exists, use new components (including bushings) when installing the caliper. Do not
attempt to polish away the corrosion.
Installation Procedure
Important: Before installing new brake pads, wipe the outside surface of the caliper boot clean. Use denatured alcohol.
1. Bottom the piston (7) into the caliper bore (2).
Use a C-clamp when installing new brake pads in order to clamp the piston at the same time. Use a metal plate or wooden block across the face of
the piston. Do not damage the piston or the caliper boot.
Important: Lift the inner edge caliper boot (4) next to the piston (7). Press out any trapped air. The boot must lay flat below the level of the piston
face.
2. Install the two retainers (11) to the caliper bracket (12).
Important: The wear sensor is on the outside pad. The sensor is positioned at the trailing edge (downward) of the pad during forward wheel rotation.
3. Install the pads (9 and 10) to the caliper bracket (12).