
Monte Carlo V6-3.4L VIN E (2000)
-
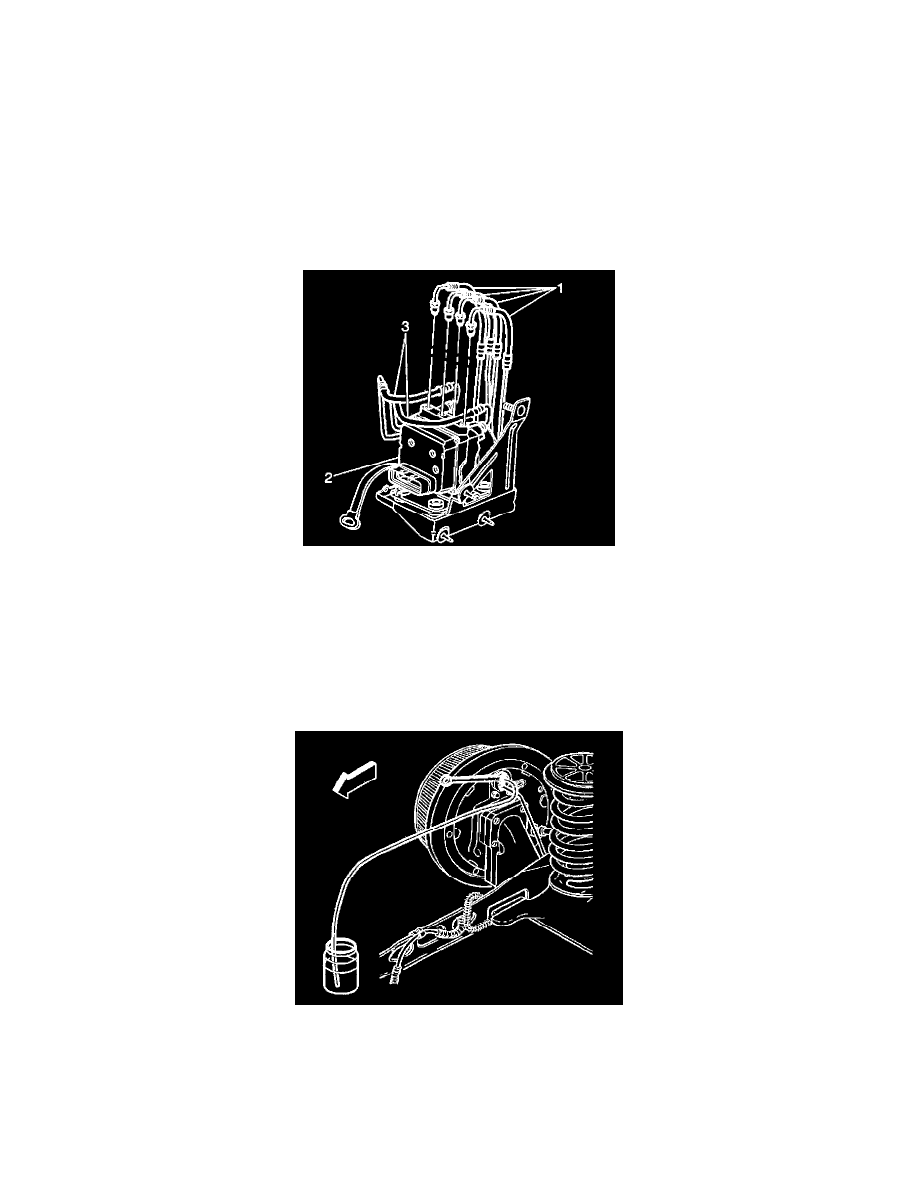
J 35589 Compact Brake Bleeder Adapter
Notice: Pressure bleeding equipment must be of the diaphragm type. It must have a rubber diaphragm between the air supply and the brake fluid to
prevent air, moisture, and other contaminants from entering the hydraulic system.
1. Inspect and fill the master cylinder reservoir to the proper level as necessary.
2. Assemble the components as shown.
3. Install the J 35589 to the master cylinder reservoir.
4. Connect the J 29532 to the J 35589.
5. Adjust the J 29532 to 35 - 70 kPa (5 - 10 psi).
6. Wait approximately 30 seconds, then inspect the entire hydraulic brake system in order to ensure that there are no existing brake fluid leaks.
Repair any brake fluid leaks.
7. Adjust the J 29532 to 205 - 240 kPa (30 - 35 psi).
Important: Use a shop cloth in order to catch escaping brake fluid.
8. Slowly open the ABS modulator brake pipe fitting (1) starting from the first pipe on the left side in order to allow the brake fluid to flow.
Notice: Refer to Fastener Notice in Service Precautions.
9. Close the ABS modulator brake pipe fitting when air bubbles are no longer detected in the brake fluid.
^
Tighten the ABS modulator brake pipe fitting to 24 Nm (18 ft. lbs.).
10. Repeat Steps 8 and 9 for the remaining ABS modulator brake pipe fittings.
11. Raise and suitably support the vehicle.
12. Install the clear plastic bleeder hose to the RIGHT REAR bleeder valve:
^
For vehicles with rear drum brakes, install the clear plastic bleeder hose to the wheel cylinder bleeder valve.
^
For vehicles with rear disc brakes, install the clear plastic bleeder hose to the brake caliper bleeder valve.