
Monte Carlo V6-3.4L VIN E (2000)
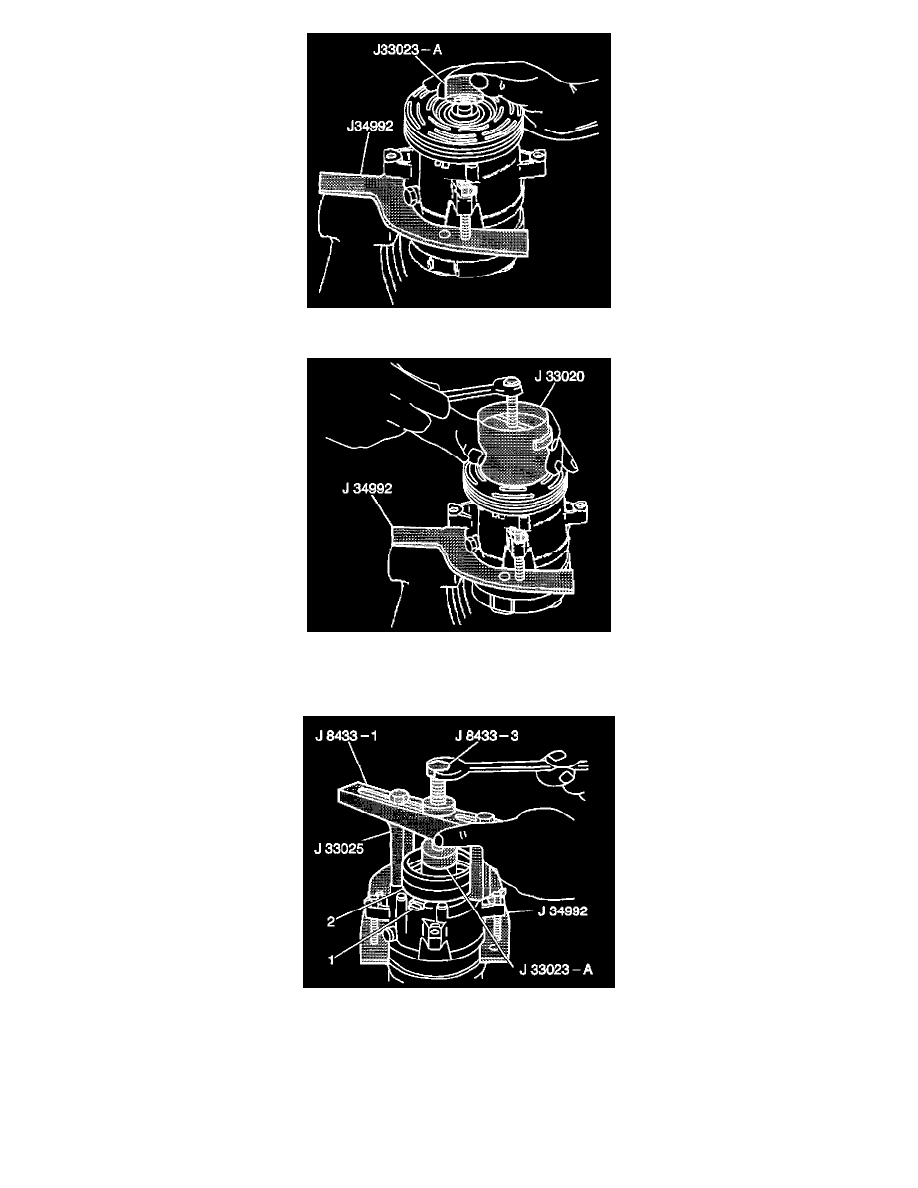
3. Install the J 33023-A to the front head.
4. Install the J 33020 into the inner circle of slots in the rotor.
5. Turn the J 33020 clockwise in the slots in order to engage the tangs of the puller with the segments between the slots in the rotor.
6. Hold the J 33020 in place. Tighten the puller screw against the puller guide in order to remove the puller rotor and bearing assembly.
7. Mark the location of the clutch coil terminal (1) on the compressor front head.
8. Install the J 33023-A on the front head of the compressor.
9. Install the J 8433-1 and the J 8433-3 with the J 33025 on the front head of the compressor.
10. Tighten the J 8433-3 against the J 33023-A in order to remove the clutch coil (2).