
Monte Carlo V6-3.4L VIN E (2000)
Compass: Service and Repair
Electronic Compass Calibration
The electronic compass is capable of distinguishing 8 primary directions:
^
North (N)
^
Northeast (NE)
^
East (E)
^
Southeast (SE)
^
South (S)
^
Southwest (SW)
^
West (W)
^
Northwest (NW)
The compass calibration procedures establish a base direction from which the compass can work. Once the compass has been properly calibrated, the
digital display indicates the direction of vehicle travel.
Calibration Procedure
The compass is self-calibrating, eliminating the need to manually set the compass. Occasionally, the calibration process on a new vehicle may not be
complete, causing the CAL symbol to illuminate. In order to correct this problem, drive the vehicle less than 5 mph (8 km/h) through 3 complete 360
degree turns. The CAL symbol will then turn OFF and the compass will function normally. If the compass appears erratic and the CAL symbol does
not appear, you must manually put the compass into the calibration mode.
1. Turn ON the ignition.
2. Press the MODE button until the compass/temperature mode appears.
3. Press and hold the RESET button on the overhead console for approximately 10 seconds, or until the display reads CAL.
4. Release the RESET button and drive the vehicle less than 5 mph (8 km/h) through 3 complete 360 degree turns. The CAL symbol will turn off
when the compass is calibrated, and the compass will function normally.
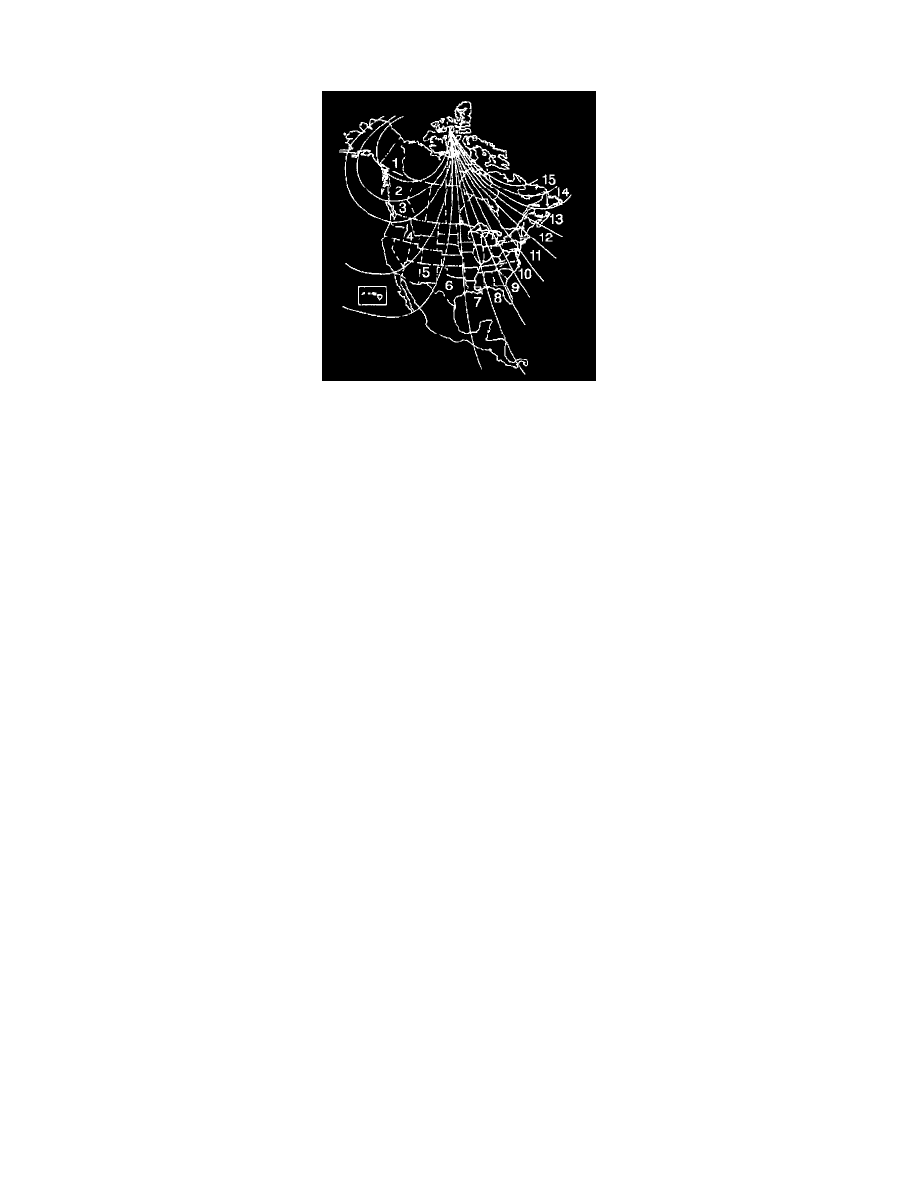
Variance
Variance is defined as the difference between magnetic north and geographic north. In some areas of the country, this difference is great enough to
cause false compass readings. Set the variance for a particular location as follows:
1. Determine the vehicle's location on the zone map. Note the zone number.
2. Turn ON the ignition.
3. Press the MODE button until the compass/temperature mode appears.
4. Press and hold the RESET button on the overhead console for approximately 5 seconds. The last entered variance zone appears on the display.
5. Press the MODE button until the correct zone number appears on the display.
6. Press the RESET button in order to set the new variance zone and resume normal operation. The display will illuminate all segments briefly in
order to acknowledge the change in the zone number.