
Monte Carlo V6-3.4L VIN E (2000)
Fluid Pressure Sensor/Switch: Service and Repair
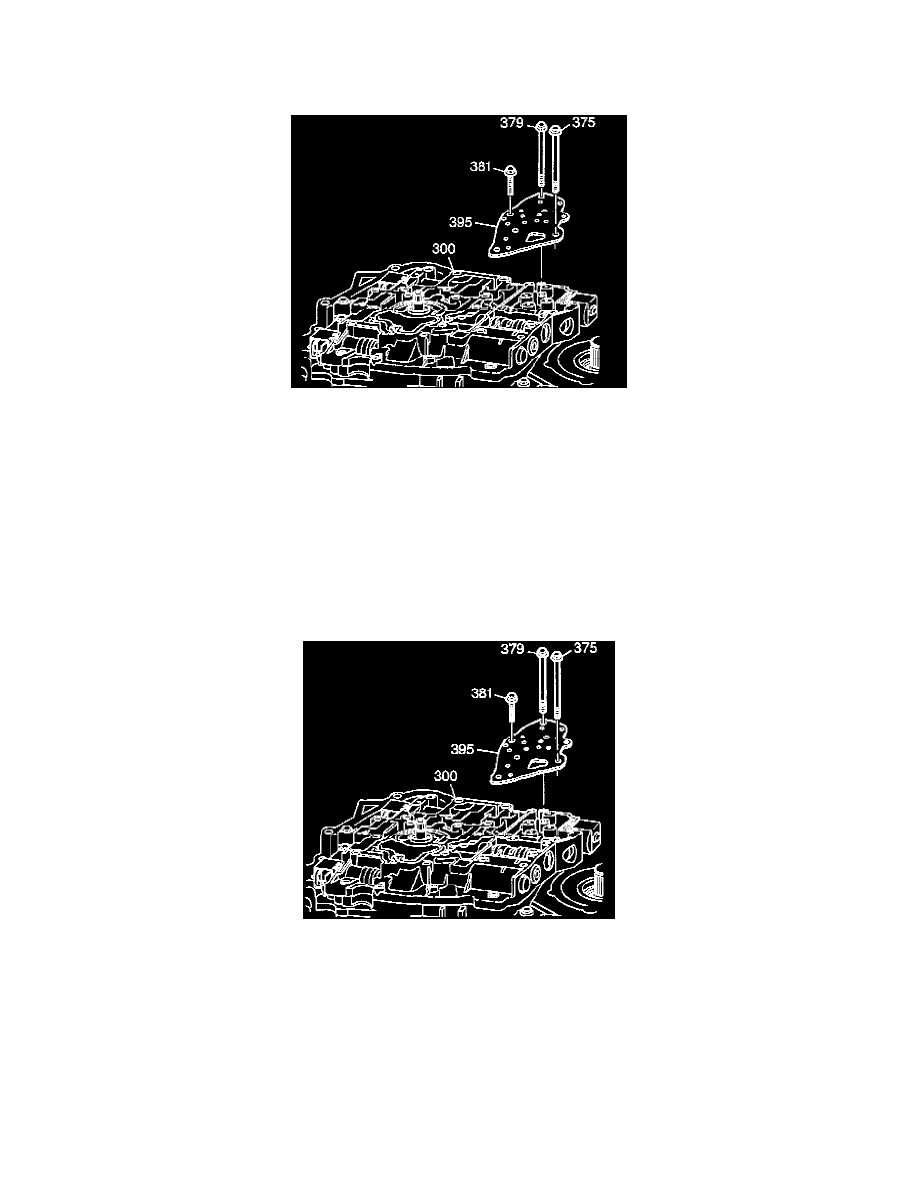
Fluid Pressure Manual Valve Position Switch Replacement
Removal Procedure
1. Remove the case side cover. Refer to Case Side Cover Replacement.
2. Disconnect the transaxle wiring harness.
3. Remove the control valve body bolts (375, 379 and 381) that mount the fluid pressure manual valve position switch to the control valve body
(300).
4. Carefully remove the fluid pressure manual valve position switch (395). Handle the switch carefully, the fluid pressure manual valve position
switch is very delicate.
5. Inspect the fluid pressure manual valve position switch (395) for the following conditions:
-
Damaged electrical connector terminals
-
Damaged seals
-
Damaged switch membranes
-
Debris on the switch membranes
Installation Procedure
1. Carefully install the fluid pressure manual valve position switch (395). Handle the switch carefully, the fluid pressure manual valve position switch
is very delicate.
Notice: Refer to Fastener Notice in Service Precautions
2. Install the control valve body bolts (375, 379, and 381) that mount the fluid pressure manual valve position switch to the control valve body (300).
-
Tighten the control valve body bolt (375) to 12 Nm (106 inch lbs.).
-
Tighten the control valve body bolt (379) to 16 Nm (106 inch lbs.).
-
Tighten the control valve body bolt (381) to 8 Nm (70 inch lbs.).
3. Connect the transaxle wiring harness.
4. Install the case side cover. Refer to Case Side Cover Replacement.