
Monte Carlo V6-3.4L VIN E (2000)
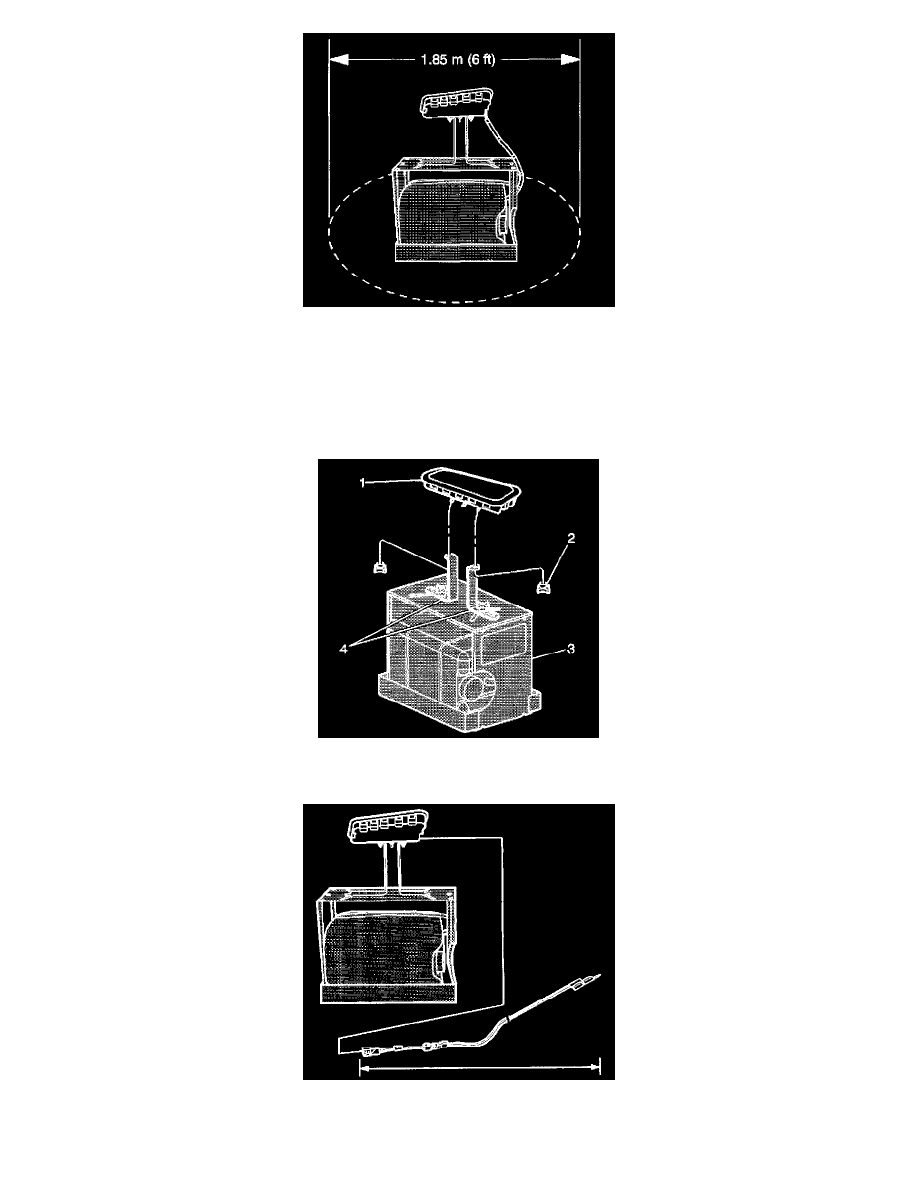
9. Clear a space on the ground about 1.85 M (6 ft) in diameter for deployment of the module. If possible, use a paved, outdoor location free of
activity. Otherwise, use a space free of activity on the shop floor. Verify that you have sufficient ventilation.
10. Clear all loose or flammable objects from the area.
11. Place J 39401-B in the center of the cleared area.
12. Fill the fixture plastic reservoir with water or sand.
IMPORTANT: Securely hand tighten all fasteners prior to deployment.
13. Mount the module (1) in J39401-B (3) with the vinyl trim cover facing up.
14. To mount, use two M6 x 1.0 nuts (2) with washers in order to secure the module (1) to the deployment fixture (3).
15. Extend the SIR deployment harness and adapter to full length from the module.
16. Place a 12-V minimum, 2-A minimum power source (e.g., vehicle battery) near the shorted end of the harness.