
Monte Carlo V6-3.4L VIN E (2000)
5. Remove the driver side air bag fasteners (2).
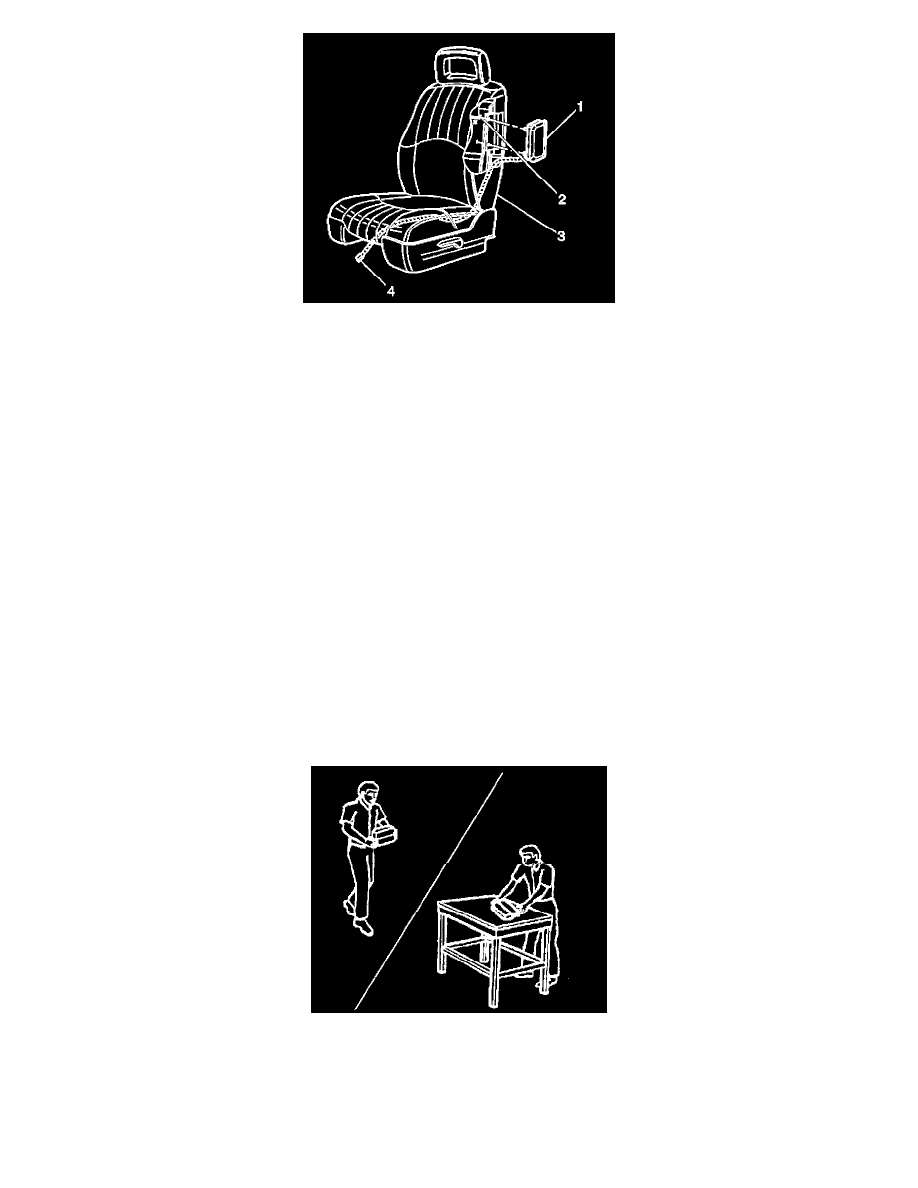
6. Note the routing of the driver side air bag wiring harness (4) and retaining clip attachments within the driver seat.
7. Remove the driver side air bag wiring harness (4) retaining clips from the driver seat frame.
8. Gently pull the pigtail harness up into the seat back while guiding the harness through the wire triangle of the seat frame.
9. Remove the module (1) from the driver seat back frame.
INSTALLATION PROCEDURE
1. Install the module (1) to the seat while guiding the pigtail harness through the trim cup.
NOTE: Refer to Fastener Notice in Service Precautions.
2. Install the driver side air fasteners (2).
Tighten
Tighten the driver side air bag fasteners to 10 N.m (89 lb in).
3. Gently pull the driver side air bag wiring harness (4) down into the seat cushion while guiding the harness through the wire triangle of the seat
frame.
4. Install the harness retaining clips to the seat frame.
5. Install the seat back cover.
6. Connect together the J-clip that is along the lower rear seat back.
7. Install the driver seat.
8. Enable the SIR system. Refer to Enabling the SIR System.
Inflator Module Handling, Shipping, and Scrapping
LIVE (UNDEPLOYED) INFLATOR MODULE
CAUTION: Refer to Inflator Module Handling And Storage Caution in Service Precautions.
Be careful when you handle or store a live (undeployed) inflator module. An air bag deployment produces rapid gas generation. This may cause the
inflator module or an object in front of the inflator module to jettison through the air in the event of an unlikely deployment.