
Monte Carlo V6-3.4L VIN E (2000)
1. Position the generator to the engine.
NOTE: Refer to Fastener Notice in Service Precautions.
2. Install the battery (positive) lead and the generator output BAT terminal nut.
Tighten
Tighten the generator output BAT terminal nut to 20 N.m (15 lb ft).
3. Press the protective boot on to the generator output BAT terminal.
4. Install the electrical connector to the generator.
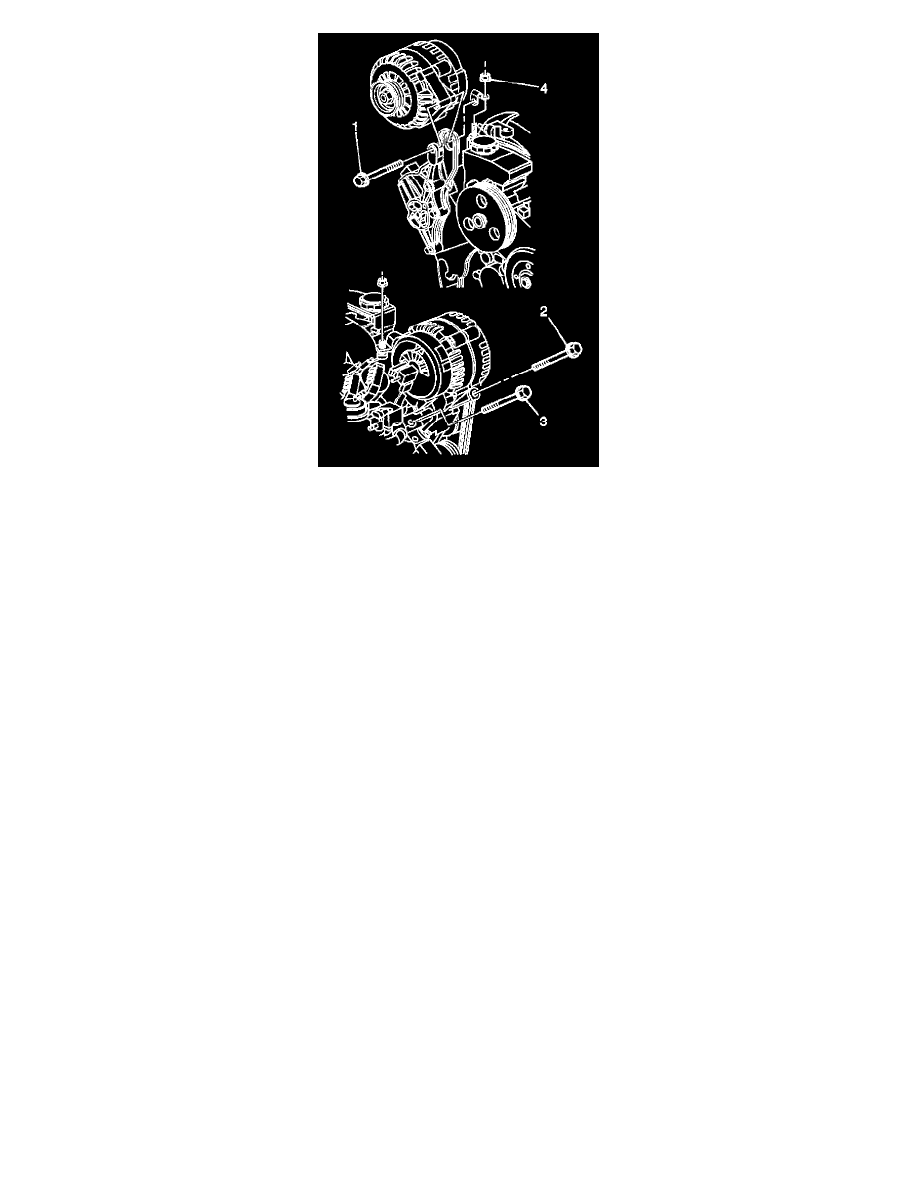
5. Install the generator bolt (2) and generator bolt (3) through the holes on the generator and finger start the bolts. Do not tighten the bolts.
6. Install the generator pivot bolt (1) through the generator and finger start the bolts. Do not tighten the bolt.
7. Tighten the generator bolts in the order described. The following is a mandatory torque sequence:
7.1.Tighten
Tighten the generator pivot bolt (1) to 50 N.m (37 lb ft).
7.2.Tighten
Tighten the generator bolt (2) to 50 N.m (37 lb ft).
7.3.Tighten
Tighten the generator bolt (3) to 50 N.m (37 lb ft).
8. Install the coolant recovery reservoir.
9. Install the drive belt.
10. Install the engine compartment cross brace.
11. Connect the battery ground (negative) cable.
For a description of the RPO Code(s) shown in this article/images refer to the RPO Code List found at Vehicle/Application ID. See: Application and
ID/RPO Codes