
Monte Carlo V6-3.8L SC VIN 1 (2004)
^
The fastener and its counterpart are clean and free from rust.
^
The fastener develops 3 Nm (27 in. lbs.) of torque/drag against its counterpart prior to the fastener seating. If the fastener does not meet these
criteria, REPLACE the fastener.
4. Align the strut to the mark on the knuckle.
^
Tighten the strut lower nuts to 122 Nm (90 ft. lbs.).
5. Install the tire and wheel.
6. Lower the vehicle.
7. Align the front wheels.
Suspension Strut Disposal
Suspension Strut Disposal
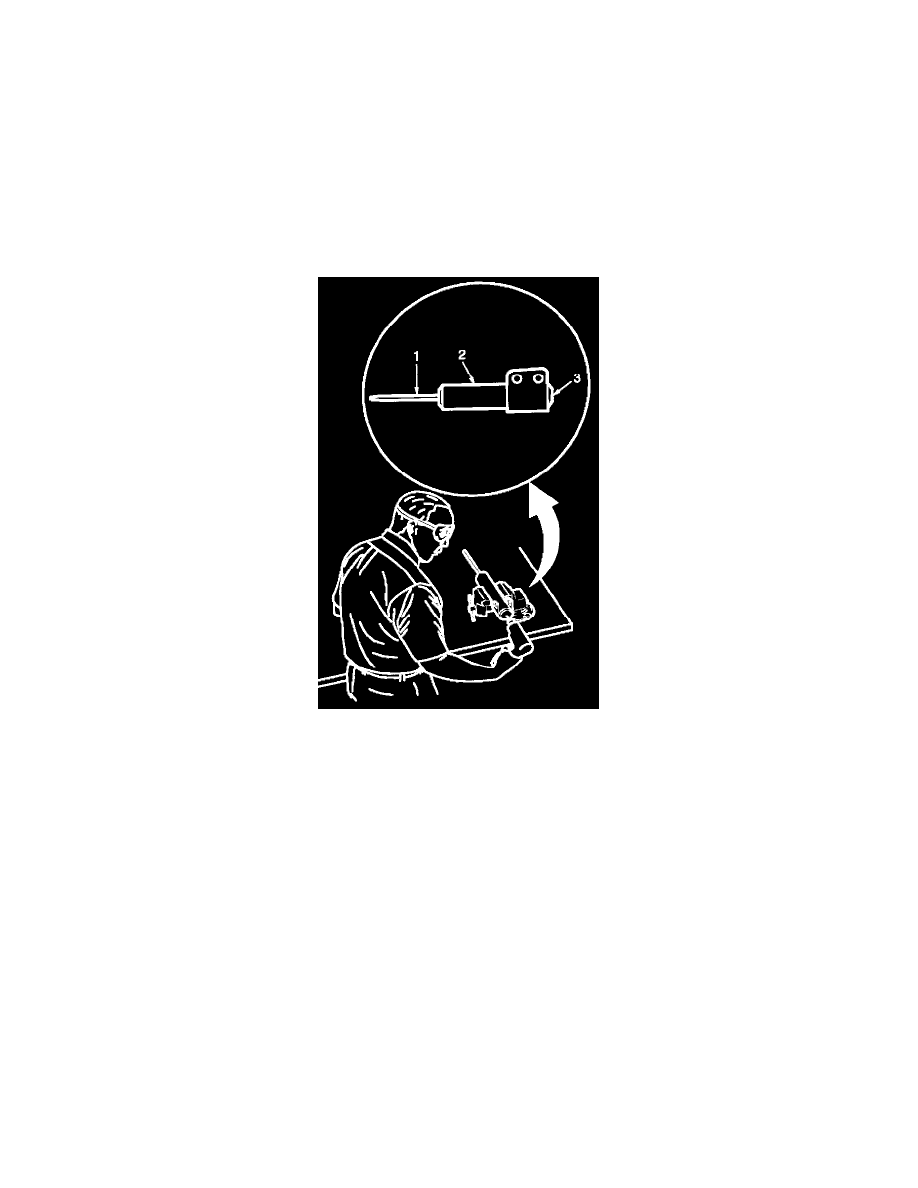
Caution: Use the proper eye protection when drilling to prevent metal chips from causing physical injury.
1. Clamp the strut in a vise horizontally with the rod (1) completely extended.
2. Drill a hole in the strut at the center of the end cap (3) using a 5 mm (3/16 in.) drill bit. Gas or a gas/oil mixture will exhaust when the drill bit
penetrates the strut. Use shop towels in order to contain the escaping oil.
3. Remove the strut from the vise.
4. Hold the strut over a drain pan vertically with the hole down.
5. Move the rod (1) in and out of the tube (2) to completely drain the oil from the strut.
Strut, Strut Component and/or Spring Replacement
Strut, Strut Component and/or Spring Replacement
^
Tools Required
-
J 42991 Strut Rod Nut Socket
-
J 45400 Strut Spring Compressor
Disassembly Procedure