
Monte Carlo V6-3.8L VIN K (1998)
NOTICE: Replace copper gaskets.
6. Install the brake hose caliper bolt, if removed.
^
Tighten the inlet fitting bolt to 44 Nm (32 ft. lbs.).
7. Remove the wheel nuts securing the rotor to the hub.
8. Install the tires and the wheels. Align the previous marks on the wheel and hub.
9. Lower the vehicle.
10. Fill the master cylinder to the proper level with clean brake fluid.
11. Bleed the caliper if the inlet fitting was removed.
12. Apply approximately 778 N (175 lbs) of force to the brake pedal after bleeding, if necessary.
13. Inspect the hydraulic brake system for brake fluid leaks.
Brake Caliper Replacement (Rear)
REMOVAL PROCEDURE
CAUTION: Do not move the vehicle until a firm brake pedal is obtained. Failure to obtain a firm pedal before moving vehicle may result in
personal injury.
NOTICE: Do not allow calipers to hang from the flexible hoses. Doing so can damage the hoses.
1. Remove two-thirds of the brake fluid from the master cylinder.
2. Raise and suitably support the vehicle.
3. Mark the relationship of the wheel to the hub and the bearing.
4. Remove the tire and the wheel.
5. Install two wheel nuts in order to retain the rotor.
6. If the caliper will be removed completely from the vehicle for unit repair, complete the following steps:
^
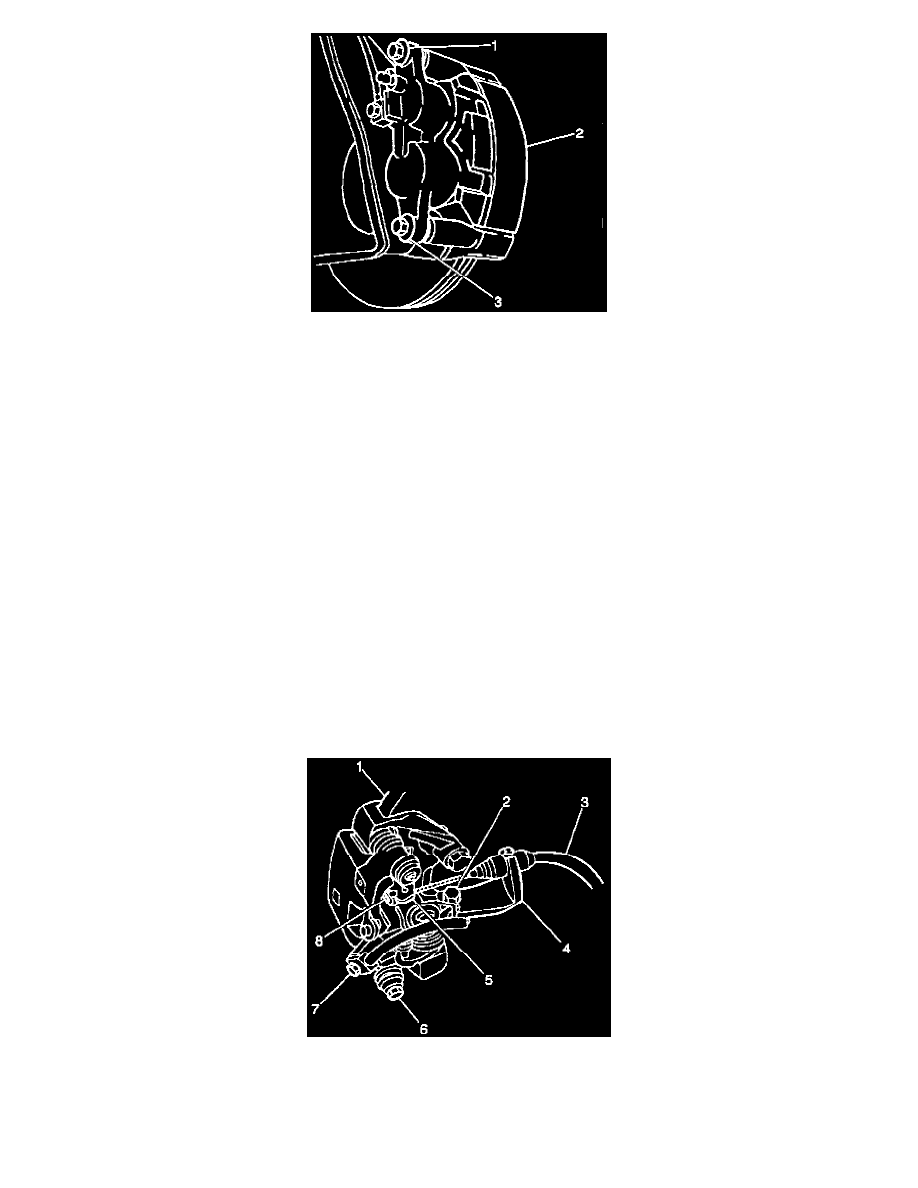
Remove the brake hose (7) from the caliper.
Plug the openings in the caliper and the brake hose in order to prevent fluid loss and contamination.
^
Remove the parking brake cable (3) from the parking brake lever (5).
Lift up one end of the cable spring clip (8) in order to free the end of the cable from the lever.