
Monte Carlo V6-3.8L VIN K (1998)
Intake Manifold: Service and Repair
Intake Manifold Replacement (Lower)
REMOVAL PROCEDURE
1. Remove the upper intake manifold. Refer to Intake Manifold Replacement (Upper).
NOTICE: The two bolts which fasten the lower intake manifold to the cylinder head are accessible only after the upper intake is removed. The
bolts are located in the right front and left rear corners of the lower intake manifold. Remove the upper intake manifold to service the lower intake.
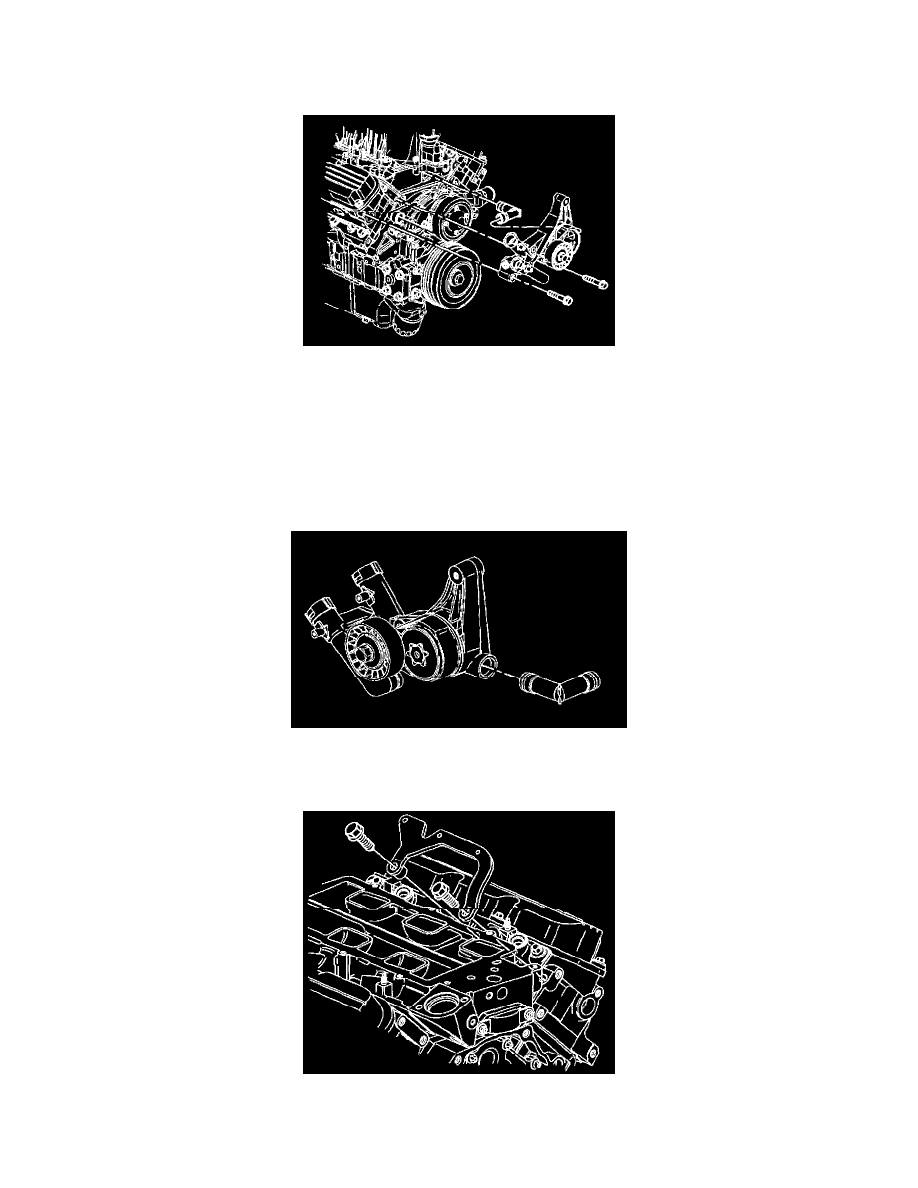
2. Remove the generator braces. Refer to Generator Brace Replacement (3800 L36 (VIN K) Rear Brace) and Generator Brace Replacement (3800
L36 (VIN K) Front Brace) in Starting and Charging.
3. Remove the generator. Refer to Generator Replacement (3800 L36 (VIN K)) in Starting and Charging.
4. Remove the drive belt tensioner with mounting bracket. Refer to Drive Belt Tensioner Replacement.
5. If necessary, remove the heater water bypass inlet pipe from the drive belt tensioner mounting bracket.
6. Remove the radiator inlet hose from the water outlet housing. Refer to Radiator Inlet Hose Replacement (3800 Engine) in Cooling System.
7. Remove the temperature sensor wiring harness connector.
8. Remove the generator brace bracket bolts.
9. Remove the generator brace bracket.
10. Remove the evaporative emissions canister purge solenoid valve.