
Monte Carlo V6-3.8L VIN K (1998)
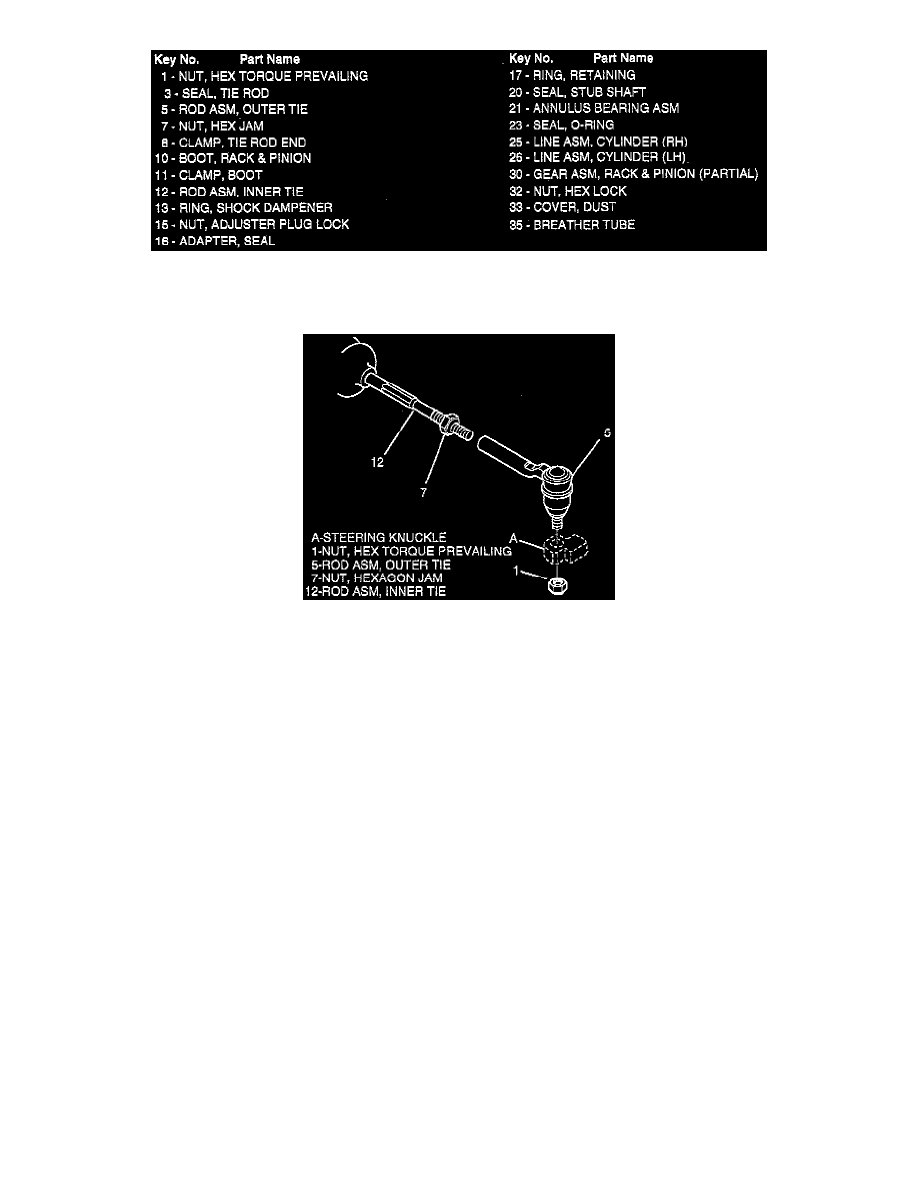
Power Rack And Pinion - End Take Off - Legend
Remove or Disconnect
Outer Tie Rod Replacement
1. Hex torque prevailing nut (1) from outer tie rod assembly (5). Discard the hex torque prevailing nut (1)
2. Loosen jam nut (7).
3. Outer tie rod (5) from steering knuckle. This tapered joint has been designed to separate easily, unlike previous joints of this type. If required, use
tool J24319-01 to separate stud from steering knuckle.
4. Outer tie rod (5) from inner tie rod (12).
Install or Connect
1. Outer tie rod assembly (5) to inner tie rod (12). Do not tighten jam nut (7).
2. Outer tie rod (5) to steering knuckle, hex torque prevailing nut (1) to outer tie rod stud. Ensure that mating surfaces of stud and knuckle are clean.
Tighten
Hex torque prevailing nut (1)
Adjust
-
Toe by turning inner tie rod (12).
Important: Be sure rack and pinion boot (10) is not twisted or puckered during toe adjustment.
Tighten
-
Jam nut (7) against outer tie rod (5) to 68 N.m (50 ft. lbs.).
Rack Bearing Preload (on Vehicle Adjustment)
Adjust
1. Loosen adjuster plug lock nut (15) and turn adjuster plug clockwise until it bottoms in gear assembly (30), then back off 50 degrees to 70 degrees
(approximately one flats).
2. Make adjustment with front wheels raised and steering wheel centered. Be sure to check return ability of the steering wheel to center after
adjustment.
3. Lock nut (15) to adjuster plug.