
Monte Carlo V6-3.8L VIN K (1998)
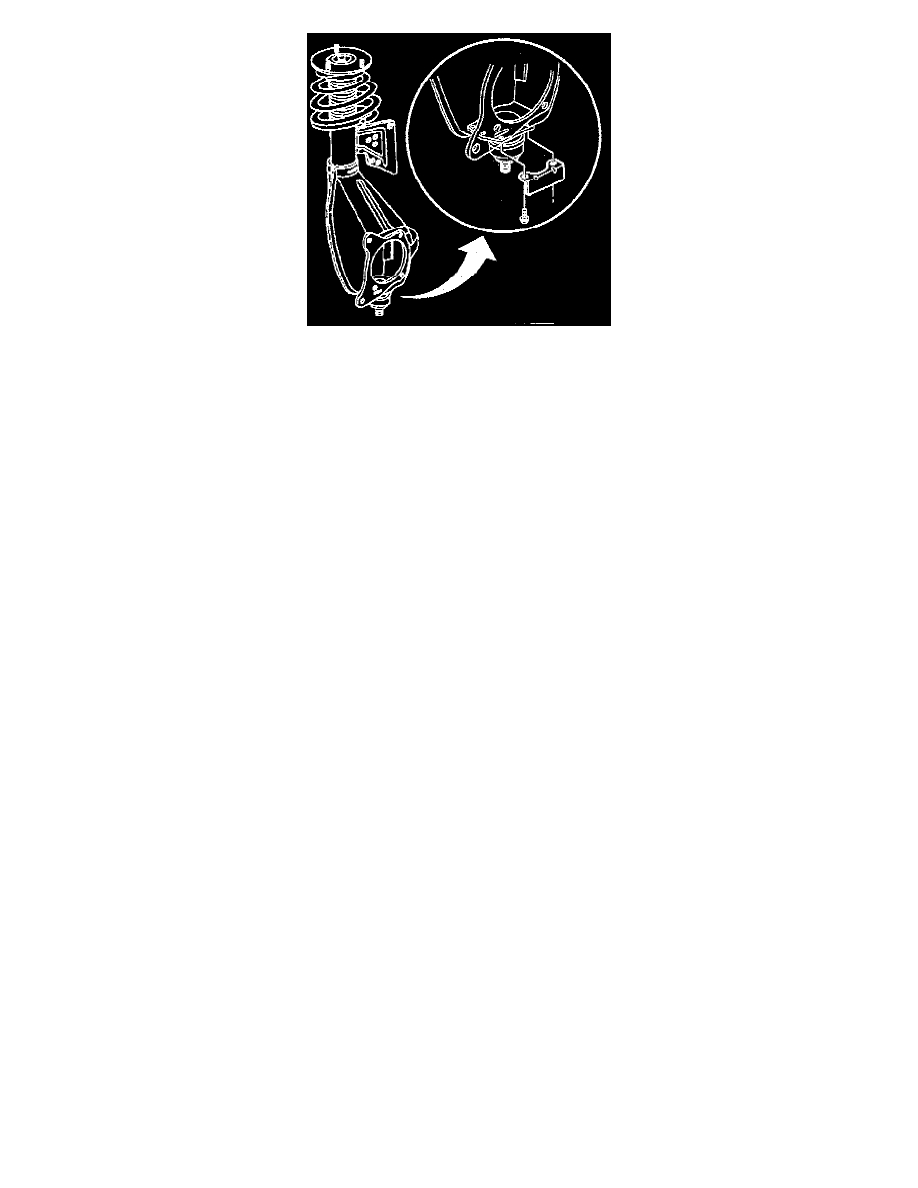
1. Install the ball joint in the knuckle/strut.
2. Install the four ball joint bolts and nuts as shown in the ball joint kit instruction sheet. Tighten to the specifications indicated on the instruction
sheet.
3. Install the ball joint to the lower control arm.
NOTICE: Use the correct fastener in the correct location. Replacement fasteners must be correct part number for that application. Fasteners
requiring replacement of fasteners requiring thread locking compound or sealant are identified in the service procedure. Do not use paints,
lubricants, or corrosion inhibitors on fasteners or fastener joint surfaces unless specified. These coatings affect fastener torque and joint clamping
force and may damage the fastener. Use the correct tightening sequence and specifications when installing fasteners in order to avoid damage to
parts and system.
Important:
-
Tighten in order to align the next slot in the nut with the cotter pin hole in the stud.
-
DO NOT tighten more than 60 degrees (1 flat) in order to align with the hole.
-
DO NOT loosen the nut at any time during installation.
4. Install a new ball joint to lower control arm nut.
Tighten
-
Tighten the stabilizer shaft bushing clamp bolts to 48 N.m (35 ft. lbs.).
-
Tighten the lower ball joint nut to 85 N.m (63 ft. lbs.).
5. Install a new cotter pin.
6. Install the ball joint heat shield and the ball joint heat shield retaining bolts. Tighten Tighten the ball joint heat shield bolts/screws to 7 N.m (62
inch lbs.).
7. Install the tire and the wheel.
8. Lower the vehicle.