Prizm L4-108 1.8L DOHC VIN 8 MFI (1998)

^
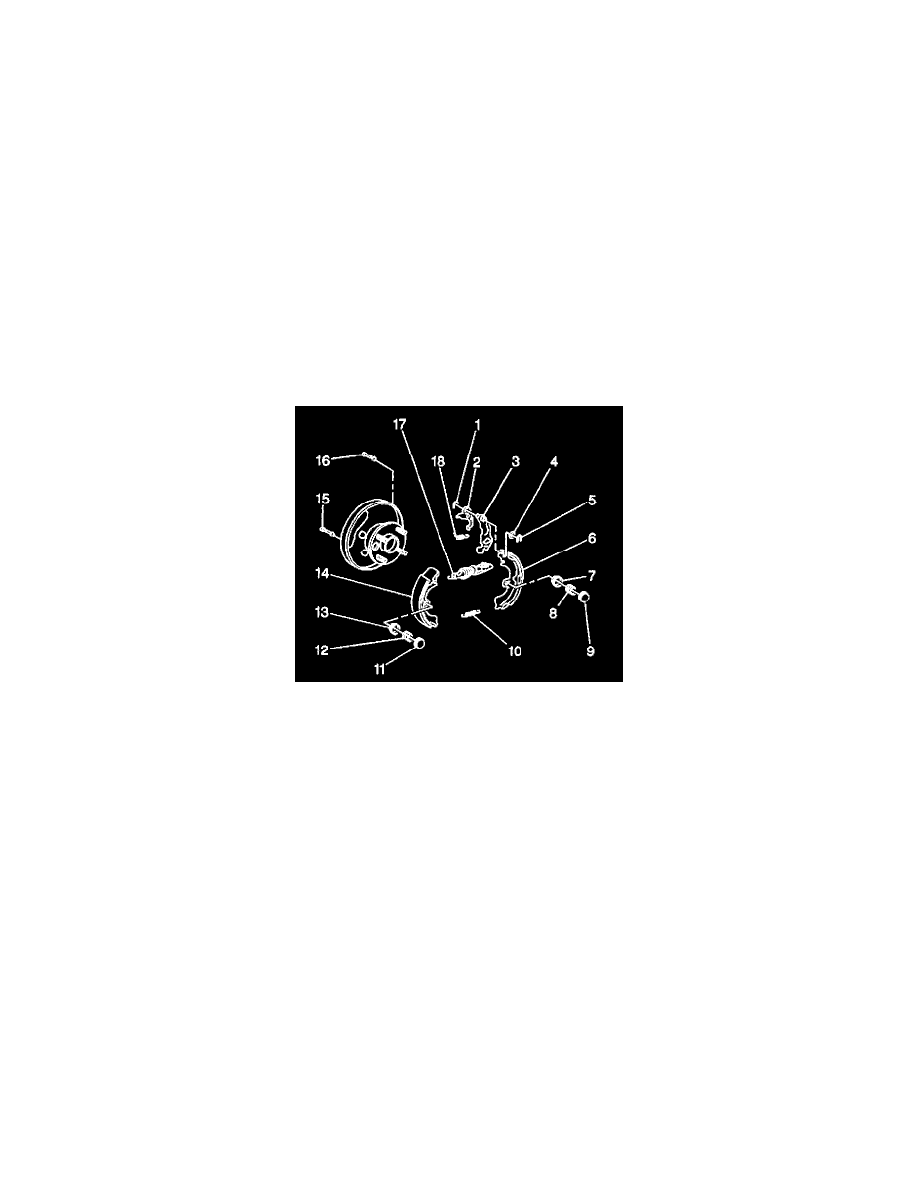
The front shoe (14)
^
The anchor spring (10)
7. Remove the following components:
^
The rear shoe hold-down spring (8)
^
The cups for the shoe hold-down spring (7,9)
^
The pin for the shoe hold-down spring (16)
^
The adjusting lever spring (18)
^
The adjuster(17)
^
The rear shoe (6)
8. Disconnect the parking brake cable from the lever.
9. Remove the following components:
^
The two C-washers (1,5)
^
The shim (4)
^
The parking brake lever (3)
^
The automatic adjusting lever (2)
10. Inspect all of the drum brake components. Refer to Brake Shoe Inspection.
INSTALLATION PROCEDURE
IMPORTANT: Apply Lubriplate(g) GM P/N 1050109 white lithium grease, or the equivalent, to all of the brake component metal contact points
(where the brake shoe metal contacts the backing plate, the wheel cylinder and the adjustment strut, etc.) prior to installation.
1. Install the following components:
^
The automatic adjusting lever (2)
^
The parking brake lever (3)
^
The shim (4)
^
The two C-washers (1,5)
2. Install the parking brake cable to the lever.
3. Install the following components:
^
The rear shoe (6)
^
The adjuster (17)
^
The adjusting lever spring (18)
^
The pin for the rear shoe hold-down spring (16)
^
The cups for the rear shoe hold-down spring (7, 9)
^
The rear shoe hold-down spring (8)
4. Install the following components:
^
The front shoe (14)
^
The anchor spring (10)
^
The pin for the front shoe hold-down spring (15).
^
The cups for the front shoe hold-down spring (11, 13)
