
Prizm L4-108 1.8L DOHC VIN 8 MFI (1998)
Fluid - A/T: Service and Repair
3 Speed-MB3 Automatic Transmission
REMOVAL PROCEDURE
1. Raise and support the vehicle. Refer to Vehicle Lifting Points.
2. Remove 6 bolts and the left splash shield from the vehicle.
3. Place a drain pan or suitable container under the transaxle fluid pan.
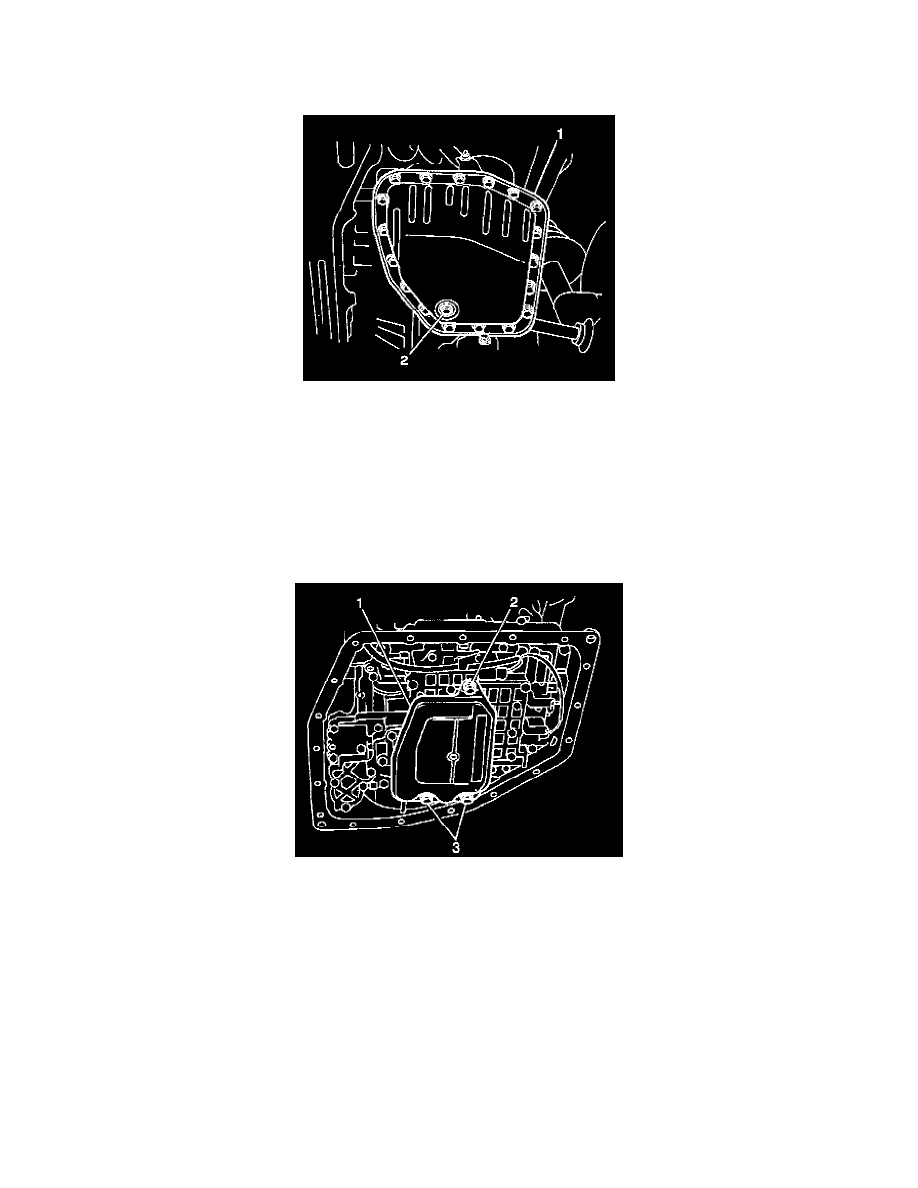
4. Remove the transaxle drain plug (2) from the transaxle fluid pan (1) and drain the transaxle fluid.
5. Remove 18 bolts, the transaxle fluid pan, and the fluid pan gasket from the transaxle.
NOTICE: When removing the transaxle fluid pan, use caution in order not to damage the transaxle case-to-fluid pan mating surfaces. If the fluid
pan is frozen to the transaxle case, use a rubber mallet and a wood block to lightly tap the fluid pan free. Do not attempt to pry the fluid pan away
from the case with metal tools; damage to the case or fluid pan flange could result.
6. Remove 3 bolts, the fluid filter screen (1), and the gasket from the valve body.
7. Inspect the bottom of the fluid pan for any large pieces of metal or other foreign matter.
IMPORTANT: A small amount of clutch material in the bottom of the transaxle fluid pan is a normal condition and is consistent with normal
transaxle wear. The bottom of the fluid pan is equipped with a magnet that will collect minute metal filings. However, if large amounts of clutch
material, metal shavings or other foreign matter are present, disassembly and inspection of the transaxle is indicated.
8. Clean the fluid filter screen with solvent and dry thoroughly. If the screen mesh is damaged, replace the filter screen.